Developers who are excited to learn more about the most popular Version Control System (VCS) ie., Git and cloning the Git repository can refer to this tutorial until the end. To start working with Git, you need to create your own Git repository or you can clone an existing Git repository.
This tutorial will help you concentrate on understanding what is cloning, about the git clone repository, and how to clone an existing Git repository. Moreover, you can observe various methods to clone a specific branch, clone git repository using the command line or Git commands, with sourcetree, clone using an SSH key, and determine access denied issues.
- What is cloning?
- Git Clone Repository
- Prerequisites
- Clone a Git repository using the command line (git clone)
- Clone a Git repository with Sourcetree
- Clone a Git repository into a specific folder
- Git clone a specific branch
- Git clone exclusively one branch
- Clone a private Git repository
- Clone using SSH
- Specifying the SSH key to use
- Clone using a password
- Git Clone Authentication Failure
What is cloning?
Basically, Cloning is the process of downloading an existing repository hosted on a remote server to your own computer.
Git Clone Repository
Cloning a repo permit you to make local modifications to the repository before committing and pushing them to the remote. Especially, it is beneficial for beginner developers as cloning offers you a sandbox to experiment without affecting the original codebase.
Do Check: How To Install Git On Debian 10 Buster
Prerequisites
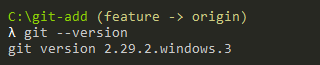
To clone a git repository, clearly, you should have Git installed on your computer. If you want to check that Git is correctly installed on Windows or on Linux, the following command should be executed:
$ git --version
git version 2.22.0
If Git is correctly installed, you are ready to start cloning your first Git repository.
- How To Change Git Remote Origin | What is Git Remote? | Git Remote Add Origin
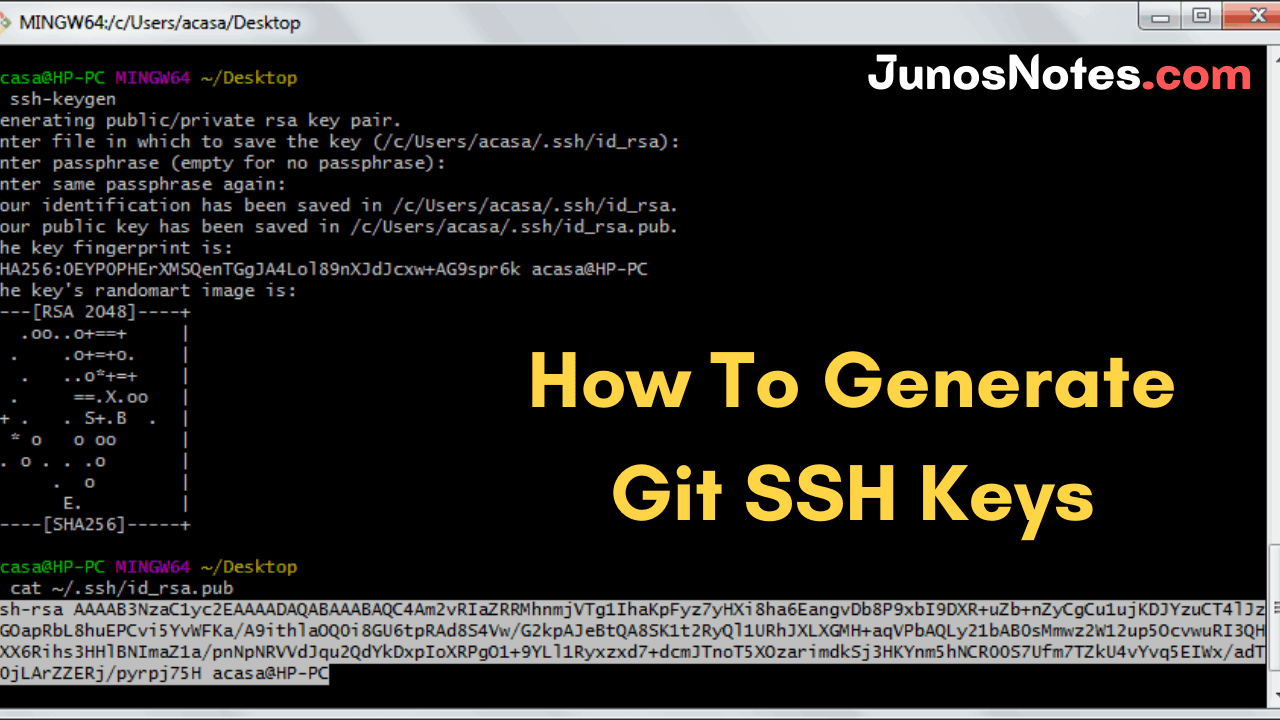
- How To Generate Git SSH Keys | Process of Git Generate SSH Key on Windows, Linux, Mac
- How To Add and Update Git Submodules | Definition of Submodule
Clone a Git repository using the command line (git clone)
To clone a git repository, use the “git clone” command with the URL of your Git repository.
$ git clone <url>
For instance, let’s assume that you want to clone a public repository from Github, you are going to execute the following command:
$ git clone https://github.com/username/project.git

Cloning into 'project'...
remote: Enumerating objects: 813, done.
remote: Total 813 (delta 0), reused 0 (delta 0), pack-reused 813
Receiving objects: 100% (813/813), 3.66 MiB | 5.52 MiB/s, done.
Resolving deltas: 100% (391/391), done.
As you can see, by default, Git is going to clone your Git repository into a folder named by the name of the project.
However, you can choose to clone your Git repository into a different folder.
Clone a Git repository with Sourcetree
By using Sourcetree, you can clone your repository. Are you new to the sourcetree? Make use of our provided alternative method using the command line. If you are interested to do this method, then follow the below instructions to clone your git repository.
- Firstly, download the application of sourcetree, if you don’t have it earlier.
- Choose the Clone button from the repository
- In the Clone this repository dialog, choose the Clone in Sourcetree button.
- If needed, update the Destination Path or Bookmark Name.
- The Destination Path is the folder where your clone saves to your local system.
- The Bookmark Name is the name of that folder.
- Select the Clone button.
It also builds the folder on your local system and even more, you can make use of Sourcetree to interact with the repository.
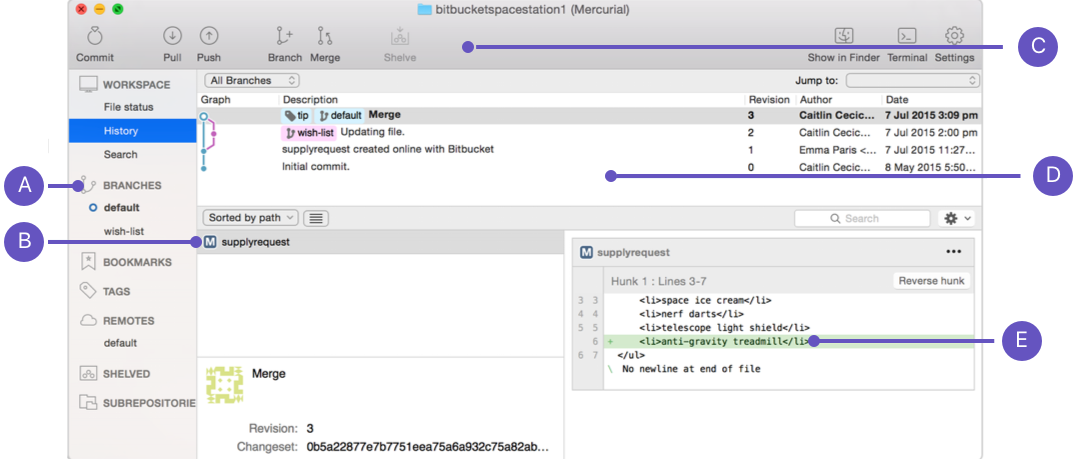
A. Branches list: Lists your Git branches.
B. Files list: Includes all the files in your repository.
C. Action buttons: This allows you to interact with the repository.
D. Commits list: Includes a list of commits to the repository and details of each commit.
E. Selected file: Shows a diff of the selected file.
Clone a Git repository into a specific folder
In order to clone a git repository into a specific folder, execute the “git clone” command and specify the destination folder at the end.
$ git clone <url> <directory>
For example, given the Github project we fetched in the previous section, if we want to clone it into a folder named “myproject” we would run
$ git clone https://github.com/username/project.git myproject

Cloning into 'myproject'...
remote: Enumerating objects: 813, done.
remote: Total 813 (delta 0), reused 0 (delta 0), pack-reused 813
Receiving objects: 100% (813/813), 3.66 MiB | 5.65 MiB/s, done.
Resolving deltas: 100% (391/391), done.
Now, verify that your git project was correctly cloned to the destination folder.
$ ls -l
total 4
drwxrwxr-x 5 schkn schkn 4096 Nov  1 10:39 myproject
Awesome!
You successfully cloned a Git repository into a specific folder on your server.
In this case, you cloned the master branch from your Git remote repository.
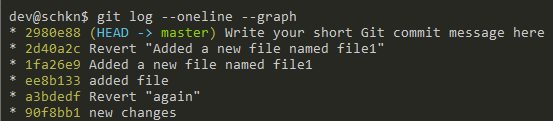
You can check the current branch cloned by running the “git branch” command.
$ git branch
* master
However, in some cases, you may want to clone a specific branch in order to start working.
Your team may have chosen to let the “master” branch a bit behind and to have the most recent commits directly to the “dev” branch for example.
Git clone a specific branch
In order to clone a specific branch, you have to execute the “git branch” with the “-b” and specify the branch you want to clone.
$ git clone -b <branch> <remote_repo>
For example, in order to clone the “dev” branch of your Github repository, you would run
$ git clone -b dev https://github.com/username/project.git

Cloning into 'project'...
remote: Enumerating objects: 813, done.
remote: Total 813 (delta 0), reused 0 (delta 0), pack-reused 813
Receiving objects: 100% (813/813), 3.66 MiB | 5.65 MiB/s, done.
Resolving deltas: 100% (391/391), done.
To verify that you correctly cloned the “dev” branch, make sure to run the “git branch” command.
$ git branch
* dev
Using the “-b” option, you are fetching all the branches but you are checking out the branch you chose.
It means that if you run the “git branch” with the “-a” (for all) option, you are going to see that all your branches were fetched.
Note : you have to execute this command into the Git repository you just cloned.
$ git branch -a

* dev
  remotes/origin/HEAD -> origin/master
  remotes/origin/dev
  remotes/origin/master
  remotes/origin/feature
Git clone exclusively one branch
In order to clone and fetch exclusively the branch you chose, you have to specify the “–single-branch” option.
$ git clone --single-branch --branch <branchn> <repository>Make sure that only the branch chosen was fetched on your local repository.
Note: you have to execute this command into the Git repository you just cloned.
$ git branch -a

* dev
  remotes/origin/dev
This option works for Git versions greater than 1.17.10, so make sure that this is the case before issuing the command.
$ git --version

git version 2.22.0
In the previous sections, we saw the various ways to clone public repositories to your local server.
It means that you did not need to provide any username or password in order to clone the repositories.
However, in some cases, you may have private Git servers that only authorized team members can access.
Clone a private Git repository
When cloning a Git repository, there are two ways of authenticating with the server: with a user/password set or using SSH keys.
In this section, we are going to see how you can authenticate to your Git server using both methods.
Clone using SSH
In most cases, you want to secure your Git repositories with SSH keys in order to avoid having to type your password every single time.
In order to clone from a private repository using SSH, your SSH keys need to be correctly set and configured on your server.
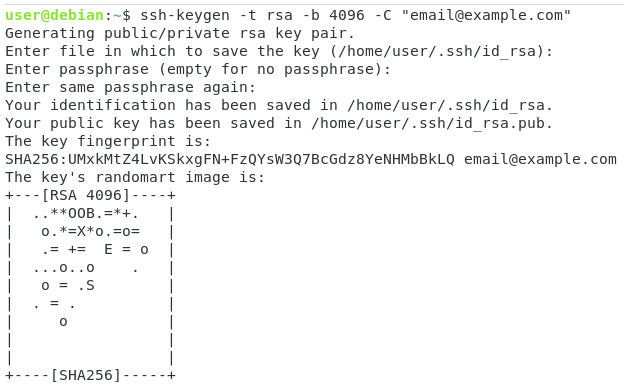
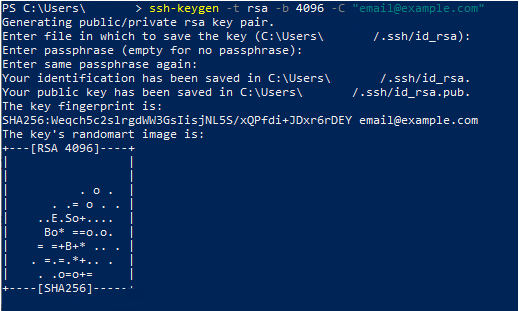
Go into your personal “.ssh” directory and create a new SSH key named “repo_id_rsa” where repo stands for the name of the repository you are trying to clone.
$ cd ~/.ssh && ssh-keygen -t rsa -b 4096 -C "email@example.com"

Generating public/private rsa key pair.
Enter file in which to save the key (/home/schkn/.ssh/id_rsa):
Enter passphrase (empty for no passphrase):
Enter same passphrase again:
Your identification has been saved in repo_id_rsa.
Your public key has been saved in repo_id_rsa.pub.
The key fingerprint is:
SHA256:Lu0CV79iccFGzDLs4x6RXZbUOyimXRsIlNc0o30T+u4 email@example.com
The key's randomart image is:
+---[RSA 4096]----+
|       o.+ +=o.  |
|        * =o=+.. |
|       . X.+o.o. |
|        * O +oo. |
|       oSO + o.. |
|    . .o= + ..   |
|     o..o+ .  .  |
|      .o+ .  .   |
|       o..    E  |
+----[SHA256]-----+
Your public key has been correctly generated.
Print down the public key content using the “cat” command.
ssh-rsa AAAAB3NzaC1yc2EAAAADAQABAAACAQDKRsXF9r2DSgSHxYe6QkJE0Otekn5F9E5e+VQfFtzJAr/xsgr8vCuJbWWsPo6Fibbw54jYjEGjVhnMFOQl9nWA8KxubX6HUHtXxlw9VRVKob6OyO4Qt0F8nw== email@example.com
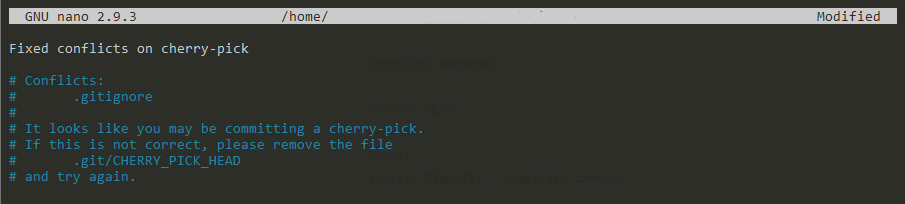
On the server, head over to the “authorized_keys” file and add the content of your public key to the server.
$ sudo nano /home/git/.ssh/authorized_keys

ssh-rsa AAAAB3NzaC1yc2EAAAADAQABAAACAQDKRsXF9r2DSgSHxYe6QkJE0Otekn5F9E5e+VQfFtzJAr/xsgr8vCuJbWWsPo6Fibbw54jYjEGjVhnMFOQl9nWA8KxubX6HUHtXxlw9VRVKob6OyO4Qt0F8nw== email@example.com
Next, you should be able to clone the git repository using your newly created SSH keys.
$ git clone <username>@<hostname>:<repository>.git

Cloning into 'private-repo'...
remote: Enumerating objects: 3, done.
remote: Counting objects: 100% (3/3), done.
remote: Total 3 (delta 0), reused 0 (delta 0), pack-reused 0
Receiving objects: 100% (3/3), done.
Specifying the SSH key to use
In some cases, you might not use the “id_rsa” key in order to store your Git public keys.
To create a specific SSH key for your Git repositories, simply specify a name when prompted by the “ssh-keygen” utility.
$ cd ~/.ssh && ssh-keygen -t rsa -b 4096 -C "email@example.com"

Generating public/private rsa key pair.
Enter file in which to save the key (/home/schkn/.ssh/id_rsa): repo_id_rsa
In this case, if you try to clone the repository, you might not be able to do so because you need to tell SSH which key to use for the server.
To specify the SSH key to use, add the following content to your ~/.ssh/config file (you need to create it if it does not already exist)
Host *
    Hostname <server_ip>
    User git
    IdentityFile ~/.ssh/repo_id_rsa
If you were to use Github as a git server, it would give the following configuration.
Host *
    Hostname github.com
    User git
    IdentityFile ~/.ssh/repo_id_rsa
Restart your SSH service.
$ sudo systemctl restart ssh
Then, you should be able to clone your git repository seamlessly.
$ git clone <username>@<hostname>:<repository>.git
Clone using a password
The other way to authenticate to a Git server is to use a password in order to connect.
To git clone using a password, simply provide the username for the git account, and you will be prompted with the password.
git clone https://username@<repository_url>

Cloning into 'private-repo'
Password for 'https://<username>@<repository_url>:
remote: Enumerating objects: 3, done.
remote: Counting objects: 100% (3/3), done.
remote: Total 3 (delta 0), reused 0 (delta 0), pack-reused 0
Receiving objects: 100% (3/3), done.
For example, if you want to clone your repository from Github using a password, simply type the following command.
git clone https://<username>@github.com/<username>/<repository>.git

Password for 'https://<username>@github.com':
Store your password using git credentials
Using the previous method, you will have to specify the account password every time you want to push your code to the server or when you want to pull it from the server.
This is not very handy.
Luckily for you, you can set your password in order not to be prompted again.
To enable the credentials helper, simply run “git config” with the “credential.helper” option.
$ git config --global credential.helper store
When cloning a new repository, you will still be asked to provide the password the first time.
However, you won’t be asked to provide it again on push and pull operations.
Your credentials will be stored in the git-credentials file in your home directory.
$ cat ~/.git-credentials

https://<username>:<password>@<server>
Git Clone Authentication Failure
In some cases, you may be facing authentication failures when performing git clones.
Here are some hints on what you may check in order to solve this issue :
- Make sure that you are writing the correct password when cloning a repository.
In the section dedicated to git clone with a password, you may need to inspect the git-credentials file. If your password is changed on the server, make sure to change it in your git-credentials file for the changes to be applied.
- Make sure that the user account is correctly configured on the Git server.
In some cases, you may have an account on the Git server but you may not have enough rights to perform read or write operations to the server.
Depending on the git server you are using (Gitlab, Gittea, Bitbucket), you need to check the account sections to see if the user account is correctly configured.
- When using authentication with SSH, you may need to check that your SSH client is actually using the SSH key to connect to your server.
In order to check if OpenSSH is using your SSH key, use “ssh” with the “-vT” option.
$ ssh -vT git@github.com:<user>/<repository>.git

OpenSSH_7.6p1 Ubuntu-4ubuntu0.3, OpenSSL 1.0.2n  7 Dec 2017
debug1: Reading configuration data /home/schkn/.ssh/config
debug1: /home/schkn/.ssh/config line 1: Applying options for *
debug1: Reading configuration data /etc/ssh/ssh_config
debug1: /etc/ssh/ssh_config line 19: Applying options for *
debug1: Connecting to github.com [140.82.118.3] port 22.
debug1: Connection established.
- When using SSH key-based authentication, verify that your server contains the public key of your client.
In order to check authorized keys on the server, make sure to inspect the authorized_keys in the .ssh directory.
$ cat ~/.ssh/authorized_keys

ssh-rsa AAAABfzaC1yc2EAAAADAfgzrgegtexoq6FuKMPSs9cpeoCv+HUaL3fijO2otTw54451cfzfxpcdrtRLfYZp34qztJGC1AwNiU5yezfzi/D2afzfzzFls3wvwn+DNA email@example.com
Conclusion
In this tutorial, you learned more about the git clone and how it can be used in order to start working on different projects on your codebase.
You also learned more about the two main authentication methods: SSH key-based authentication and password.
If you are interested in software engineering, we have a complete section dedicated to it on the website, so make sure to have a look.