How To Switch Branch on Git

How To Switch Branch on Git | What is Git Switch? | Git Switch vs Checkout

Apparently, managing various branches in your Git Repository when working on a project is difficult. So, switching from one branch to another branch or else to the master branch should be done frequently for better performance. In Git, changing branches can be performed by checkout command whereas to switch branches in old versions.

Now, we have the Git Switch command to easily switch branches on Git also various Git Commands can support you in performing Git tasks. In this tutorial, you will learn how to switch branches on Git using Checkout & Switch command along with How do you switch between local Git branches?

What is Git Switch?

A simple alternative to ‘checkout’ is the “switch” command in git. It lets you switch your current HEAD branch. It was added newly in Git v2.23. Before the switch, the amending branches had to be done with the checkout command.

By using the checkout command you can not only use it to switch branches, but also to discard changes, restore files, and much more. Git switch has a very clear and limited purpose like switching and creating branches!

Switch Branch using git checkout

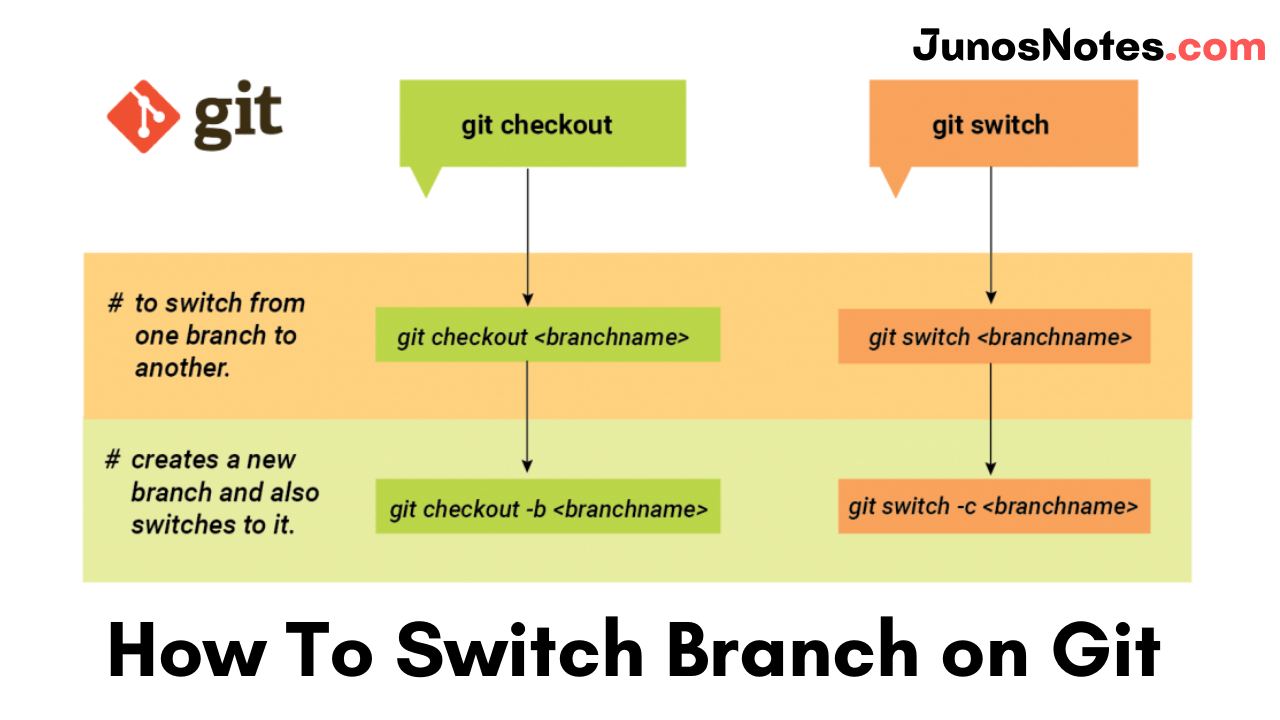
The simplest way to switch branches on Git is to use the “git checkout” command and specify the name of the branch you want to switch to.

If the destination branch does not exist, you have to append the “-b” option, otherwise, you won’t be able to switch to that branch.

$ git checkout <existing_branch>

$ git checkout -b <new_branch>

As an example, let’s say that you want to switch from the master branch to another branch named “feature” in your repository.

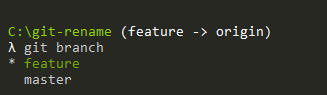
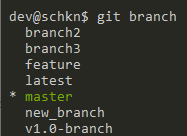
First, make sure that the target branch exists by running the “git branch” command.

$ git branch

Switch Branch using git checkout git-branch

Now that you made sure that your branch exists, you can switch from the master branch to the “feature” branch by executing the “git checkout” command.

$ git checkout feature

Switch Branch using git checkout git-checkout

That’s it!

You have successfully switched to your “feature” branch with the checkout command.

Do Check: How To Create a Git Branch

How to switch to a non-existing branch in Git?

On the other hand, if you try to switch to a non-existing branch, you will the following error message

$ git checkout non-existing-branch

error: pathspec 'non-existing-branch' did not match any file(s) known to git

To solve this error, you will have to append the “-b” (for “new branch”) option to the checkout command.

$ git checkout -b non-existing-branch

Switched to a new branch 'non-existing'

Now that you know more about the “checkout” command, let’s see another useful command to change branches using Git.

Switch branch using git switch

A quick way of switching branches on Git is to use the “git switch” command and specify the name of the branch you want to switch to.

If the destination branch does not exist, you have to specify the “-c” option (for “create branch“), otherwise, you will get an error message when switching to that branch.

$ git switch <existing_branch>

$ git switch -c <non_existing_branch>

Again, as an example, let’s say that you want to switch to the “feature” branch from the “master” branch.

In order to switch from the “master” branch to the “feature” branch, use the “git switch” command and specify the destination branch (which is “feature” in this case)

$ git switch feature

Switch Branch using git checkout git-checkout

On the other hand, if you try to switch to a nonexisting branch, you will get the following error message

$ git switch non-existing-branch

fatal: invalid reference: non-existing-branch

To solve this error, make sure to append the “-c” option to the “git switch” command to specify that you want to switch to a new branch.

$ git switch -c non-existing-branch

Switched to a new branch 'non-existing-branch'

Congratulations, you have now successfully switched to another branch and you can start working on it.

How do you switch between local Git branches?

First, you need to begin with running the git branch command to view a list of your local branches so that you understand which branches you have to work with and which branch you currently have checked out.

Later, you will utilize the git checkout command to checkout, or switch to, a different local branch. It should look something like this:

$ git checkout <name-of-branch-you-want-to-switch-to>

Checkout Remote Branch on Git

In some cases, you may be interested in checking out remote branches from your distant repository.

In order to switch to a remote branch, make sure to fetch your remote branch with “git fetch” first. You can then switch to it by executing “git checkout” with the “-t” option and the name of the branch.

$ git fetch

$ git checkout -t <remote_name>/<branch_name>

The “-t” option in checkout stands for “track” and it is used to create your branch and setting up the upstream branch automatically to the remote branch.

As an example, let’s say that you have a branch named “remote-branch” on the “origin” remote.

In order to check out the remote branch, you will need to execute the checkout command and specify the information specified above.

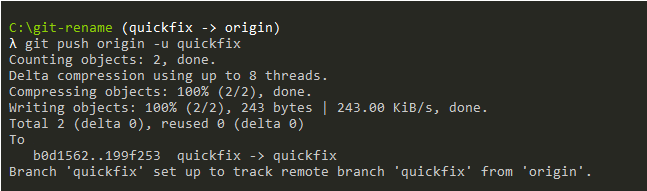
$ git checkout -t origin/remote-branch

Branch 'remote-branch' set up to track remote branch 'remote-branch' from 'origin'.
Switched to a new branch 'remote-branch'

As you can see, the remote tracking information was set automatically: as a consequence, if you commit any modifications, you will automatically push them to the upstream branch.

Checkout New Branch from Specific Commit

In some cases, you may need to switch to a new branch, but you want it to start from a specific commit on the branch.

In order to checkout a new branch from a specific start point, you have to execute the “git checkout” command and specify the “-B” option, as well as the branch and its start point.

$ git checkout -B <branch> <start_point>

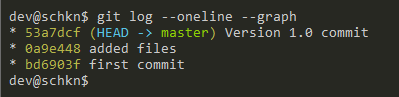
In order to checkout to a specific start point, you will have to list the commits done in your repository using the “git log” command.

$ git log --oneline --graph

* 98a14be Version 2 commit (master, HEAD)
* 53a7dcf Version 1.0 commit
* 0a9e448 added files
* bd6903f first commit

As you can see, the HEAD of the master branch is at 98a14be but we want to checkout to the commit just before HEAD (which is 53a7dcf).

In order to switch to the master branch, on this specific commit, we are going to execute the “git checkout” command and specify the “master” branch as well as the commit SHA.

$ git checkout -B master 53a7dcf 

Switched to and reset branch 'master'

In order to check that you are correct on a specific commit, you can use the “git log” command again.

$ git log --oneline --graph

Checkout New Branch from Specific Commit git-log

Awesome, you have successfully switched to another branch on a specific commit.

Conclusion

In this tutorial, you learned how you can easily switch to a branch on Git using the checkout command or the switch command.

You also learned that you can switch to a branch that does not exist yet by specifying the “-b” option or the “-c” option.

Finally, you have discovered advanced tips related to switching branches: checking out a remote branch and checking out a branch from a specific starting point.

How To Change Branch Name on Git

How To Change Branch Name on Git | How To Rename a Local and Remote Git Branch

Git Branches are mainly used for the development of the main project smoothly and in a decided workflow. At some times, developers may think to change the branch names in git for pushing the changes in that specific branch. Choosing the branch name will always depend upon what you are working on.

Renaming the branch name in Git is very simple using the related git commands. If you want to change your git branch names then take a look at the entire tutorial on How do you Change Branch Name on Git easily.

This guide will help you rename git branches locally and remotely. So, check out the available stuff regarding Git Rename Branch from here.

Change Branch Git Name

In order to change a branch name on Git, you have to use the “git branch” command followed by the “-m” option. Next, you just have to specify the name of the new branch.

# Optional command (if you are not on the target branch)
$ git checkout <branch>

$ git branch -m <new_branch_name>

Note: Before changing the branch name, make sure to switch to the branch that you want to rename.
It is important to mention that this command changes the name of your local branch.

If you want your changes to be available on the remote side, you have to push your branch to the remote.

To achieve that, you have to use the “git push” command and specify the old branch name as well as the new branch name.

$ git push <remote> :<old_branch_name> <new_branch_name>

Finally, you have to set the upstream branch for the newly created branch using the “git upstream” command.

$ git push <remote> -u <new_branch_name>

In order to illustrate this method, let’s observe a quick example from the below modules.

Also Read: How To Change Git Remote Origin

Git Rename Branch

The git branch command allows you to change a branch. For renaming a branch, the command that should run is git branch -m <old> <new>. “old” is the name of the branch you want to rename and “new” is the new name for the branch.

Look at the following syntax for the Git rename branch command:

git branch -m <old> <new>

Examples on Git Rename Branch

In the below examples, we are going to rename one of our branches currently named “feature”.

First of all, we are going to check on which branch we are at the moment with the “git branch” command.

$ git branch

Example changing a branch name git-branch-command

In this case, we are already on the “feature” branch, so we do not need to switch to any other branches.

Git Rename Local Branch Example

Now that we are on our “feature” branch, we are going to change the branch name to “quickfix” using the branch command.

$ git branch -m "quickfix"

Example changing a branch name git-change-branch-name

As you can see, the “local” branch name was changed to “quickfix“, but this does not mean that your branch name was updated on the remote!

Actually, if you run the “git branch” with the “-a” option (for “all”), you can see that the upstream branch is still pointing to the “feature” branch.
Example changing a branch name git-display-all-branches

Git Rename Remote Branch Example

To change the name of the remote, you are going to push the updated references to your remote.

$ git push origin :"feature" "quickfix"

Example changing a branch name git-update-remote-1

As you can see, two operations were actually performed here :

  • the “feature” branch was deleted from the remote
  • the “quickfix” branch was created on the remote.

However, updating your references does not mean that the upstream branch was actually updated.

To update your new upstream branch, you need to use the “push” command.

$ git push origin -u quickfix

How To Change Branch Name on Git set-upstream-branch-git

Done!

Congratulations, you successfully changed the name of your branch on Git!

Conclusion

In this tutorial, you learned how you can change the name of your branch on Git easily.

You learned that you have to change the name of your branch locally and on the remote, otherwise you might run into some inconsistencies on your repository.

If you are interested in software engineering, we have a complete section dedicated to it on the website, so make sure to check it out!

How To Install Git On Debian 10 Buster

How To Install Git On Debian 10 Buster | Debian Git Repository | Debian Buster Git

Git is the world’s famous distributed software version control system that allows you to keep track of your software at the source level. It is used by many open-source and commercial projects. In this tutorial, we will be discussing completely how to install & get started with Git on Debian 10 Buster Linux along with the introduction of Git such as what is git, git terms, git commands, and also features of git.

What is Git?

Git is the most commonly used distributed version control system in the world created by Linus Torvalds in 2005. The popular option among open-source and other collaborative software projects is Git. Also, several project files are kept in a Git repository, and big companies like GitHubGitlab, or Bitbucket assist to promote software development project sharing and collaboration.

Mainly, the Git tool is utilized by development teams to keep track of all the changes happening on a codebase, as well as organizing code in individual branches. In today’s tutorial, we are working on how to set up Git on a Debian 10 Buster machine.

What is Debian?

Debian is an operating system for a wide range of devices including laptops, desktops, and servers. The developers of Debian will provide the security updates for all packages for almost of their lifetime. The current stable distribution of Debian is version 10, codenamed buster. Debian 10 is brand new, so if you require a complete setup tutorial for Debian 10, follow this tutorial.

Also Check:

Terms of Git

For a better understanding of Git, you must know a few of the common Git Terms. So, we have compiled here in detail:

  • Repository: It is a directory on your local computer or a remote server where all your project files are kept and tracked by Git.
  • Modified: If you add a file in the staging area, and modify the file again before committing, then the file will have a modified status. You will have to add the file to the staging area again for you to be able to commit it.
  • Commit: It is keeping a snapshot of the files that are in the staging area. A commit has information such as a title, description, author name, email, hash, etc.
  • Staged: Before you commit your changes to the Git repository, you must add the files to the staging area. The files in the staging area are called staged files.
  • Tracked: If you want Git to track a file, then you have to tell Git to track the file manually.
  • Untracked: If you create a new file on your Git repository, then it is called an untracked file in Git. Unless you tell git to track it, Git won’t track a file.

Git Features

Before learning the installation of Git, knowing completely about the tool is very essential. So, here we have provided features of Git in an image format for quick reference and easy sharing to others. Look at the below shareable image and download it on your devices for usage:

Git Features shareable image

How To Install Git On Linux 2021?

Prerequisites

Before starting, make sure that you have root privileges on your instance.

To make sure of it, run the following command.

$ sudo -l

I – Prerequisites sudo-rights

How to Install Git from official sources?

By following the below sub-modules, you can easily understand the installation of Git from official sources:

Update your apt repositories

First of all, make sure that you have the latest versions of the repositories on your apt cache.

To update them, run the following command:

$ sudo apt update

II – Install Git from official sources apt-update

Install Git from the official repository

To install the latest stable version of Git (2.20.1 in my case), run the following command.

$ sudo apt-get install git

b – Install Git from the official repository git-install

Great!

Now you can check the git version that is running on your computer.
<pre$ git –version 2.20.1

Steps for Installing Git From Source

As you probably noticed, you are not getting the latest version of Git with the apt repositories. As of August 2019, the latest Git version is 2.22.0. In order to install the latest Git version on your Debian 10 instance, follow those instructions.

Install required dependencies

In order to build Git, you will have to install manually dependencies on your system. To do so, run the following command:

$ sudo apt-get install dh-autoreconf libcurl4-gnutls-dev libexpat1-dev \
  gettext libz-dev libssl-dev

a – Install required dependencies manual-dependencies

Install documentation dependencies

In order to add documentation to Git (in different formats), you will need the following dependencies

$ sudo apt-get install asciidoc xmlto docbook2x

b – Install documentation dependencies manual-2

Install the install-info dependencies

On Debian configurations, you will need to add the install-info dependency to your system.

$ sudo apt-get install install-info

c – Install the install-info dependencies manual-3

Download and build the latest Git version

Head to the Git repository on Github, and select the version you want to run on your Debian instance.
d – Download and build the latest Git version latest-git-version

Head to the directory where you stored the tar.gz file, and run the following commands.

$ tar -zxf git-2.22.0.tar.gz
$ cd git-2.22.0
$ make configure
$ ./configure --prefix=/usr
$ make all doc info
$ sudo make install install-doc install-html install-info

Again, run the following command to make sure that Git is correctly installed on your system

$ git --version

d – Download and build the latest Git version git-2.22.0

Configuring Git

Now that Git is correctly set on your instance, it is time for you to configure it.

This information is used when you are committing to repositories, you want to make sure that you are appearing under the correct name and email address.

To configure Git, run the following commands:

$ git config --global user.name "devconnected" 
$ git config --global user.email "devconnectedblog@gmail.com"

Now to make sure that your changes are made, run the following command.

$ git config --list

IV – Configuring Git git-config

You can also look at your modifications in the gitconfig file available in your home directory.

To view it, run the following command.

$ cat ~/.gitconfig

IV – Configuring Git gitconfig-file

Now that your Git instance is up and running, it is time for you to make your first contributions to the open-source world!

Here’s a very good link by Digital Ocean on a first introduction to the Open Source world!

Uninstalling Git

If by any chance you are looking for removing Git from your Debian 10 Buster instance, run the following command:

$ sudo apt-get remove git

V – Uninstalling Git git-remove

Until then, have fun, as always.

How To Compare Two Git Branches | Comparing Two Branches Using git diff and git merge

Particularly before performing any branches merge or delete in Git, it is important to compare it to another one. As a consequence, it provides you an overview of current changes and assists you to define if they must be integrated or deleted.

Comparing two branches is very helpful as it can be utilized as an easy way to view if any merging conflicts. In this tutorial, we’ll be talking about the different ways to compare branches in Git along with comparing commits, actual changes, or also a specific file on two branches using Git commands.

Comparing Actual Changes Between Two Branches

Let’s say you’d like to take a look at a feature branch named “feature/login”. You need to view all changes that are different from “main” – to get an idea of what would be integrated if you performed e.g. a git merge now. There are various ways to compare git branches and some of them are listed & explained here in detail.

  • Compare two branches using git diff
    • With Double Dot Notation
    • With Triple Dot Syntax
  • Compare two branches in Git using git-merge

Compare two branches using git diff with Double Dot Notation

For comparing two branches easily, you have to use the “git diff” command and provide the branch names separated by dots.

$ git diff branch1..branch2

Using this command, Git will compare the tip of both branches (also called the HEAD) and display a “diff” recap that you can use to see modifications.
Compare two branches using git diff git-diff-double-dot

In short, it will show you all the commits that “branch2” has that are not in “branch1”.

Let’s say for example that you are looking to see the differences between a feature branch (being one commit ahead of master) and the master branch.

In order to see what has been modified between master and feature, you would run the following command.

$ git diff master..feature

diff --git a/file-feature b/file-feature
new file mode 100644
index 0000000..add9a1c
--- /dev/null
+++ b/file-feature
@@ -0,0 +1 @@
+this is a feature file

As you can see, one file has been added to the branch.

Git is using a color code in order to display differences done between two branches: lines in green are lines added to the files and lines in red are the ones that are deleted from the files.

Also See: How To Switch Branch on Git

Comparing two branches using Triple Dot Syntax

In order to compare two branches, you can also use the “git diff” command and provide the branch names separated by three dots.

$ git diff branch1...branch2

So what’s the difference with the previous command?

Using “git diff” with three dots compares the top of the right branch (the HEAD) with the common ancestor of the two branches.

As always, a diagram speaks a hundred words, so here is the description of the diff command with three dots.

Comparing two branches using triple dot syntax triple-dot

So which method should you use in order to compare the two branches?

Most of the time, you want to stick with the first method, meaning using only two dots in order to compare two branches.

Why?

When you are developing a new feature, you are most of the time doing it on your own branch. However, developing on your own branch does not prevent the branch you checked out from having other commits.

This is particularly true whenever you are checking out a new branch from the master branch: other commits might be integrated to master while you are working on your feature.

As a consequence, in order to compare the two branches, you almost always want to stick with the first method we described.

$ git diff branch1..branch2

Compare two branches in Git using git-merge

As an alternative, you can make a git-merge with the –no-ff and –no-commit option. This assures that the current branch is not modified or updated by the merge command.

For example, the below will merge the master branch to the current branch without committing the changes.

git merge –no-commit –no-ff master

Once the merge is done, you can use Git visual tools such as gitk and git-gui to envision the differences. Once you’re finished, you can abort the merge with the –abort option. This will replace the pre-merge state.

git merge –abort

git merge command for comparing two git branches

Compare Specific File Between Two Branches

You may want to see all changes done to a specific file on the current branch you are working on in some cases.

To see the differences done to a file between two branches, use the “git diff” command, specify the two branches and the filename.

$ git diff master..feature -- <file>

For example that the file that you modified between those two branches is called “README”.

In order to see the differences done to this file, you would run the following command

$ git diff master..feature -- README

diff --git a/README b/README
new file mode 100644
index 0000000..add9a1c
--- /dev/null
+++ b/README
@@ -0,0 +1 @@
+this is the README file

Note that you can use the triple-dot syntax we saw earlier in order to compare those files.

$ git diff master...feature -- <file>

Compare commits between two branches

In some cases, you may be interested in knowing the commit differences between the two branches.

In order to see the commit differences between two branches, use the “git log” command and specify the branches that you want to compare.

$ git log branch1..branch2

Note that this command won’t show you the actual file differences between the two branches but only the commits.

Back to the example, we provided before comparing the commit differences between the master and the feature branch would be written

$ git log master..feature

commit 802a2abed7f88d67e0ab9a0e780b858651c5813b (HEAD -> feature, origin/feature)
Author: SCHKN <test@gmail.com>
Date:   Wed Dec 4 13:10:01 2019 -0500

    feature commit

If you are not interested in all the information provided by this command, there is a way to get shorter commit lines.

In order to compare two branches using commit abbreviations, use the “git log” command with the following options.

$ git log --oneline --graph --decorate --abbrev-commit branch1..branch2

Using the example we provided before, this command would give us the following output

$ git log --oneline --graph --decorate --abbrev-commit master..feature
* 802a2ab (HEAD -> feature, origin/feature) feature commit

Compare two branches using Sourcetree

In some cases, you might be interested in viewing differences in a Git graphical client.

For this example, I am going to use the popular Sourcetree Git GUI in order to display the differences between the two branches.

Given the repository view, you have access to all your branches in the left side menu.

In order to see the differences between two branches, on the Sourcetree left menu, click on the branch that you want to compare and click “Diff Against Current”

Compare two branches using Sourcetree diff-against

After clicking on “Diff Against Current”, you will be presented with the list of differences between your files, whether they are in your working tree or if they are in your index already.

Compare two branches using Sourcetree differences-sourcetree

Conclusion

In this tutorial, you discovered how you can compare two branches easily using Git commands (specifically the git diff and git log commands). Also, You learned that it is possible to use graphical tools such as Sourcetree in order to compare your branches and commits easily. If you are passionate about Git, then make use of this website fully by viewing the complete section dedicated to Git.

Access Control Lists on Linux Explained

Access Control Lists on Linux Explained | Linux ACL Cheat Sheet

Access control list (ACL) gives an additional, more flexible permission mechanism for file systems. It is intended to help UNIX file permissions. ACL permits you to grant permissions for any user or group to any disc resource.

If you are working as a system administrator then you would probably be familiar with Linux ACLs. Because they were used to define more fine-grained discretionary access rights for files and directories.

In today’s Access Control Lists on Linux Explained Tutorial, we are going to explain deeper information about Linux access control lists, what they are used for and how they are managed to configure a Linux system properly.

Get Ready to Learn A New Topic?

What You Will Learn

If you follow this tutorial until the end, you are going to learn about the following topics:

That’s quite a long program, so without further ado, let’s start with a quick definition of what Linux file access control lists acls are.

Access Control Lists Basics on Linux

On Linux, there are two ways of setting permissions for users and groups: with regular file permissions or with access control lists.

What is ACL(Access Control Lists)?

Access control lists are used on Linux filesystems to set custom and more personalized permissions on files and folders. ACLs allow file owners or privileged users to grant rights to specific users or to specific groups.

getfacl-1

In Linux, as you probably know, the permissions are divided into three categories: one for the owner of the file, one for the group, and one for the others.

However, in some cases, you may want to grant access to a directory (the execute permission for example) to a specific user without having to put this user into the group of the file.

This is exactly why access control lists were invented in the first place.

Do Refer More Linux Tutorials: 

Listing Access Control List

On Linux, access control lists are not enabled when you create a new file or directory on your host (except if a parent directory has some ACLs predefined).

To see if access control lists are defined for a file or directory, run the ls command and look for a “+” character at the end of the permission line.

$ ls -l

access-control-list
To show the difference, here is the difference when listing files on a minimal instance.

Listing Access Control List acl-fileNow that you have some basics about access control lists, let’s see how you can start creating basic ACL for your files and directories.

List of commands for setting up ACL

1) To add permission for user
setfacl -m "u:user:permissions" /path/to/file

2) To add permissions for a group
setfacl -m "g:group:permissions" /path/to/file

3) To allow all files or directories to inherit ACL entries from the directory it is within
setfacl -dm "entry" /path/to/dir

4) To remove a specific entry
setfacl -x "entry" /path/to/file

5) To remove all entries
setfacl -b path/to/file

Creating access control lists on Linux

Before starting with ACL commands, it is important to have the packages installed on your host.

Checking ACL packages installation

It might not be the case if you chose to have a minimal server running.

Start by checking the help related to the setfacl by running the following command

$ setfacl --help

If your host cannot find the setfacl command, make sure to install the necessary packages for ACL management.

$ sudo apt-get install acl -y

Note that you will need sudo privileges on Debian 10 to run this command.

Checking ACL packages installation

Run the setfacl command and make sure that you are able to see the help commands this time.

Now that your host is correctly configured, let’s see how the setfacl command works.

Setting access control lists using setfacl

With access control lists, there are two main commands that you need to remember: setfacl and getfacl.

In this chapter, we are going to take a look at the setfacl command as the getfacl one is pretty self-explanatory.

The setfacl command is used on Linux to create, modify and remove access control lists on a file or directory.

The setfacl has the following syntax

$ setfacl {-m, -x}  {u, g}:<name>:[r, w, x] <file, directory>

Where curly brackets mean one of the following options and regular brackets mean one or several items.

  • -m: means that you want to modify one or several ACL entries on the file or directory.
  • -x: means that you want to remove one or several ACL entries on a file or directory.
  • {u, g}: if you want to modify the ACL for a user or for a group.
  • name: this is an optional parameter, it can be omitted if you want to set the ACL entries for every user or for every group on your host.
  • [r, w, x]: in order to set read, write or execute permissions on the file or directory.

For example, in order to set specific write permissions for a user on a file, you would write the following command

$ setfacl -m u:user:w <file, directory>

In order to set execute permissions for all users on your host, you would write the following command

$ setfacl -m u::x <file, directory>

To set full permissions for a specific group on your host, you would write the setfacl this way

$ setfacl -m g:group:rwx <file, directory>

Now let’s say that you want to remove an ACL entry from a file.

In order to remove a user-specific entry from a file, you would specify the x option.

Note: you cannot specific rights from a single ACL entry, meaning that you can’t remove write permissions, keeping the ACL read permissions active.

$ setfacl -x u:<user> <file, directory>

Similarly, to remove ACL related to groups on your host, you would write the following command

$ setfacl -x g:<group> <file, directory>

Now that you have seen how you can create access control lists easily on Linux, it is time to see how you can check existing access control lists on files and directories.

Listing access control lists using getfacl

The getfacl command is used on Linux to print a complete listing of all regular permissions and access control lists permissions on a file or directory.

The getfacl can be used with the following syntax

$ getfacl <file, directory>

getfacl-2

The getfacl command is divided into multiple categories :

  • Filename, owner, and group: The information about the user and group ownership is shown at the top;
  • User permissions: First, you would find regular user permissions, also called the owning user, followed by any user-specific ACL entries (called named users)
  • Group permissions: Owning groups are presented followed by group-specific ACL entries, also called named groups
  • Mask: That restricts the permissions given to ACL entries, the mask is going to be detailed in the next section;
  • Other permissions: Those permissions are always active and this is the last category explored when no other permissions match with the current user or group.

Working with the access control lists mask

As you probably saw from the last screenshot, there is a mask entry between the named groups and the other permissions.

But what is this mask used for?

The ACL mask is different from the file creation mask (umask) and it is used in order to restrict existing ACL entries existing on a file or directory.

The ACL mask is used as the maximum set of ACL permissions regardless of existing permissions that exceed the ACL mask.

As always, a diagram speaks a hundred words.

Working with the access control lists mask

The ACL mask is updated every time you run a setfacl command unless you specify that you don’t want to update the mask with the -n flag.

To prevent the mask from being updated, run the setfacl with the following command

$ setfacl -n -m u:antoine:rwx <file, directory>

As you can see in this example, I have set the user “antoine” to have full permissions on the file.

The mask is set to restrict permissions to read and write permissions.

As a consequence, the “effective permissions” set on this file for this user are read and write ones, the execute permission is not granted.

Working with the access control lists mask

Note: If your maximum set of permissions differs from the mask entry, you will be presented with an effective line computing the “real” set of ACL entries used.

Creating access control lists defaults on directories

As already mentioned in this article, it is possible to create ACL entries on directories and they work in the same way file access control lists work.

However, there is a small difference when it comes to directories: you have to option to create access control lists defaults.

Access control lists defaults are used to create ACL entries on a directory that will be inherited by objects in this directory like files or subdirectories.

When creating default ACL entries :

  • Files created in this directory inherit the ACL entries specified in the parent directory
  • Subdirectories created in this directory inherit the ACL entries as well as the default ACL entries from the parent directory.

To create default ACL entries, specify the -d option when setting ACL using the setfacl command.

$ setfacl -d -m {u, g}:<name>:[r, w, x] <directory>

For example, to assign read permissions to all files created in a directory, you would run the following command

$ setfacl -d -m u::r directory

Creating access control lists defaults on directories getfacl-3

Now, when a file is created in this acl-directory, you can see that default ACL entries are applied to the file.

Creating access control lists defaults on directories default-1-1

Similarly, when a directory is created in the acl-directory, it will inherit default ACL entries specified in the parent directory.

Creating access control lists defaults on directories default-2

Note that it is recommended to specify default permissions for all three categories (user, group, and other).

In fact, specifying one of the three entries will create the remaining two with permissions related to the file creation mask.

Deleting default access control lists on directories

In order to delete default existing access control lists on directories, use the -k flag with the setfacl command.

$ setfacl -k <directory>

Given the example we specified earlier, here is how to delete default entries

$ setfacl -k acl-directory

Deleting default access control lists on directories remove-default

Note that deleting ACL entries from the parent directory does not delete ACL entries in files or directories contained in the parent directory.

To remove default ACL entries in a directory and all subdirectories, you would have to use a recursive option (-R)

$ setfacl -kR <directory>

remove-default-1

Conclusion

In this tutorial, you learned about access control lists on Linux, the getfacl, and the setfacl command.

You also discovered more about the access control lists mask and how default ACL is used in order to create ACL entries on files and subdirectories contained in the parent directory.

If you are curious about Linux system administration, we have many more tutorials on the subject, make sure to read them!

Understanding Hard and Soft Links on Linux

Understanding Hard and Soft Links on Linux | What are Hard & Soft Links in Linux?

In this tutorial, we are going to discuss what are hard and soft links with syntax and how we can understand Hard and Soft Links on Linux easily.

In case, you are wondering how you can generate a shortcut on a Linux system, then this tutorial can be the perfect answer for you all.

Are you Ready to Start learning about Understanding Hard and Soft Links on Linux? here you go.

What Will You Learn?

This section is completely about the stuff that is provided in this tutorial about the topic we are going to discuss. It helps you to know a bit earlier about what you are going to learn:

  • How storage works on a Linux system and what inodes are exactly?
  • What hard and soft links are, given what you just learned before
  • How copying differs from creating links to your files
  • How to create links on a Linux system
  • How to find hard and soft links: all the commands that you should know.
  • Some of the quick facts about hard and soft links

That’s a long program, so without further ado, let’s see how data is organized on your Linux system and what inodes are?

Do Refer: 

How does storage work on a Linux system?

In order to understand what hard and soft links are, you need to have some basics on how data is stored on your system.

In a computer, data are stored on a hard drive.

Your hard drive has a capacity, let’s say 1 TB, and it is divided into multiple blocks of a given capacity.

II - How does storage work on a Linux system storage-design

If I launch a simple fdisk command on my system, I am able to see that my device is separated into sectors of 512 bytes.

II - How does storage work on a Linux system fdisk-simple

That’s a lot of sectors, as my hard drive has a capacity of almost 32 GBs.

Now every time that I create a file, it will be stored on a block.

But what if the file size exceeds 512 bytes?

You guessed it, my file will be “fragmented” and stored into multiple different blocks.

how-files-are-stored

If the different pieces of your file are physically far away from each other on the disk, the time needed to build your file will obviously be longer.

That’s why you had to defragment your disk on Windows systems, for example, you were essentially making related blocks closer.

Luckily for us, those blocks have addresses.

Your Linux system does not have to read the entire disk to find your file, it will cherry-pick some addresses that correspond to your file data.

How?

By using inodes.

a – What are inodes?

Inodes are essentially identification cards for your file.

They contain the file metadata, the file permissions, the file type, the file size but most importantly the physical address of this file on the disk.

inode

Without going into too many details, your inode will keep references to the locations of your different file blocks.

So one inode equals one file.

That’s the first layer of your file system, and how references are kept to the underlying data.

storage-first-layer

However, as you probably noticed, filenames are not part of the inode, they are not part of the identification card of the file.

b – About filenames and inodes

On a Linux system, filenames are kept on a separate index.

This separate index keeps track of all the different filenames existing on your system (even directories) and they know the corresponding inode in the inode index.

What does it mean?

It essentially means that you can have multiple filenames (say “doc.txt” and “paper.txt”) pointing to the same exact file, sharing the same content.

Now that you learned about the filenames index, let’s add another layer to our previous layered architecture.

b – About filenames and inodes filesystems-design

With this schema, you have a basic understanding of how files are organized and stored on your filesystem, but more importantly, you will be able to understand what hard and soft links are.

What is Soft Link And Hard Link In Linux?

Let’s start with softs links as they are probably the easiest to understand.

a – Understanding soft links

Soft links, also called symbolic links, are files that point to other files on the filesystem.

Similar to shortcuts on Windows or macOS, soft links are often used as faster ways to access files located in another part of the filesystem (because the path may be hard to remember for example).

Symbolic links are identified with the filetype “l” when running a ls command.

They also have a special syntax composed of the link name and an arrow pointing to the file they are referencing.

a – Understanding soft links symbolic-link

In this case, the file “shortcut” is pointing to the file “file.txt” on my filesystem.

Have you paid attention to the permissions?

They are set to “rwx” by default for the user, the group, and the others.

However, you would be constrained by the permissions of the file if you were to manipulate this file with another user.

b – Soft links and inodes

So why did we talk so much about inodes in the first section?

Let’s have a quick look at the inode of the file and the inode of the shortcut.

$ stat shortcut
  File: shortcut -> file.txt
  Size: 3               Blocks: 0          IO Block: 4096   symbolic link
Device: fc01h/64513d    Inode: 258539      Links: 1

$ stat file.txt
  File: job
  Size: 59              Blocks: 8          IO Block: 4096   regular file
Device: fc01h/64513d    Inode: 258545      Links: 2

The inodes are different.

However, the original file inode is pointing directly to the file content (i.e the blocks containing the actual content) while the symbolic link inode is pointing to a block containing the path to the original file.

sooft-links

The file and the shortcut share the same content.

It means that I was to modify the content of the shortcut, the changes would be passed on to the content of the file.

If I delete the shortcut, it will simply delete the reference to the first inode. As the file inode (the first one) still references the content of the file on the disk, the content won’t be lost.

However, if I were to delete the file, the symbolic link would lose its reference to the first inode. As a consequence, you would not be able to read the file anymore.

This is what we call a dangling symbolic link, a link that is not pointing to anything.

deleting-soft-link-original-file

See the red highlighting when I deleted the original file?

Your terminal is giving visual clues that a symbolic link is a dangling symbolic link.

So what’s the size of a symbolic link?

Remember, the symbolic link points to the path of the original file on the filesystem.

In this example, I created a file named “devconnected”, and I built a shortcut to it using the ln command.

Can you guess the size of the shortcut? 12, because “devconnected” actually contains 12 letters.

soft-link-size

Great!

Now you have a good understanding of what soft links are.

c – Understanding hard links

Hard links to a file are instances of the file under a different name on the filesystem.

Hard links are literally the file, meaning that they share all the attributes of the original file, even the inode number.

hard-link

Here’s a hard link created on my system.

It is sharing the same content as the original file and it is also sharing the same permissions.

Changing permissions of the original file would change the permissions of the hard link.

d – Hard links and inodes

Let’s have a quick look at the original file inode and the hard link inode.

$ stat hardlink
  File: hardlink
  Size: 59              Blocks: 8          IO Block: 4096   regular file
Device: fc01h/64513d    Inode: 258545      Links: 2

$ stat file.txt
  File: file.txt
  Size: 59              Blocks: 8          IO Block: 4096   regular file
Device: fc01h/64513d    Inode: 258545      Links: 2

As you probably noticed, the inodes are the same, but the filenames are different!

Here’s what happens in this case on the filesystem.

hard-soft-links

When you are creating a symbolic link, you are essentially creating a new link to the same content, via another inode, but you don’t have access to the content directly in the link.

When creating a hard link, you are literally directly manipulating the file.

If you modify the content in the hard link file, the content will be changed in the original file.

Similarly, if you modify the content in the original file, it will be modified in the hard link file.

However, if you delete the hard link file, you will still be able to access the original file content.

Similarly, deleting the original file has no consequences on the content of the hard link.

Data are definitely deleted when no inodes point to it anymore.

Hard or Soft?

You won’t find a clear answer to this question. If the type that suits your special situation can be the best link. While these concepts can be tricky to memorize, the syntax is pretty straightforward, so that is a plus!

To keep the two links easily separated in your mind, I leave you with this:

  • A hard link always points a filename to data on a storage device.
  • A soft link always points a filename to another filename, which then points to information on a storage device.

What is the difference between copying and creating a hard link?

With the concepts that you just learned, you may wonder what’s the difference between copying a file and creating a hard link to the file.

Don’t we have two files in the end, with the same content?

The difference between copying and hard linking is that hard-linking does not duplicate the content of the file that it links to.

When you are copying a file, you are essentially assigning new blocks on the disk with the same content as the original file.

Even if you share the same content with hard-linking, you are using disk space to store the name of the original file, not the actual content of the file.

Diagrams may explain it better than words.

Here’s what copying a file means.

copying-a-file

See how it differs from hard-linking?

Now that you know how copying files differ from hard linking to files, let’s see how you can create symbolic and hard links on a Linux system.

Manipulating links on a Linux system

a – How to create a symbolic link on Linux?

To create a symbolic link, you need to use the ln command, with a -s flag (for symbolic).

The first argument specifies the file you want to link to.

The second argument describes the name of the link you are about to create.

$ ln -s file shortcut

$ ls -l
-rw-rw-r-- 1 schkn schkn 0 Aug 14 20:12 file
lrwxrwxrwx 1 schkn schkn 4 Aug 14 20:12 shortcut -> file

You can also create symbolic links to directories.

$ mkdir folder
$ ln -s folder shortcut-folder

$ ls -l
drwxrwxr-x  2 schkn schkn   4096 Aug 14 20:13 folder
lrwxrwxrwx  1 schkn schkn      7 Aug 14 20:14 shortcut-folder -> folder/

b – How to delete symbolic links on Linux

To remove existing symbolic links, use the unlink command.

Following our previous example :

$ unlink shortcut

$ ls -l 
-rw-rw-r-- 1 schkn schkn 0 Aug 14 20:12 file

You can also simply remove the shortcut by using the rm command.

Using the unlink command might be a little bit safer than performing an rm command.

$ rm shortcut

$ ls -l 
-rw-rw-r-- 1 schkn schkn 0 Aug 14 20:12 file

c – How to create a hard link on Linux

A hard link is created using the lnwithout specifying the s flag.

$ ln file hardlink

$ ls -l
-rw-rw-r--  2 schkn schkn      0 Aug 14 20:12 file
-rw-rw-r--  2 schkn schkn      0 Aug 14 20:12 hardlink

d – How to remove a hard link on Linux

Again, you can use the unlink command to delete a hard link on a Linux system.

$ ln file hardlink
$ unlink hardlink
$ ls -l
-rw-rw-r--  2 schkn schkn      0 Aug 14 20:12 file

Now that you know how to create links, let’s see how you can find links on your filesystem.

How to find links on a filesystem?

There are multiple ways to find links on a Linux system, but here are the main ones.

Using the find command

The find command has a type flag that you can use in order to find links on your system.

$ find . -type l -ls
262558      0 lrwxrwxrwx   1 schkn    schkn           7 Aug 14 20:14 ./shortcut-folder2 -> folder2/
.
.
.
262558      0 lrwxrwxrwx   1 schkn    schkn           7 Aug 14 20:14 ./shortcut-folder -> folder/

However, if you want to limit searches to the current directory, you have to use the maxdepth parameter.

$ find . -maxdepth 1 -type l -ls 
262558      0 lrwxrwxrwx   1 schkn    schkn           7 Aug 14 20:14 ./shortcut-folder -> folder/
258539      0 lrwxrwxrwx   1 schkn    schkn           3 Jan 26  2019 ./soft-job -> job

Finding links that point to a specific file

With the lname option, you have the opportunity to target links pointing to a specific filename.

$ ls -l
drwxrwxr-x  2 schkn schkn   4096 Aug 14 20:13 folder
lrwxrwxrwx  1 schkn schkn      7 Aug 14 20:38 devconnected -> folder/

$ find . -lname "fold*"
./devconnected

Finding broken links

With the L flag, you can find broken (or daggling) symbolic links on your system.

$ find -L . -type l -ls
258539      0 lrwxrwxrwx   1 schkn    schkn           3 Jan 26  2019 ./broken-link -> file

Quick facts about links on Linux

Before finishing this tutorial, there are some quick facts that you need to know about soft and hard links.

  • Soft links can point to different filesystems, and to remote filesystems. If you were to use NFS, which stands for Network File System, you would be able to create a symbolic link from one filesystem to a file system accessed by the network. As Linux abstracts different filesystems by using a virtual filesystem, it makes no difference for the kernel to link to a file located on an ext2, ext3, or an ext4 filesystem.
  • Hard links cannot be created for directories and they are constrained to the limits of your current filesystem. Creating hard links for directories could create access loops, where you would try to access a directory that points to itself. If you need more explanations about why it can’t be done conceptually, here’s a very good post by Volker Siegel on the subject.

I hope that you learned something new today. If you are looking for more Linux system administration tutorials, make sure to check our dedicated section.

Here is the list of our recent tutorials:

Cron Jobs and Crontab on Linux Explained

Cron Jobs and Crontab on Linux Explained | What is Cron Job & Crontab in Linux with Syntax?

This Cron Jobs and Crontab on Linux Explained Tutorial helps you understand cron on Linux along with the role of the crontab file. System administrators are likely to spend a lot of time performing recurring tasks on their systems.

But the best way to automate tasks on Linux systems is the cron jobs. It was initially found in 1975 by AT&T Bell Laboratories.

Not only cron jobs and crontab command on Linux but also you are going to explain about Linux cron daemon. Rather than these concepts also keep focusing on the difference between user-defined cron jobs and system-defined cron jobs.

Are you ready for learnings?

What is ‘crontab’ in Linux?

The crontab is a list of commands that you require to run on a daily schedule, and also the name of the command used to manage that list. Crontab stands for “cron table,” because it uses the job scheduler cron to execute tasks.

cron itself is termed after “Chronos, ” the Greek word for time.cron is the system process that will automatically execute tasks for you as per the set schedule. The schedule is called the crontab, which is also the name of the program used to edit that schedule.

Linux Crontab Format

MIN HOUR DOM MON DOW CMD

Linux Crontab Syntax

Field    Description    Allowed Value
MIN      Minute field    0 to 59
HOUR     Hour field      0 to 23
DOM      Day of Month    1-31
MON      Month field     1-12
DOW      Day Of Week     0-6
CMD      Command         Any command to be executed.

Important Crontab Examples

The following are some of the necessary examples of Crontab. Kindly have a look at them:

Description Command
Cron command to do the various scheduling jobs. The below-given command executes at 7 AM and 5 PM daily.
0 7,17 * * * /scripts/script.sh
Command to execute a cron after every 5 minutes.
*/5* * * * *  /scripts/script.sh
Cron scheduler command helps you to execute the task every Monday at 5 AM. This command is helpful for doing weekly tasks like system clean-up.
0 5 * * mon  /scripts/script.sh
Command run your script at 3 minutes intervals.
*/3 * * * * /scripts/monitor.sh

Linux Crontab Command

The crontabcommand permits you to install, view, or open a crontab file for editing:

  • crontab -e: Edit crontab file, or create one if it doesn’t already exist.
  • crontab -l: Display crontab file contents.
  • crontab -r: Remove your current crontab file.
  • crontab -i: Remove your current crontab file with a prompt before removal.
  • crontab -u <username>: Edit other user crontab files. This option needs system administrator privileges.

What is Cron and Cron Jobs in Linux?

Cron is a system daemon run on any Linux system that is responsible for detecting cron jobs and executing them at given intervals.

Cron runs every minute and it will inspect a set of pre-defined directories on your filesystem to see if jobs need to be run.

On the other hand, cron jobs are tasks defined to run at given intervals or periods, usually shell scripts or simple bash commands.

Cron jobs are usually used in order to log certain events to your Syslog utilities, or to schedule backup operations on your host (like database backups or filesystem backups).

For a Linux OS running systemd as a service manager, you can inspect the cron service by running the following command

$ sudo systemctl status cron.service

Note: You need sudo privileges to inspect system services with systemd

What is the Cron Job Syntax?

The most important to know about cron is probably the cron job syntax.

In order to define a cron job, you are going to define:

  • Periodicity: meaning when your job is going to be executed over time. You can define it to run every first day of the month, every 5 minutes, or on a very specific day of the year. Examples will be given later on in the article;
  • Command: literally the command to be executed by the cron utility, it can be a backup command or whatever command that you would normally run in a shell;
  • User: this is reserved for system-defined cron jobs where you want to specify the user that should the cron command. For user-defined cron jobs, you don’t have to specify a user, and your system will run them as root by default.

cron-syntax

As you probably noticed, the periodicity column is made of 5 columns.

Every single column can either be set to *, meaning that the command will be executed for every single value of the interval specified or to a particular value, for example, the 6th month of the year.

If you want to execute a command for every minute, of every hour, of every day of the month, of every month, you need to write the following command

* * * * *  logger "This is a command executed every minute"

If you want to execute a command every 30 minutes, you would write

*/30 * * * * logger "This is executed every 30 minutes"

On the other hand, if you want to execute a command on the first day of the month at midnight, you would write

0 0 1 * * logger "This is executed on the first day of the month, at midnight"

When defining those cron jobs, I didn’t have to specify the user executing them.

This is because there is a difference between user-defined cron jobs and system-defined cron jobs.

User-Defined Cron Jobs

User-defined cron jobs are cron jobs defined by a given user on the host. It doesn’t mean that it is not able to execute commands affecting the entire system, but its tasks are isolated on given folders on the host.

Every user is able to have its own set of cron jobs on a Linux host.

Listing user-defined cron jobs

When connected to a specific user, run this command to see the cron jobs owned by the user

$ crontab -l

If you own cron jobs, they will immediately be displayed to the standard output.

By default, user-defined cron jobs are stored in the /var/spool/cron/crontabs directory but you will need to be root to explore it.

user-defined-cron

Adding user-defined cron jobs

In order to edit the cron jobs related to the user you are connected to, run the following command

$ crontab -e

By default, your host will open your default editor and you will be able to able your cron jobs on the system.

Add a new line to the end of the file with the following line for example

* * * * * logger "This is a log command from junosnotes"

Logger is a command that allows users to write custom messages to logs. If you need a complete guide on logging and Syslog, we have a complete write-up on it.

You don’t have to specify a user as the system is already aware of the user defining this command.

Moreover, the command will be executed as the current user by default.

You don’t have to restart any services, your job will be taken into account on the next occurrence.

Given the example, we specified earlier, inspect your logs to see your cron job executed

$ sudo journalctl -xfn

cron-job-user

As you can see, the cron service inspected user-specific directories on the host (in /var/spool/cron/crontabs), it opened a session as my current user, executed the command, and closed the session.

Awesome!

You learned how you can define user-defined cron jobs on your host.

Removing user defined cron jobs

In order to remove user-defined cron jobs, use the following command

$ crontab -r
(or)
$ crontab -ri

Crontab will be deleted for your current user (it won’t delete system-defined cron jobs).

Run a cron job listing to check that all cron jobs have been deleted

System Defined Cron Jobs

System-defined cron jobs are jobs defined in shared directories on the filesystem.

It means that, given that you have sudo privileges on the host, you will be able to define cron jobs that may be modified by other administrators on your system.

Directories related to system defined cron jobs are located in the etc directory and can be seen by running

$ ls -l | grep cron

As you can see, this folder contains a lot of different folders and files :

  • anacrontab: a file used by the anacron service on Linux, which will be explained in one of the next sections.
  • cron.d: a directory containing a list of cron jobs to be read by the cron service. The files in cron.d are written given the cron syntax we saw before;
  • cron.daily: a directory containing a list of scripts to be executed by the system every day. Files are different from the files contained in the cron.d directory because they are actual bash scripts and not cron jobs written with cron syntax;
  • cron.hourly, cron.monthly, cron.weekly are self-explanatory, they contain scripts executed every hour, every month, and every week of the year;
  • crontab: a cron file written with cron syntax that instructs the cron service to run jobs located in the daily, hourly, monthly, and weekly folders. It can also define custom jobs similarly to user-defined cron jobs, except that you have to specify the user that should run the command.

Listing system defined cron jobs

As you probably understood, cron jobs defined in global configuration folders are spread over multiple folders.

Moreover, multiple cron files can be defined on those folders.

However, using the command line, there are efficient ways to concatenate all the files in a given directory.

To list all cron jobs defined in cron.d, run the following command

$ cat /etc/cron.d/*

Similarly, to list cron jobs defined in the crontab file, run the following command

$ cat /etc/crontab

Similarly, you can inspect all the scripts that are going to be executed on a daily basis

ls -l /etc/cron.daily/

Adding system defined cron jobs

As you probably understood, there are multiple ways to add system-defined cron jobs.

You can create a cron file in the cron.d, and the file will be inspected every minute for changes.

You can also add your cron job directly to the crontab file. If you want to execute a task every minute or every hour, it is recommended to add your script directly to the corresponding cron directories.

The only difference with user-defined cron jobs is that you will have to specify a user that will run the cron command.

For example, create a new file in the cron.d directory and add the following content to it (you will obviously need sudo privileges for the commands to run)

$ sudo nano /etc/cron.d/custom-cron

*/1 * * * *    root    logger 'This is a cron from cron.d'

Again, no need for you to restart any services, the cron service will inspect your file on the next iteration.

To see your cron job in action, run the following command

$ sudo journalctl -xfn 100 | grep logger

This is what you should see on your screen

Great!

As you can see your job is now executed every minute by the root user on your host.

Now that you have a complete idea of what user-defined cron jobs and system-defined cron jobs are, let’s see the complete cron lifecycle on a Linux host.

Cron Complete Cycle on Linux

Without further ado, here is a complete cron cycle on Linux.

cron-cycle-2

This is what your cron service does every minute, as well as all the directories inspected.

Cron will inspect the user-defined cron jobs and execute them if needed.

It will also inspect the crontab file where several default cron jobs are defined by default.

Those default cron jobs are scripts that instruct your host to verify every minute, every hour, every day, and every week specific folders and to execute the scripts that are inside them.

Finally, the cron.d directory is inspected. The cron.d may contain custom cron files and it also contains a very important file which is the anacron cron file.

Anacron cron file on Linux

The anacron cron file is a file executed every half an hour between 7:00 am and 11 pm.

The anacron cron file is responsible for calling the anacron service.

The anacron service is a service that is responsible for running cron jobs in case your computer was not able to run them in the first place.

Suppose that your computer is off but you had a cron job responsible for running update scripts every week.

As a consequence, when turning your computer on, instead of waiting an entire week to run those update scripts, the anacron service will detect that you were not able to launch the update cron before.

Anacron will then proceed to run the cron job for your system to be updated.

By default, the anacron cron file is instructed to verify that the cron.daily, cron.weekly, cron.hourly, and cron.monthly directories were correctly called in the past.

If anacron detects that the cron jobs in the cron.monthly folders haven’t run, it will be in charge to run them.

Conclusion

Today, you learned how cron and crontab work on Linux. You also had a complete introduction on the cron syntax and how to define your own cron scripts as a user on your host.

Finally, you had a complete cron cycle overview of how things work on your host and of what anacron is.

If you are interested in Linux system administration, we have a complete section about it on our website. Check out some of our Linux Tutorials from below:

Until then, have fun, as always.

How To Create a Database on InfluxDB 1.7 & 2.0

How To Create a Database on InfluxDB 1.7 & 2.0

Developers who are seeking complete guide on creating a database on InfluxDB 1.7 & 2.0 can refer to this tutorial in a detailed way. In our previous tutorials, you have seen How To Install InfluxDB on Windows but now you can be familiar with database creation on both InfluxDB 1.7 & InfluxDB 2.0 versions.

Actually, InfluxDB is the famous time series databases available in the market founded on 2013 by InfluxData. It reserves millions of data points in structures known as databases.

In this tutorial, we will be explaining the different ways on How to create a database on InfluxDB 1.7 & 2.0.

influx-internalsThis tutorial includes both InfluxDB 1.7.x and InfluxDB 2.x versions because they are running at present.

up-to-date

Here is how to create a database on InfluxDB.

Creating an InfluxDB Database using the CLI

The first way and easiest way to create an InfluxDB database is through the InfluxDB CLI.

a – Launch the InfluxDB CLI

On InfluxDB 1.7.x, simply launch the influx binary.

$ influx
Connected to http://localhost:8086 version 1.7.7
InfluxDB shell version: 1.7.7

b – Verify that you have admin rights on the InfluxDB server

This step only applies if you have enabled the authentication on your InfluxDB server.

It means that you connected to the InfluxDB CLI by specifying your username and password.

To verify that you have admin rights on InfluxDB, issue the following command.

$ SHOW USERS
user    admin
----    -----
admin   true

If you are not an admin, ask your system administrator to grant you the permissions.

c – Create your InfluxDB database

The “CREATE DATABASE” command takes multiple arguments. Here is the syntax.

CREATE DATABASE <database_name> [WITH [DURATION <duration>] [REPLICATION <n>] [SHARD DURATION <duration>] [NAME <retention-policy-name>]]

The database name is a mandatory parameter, but all of the other parameters are optional.

By default, InfluxDB uses a default retention policy called autogen.

Autogen keeps data forever (infinite retention policy) and the default shard duration is 168h, or 7 days.

c – Create your InfluxDB database autogen

Knowing that here is a description of the different parameters used in the “CREATE DATABASE” command:

  • DURATION: sets the duration value of the “autogen” retention policy for the current database.
$ CREATE DATABASE "example" WITH DURATION 1h

duration-parameter

  • REPLICATION: In case you are using an InfluxDB cluster, your databases will probably be replicated among multiple different shards. The default is set to 1, but feel free to tweak this parameter if you are working with multiple different instances of InfluxDB.
  • SHARD DURATION: defines the minimum duration until your InfluxDB server starts collecting data is a new shard. It is quite important to correctly set up this parameter if you are working with your own custom retention policies.
  • NAME: the name of your database

shard-duration

Create an InfluxDB database using the InfluxDB API

Alternatively, there is another way to create an InfluxDB database which is by sending a HTTP request to the InfluxDB REST API.

a – Using cURL

If you don’t have cURL already, make sure to install it first.

$ sudo apt-get install curl
$ curl --help

Make sure that the HTTP API is enabled in the InfluxDB configuration file.

$ sudo vi /etc/influxdb/influxdb.conf

[http]
  # Determines whether HTTP endpoint is enabled.
  enabled = true
  
  # The bind address used by the HTTP service.
  bind-address = ":8086"

Restart your InfluxDB server is necessary, and create your database via the /query endpoint.

$ sudo systemctl restart influxdb
$ curl -XPOST 'http://localhost:8086/query' --data-urlencode 'q=CREATE DATABASE "devconnected"'

{"results":[{"statement_id":0}]}

If you are using authentication, you need to specify the user password combination.

$ curl --user admin:password -XPOST 'http://localhost:8086/query' --data-urlencode 'q=CREATE DATABASE "devconnected"'

{"results":[{"statement_id":0}]}

If you are using InfluxDB with HTTPS on self-signed certificates, you need the cURL -k option for unsafe checks.

$ curl --user admin:password -k -XPOST 'http://localhost:8086/query' --data-urlencode 'q=CREATE DATABASE "devconnected"'

{"results":[{"statement_id":0}]}

Verify that your database is correctly created via the InfluxDB CLI.

$ influx
Connected to http://localhost:8086 version 1.7.7
InfluxDB shell version: 1.7.7

> SHOW DATABASES
name: databases
name
----
_internal
devconnected
Great! You have successfully created a database on InfluxDB!

If you prefer to use Postman, here’s how to do it.

b – Using Postman

For this tutorial, let’s assume that you already have Postman installed on your computer.

First, unblock the “SSL Certificate Verification” option on Postman.

Head over to Settings > General, and uncheck the SSL verification option.

b – Using Postman ssl-verification

Create a POST request to the /query endpoint.

In the body panel, select the “x-www-form-urlencoded” option, and put the following values.

arguments-postman

In the Authorization panel, select a “Basic Auth” option, and fill the following fields with the correct credentials.

auth-postman

Click on “Send” and verify that you are getting the correct HTTP response.

results-postman

Check again on the InfluxDB server that the database was correctly created.

$ influx
Connected to http://localhost:8086 version 1.7.7
InfluxDB shell version: 1.7.7

> SHOW DATABASES
name: databases
name
----
_internal
devconnected
postman

Great! You have successfully created an InfluxDB database from Postman.

Create a Database using InfluxDB clients

In order to interact with the InfluxDB HTTP API, developers have created multiple clients in different languages: Java, Javascript, Go, .NET, Perl, and many others.

Using those clients is another way to create an InfluxDB database (if the developers exposed a method for it of course)

a – Creating a database in Java

As an example, the influxdb-java library allows you to create an InfluxDB database very easily.

In your Java project, import the influxdb-java package into your pom file.

<dependency>
    <groupId>org.influxdb</groupId>
    <artifactId>influxdb-java</artifactId>
    <version>2.15</version>
</dependency>

Next, connect to your InfluxDB instance, and create a database.

InfluxDB influxDB = InfluxDBFactory.connect("http://localhost:8086", "admin", "password");

influxDB.createDatabase("java-database");
influxDB.createRetentionPolicy(
  "one-year", "java-database", "365d", 1, true);

Again, make sure that your database was created successfully using the InfluxDB CLI.

$ influx
Connected to http://localhost:8086 version 1.7.7
InfluxDB shell version: 1.7.7

> SHOW DATABASES
name: databases
name
----
_internal
java-database
Awesome, you created an InfluxDB database using a Java client library.

b – Create a database in Javascript / NodeJS

As a second example, let’s see how you can create an InfluxDB database using Javascript and the Node runtime.

For this, we are going to use the node-influx library available on Github (developed by Ben Evans and Connor Peet)

First, install the node module in your project.

$ npm install --save influx

Database creation is done by using the createDatabase method available in the API.

const Influx = require('influx');
const influx = new Influx.InfluxDB({
  host: 'localhost',
  port: 8086,
  username: 'admin',
  password: 'password'
})

// Create an InfluxDB database
influx.createDatabase('node-database')

Did you know? This is the library that I used to design Stream Highlights, a real-time highlights detection platform for Twitch.

Finally, make sure that your database was successfully created.

$ influx
Connected to http://localhost:8086 version 1.7.7
InfluxDB shell version: 1.7.7

> SHOW DATABASES
name: databases
name
----
_internal
node-database

Create a database with the InfluxDB 2.0 CLI

At the beginning of the year, InfluxDB 2.0 was announced in alpha and the product is now actively developed.

Instead of having four different tools, also known as the TICK (Telegraf, InfluxDB, Chronograf, Kapacitor) stack, InfluxDB 2.0 will be one single platform for you to perform all your tasks.

In InfluxDB 2.0, databases no longer exist, they are replaced by buckets.

Conceptually, buckets are pretty much like databases, but we will need different commands to create them.

a – Get a secure token

If you try to execute a command with the Influx CLI without being authorized, you will get the following message.

a – Get a secure token unauthorized

On InfluxDB 2.0, you have to specify a token when performing a request.

Head over to your InfluxDB 2.0 platform located at http://localhost:9999 by default.

Click on “Settings

settings-influx-2

Then click on the “Tokens” option.

tokens-1

If a token already exists, simply click on it, and copy the token shown in the popup window.

a – Get a secure token token

Make sure that your token has at least the “read” permission for the “orgs” section, and the “write” for the “buckets” section.

a – Get a secure token rights-influxdb-2

If your token doesn’t exist already, you can generate one by clicking on the “Generate” option located at the top-right corner of the window.

generate-token

Click on “All Access Token”, give a name to your token, and you are ready to go!

create-token

b – Get your organization ID

In order to create a bucket, you will need your organization ID.

To find your organization ID, execute the following command.

$ influx org find -t yoursecrettoken
ID                     Name
044dc0bcf1860000       devconnected

c – Create your bucket

Now that you have your organization ID, you can create your bucket.

Here’s the command :

$ influx bucket create -n bucketname --org-id 044dc0bcf1860000 -r 10h -t yoursecrettoken

In this command, multiple flags are specified:

  • -n: the name of the bucket
  • –org-id: the organization ID (that you previously grabbed)
  • -r: the bucket retention time in nanoseconds
  • -t: the secret token

c – Create your bucket bucket-created

Make sure that your bucket was correctly created with the following command.

$ influx bucket find -t yoursecrettoken

Create a database using the InfluxDB 2.0 UI

If you prefer clicking buttons to running commands in a terminal, this method is for you.

Click on “Settings” > “Bucket”

V – Create a database using the InfluxDB 2.0 UI

Click on the “Create bucket” option at the top-right corner of the window.

create-bucket-2

Give a name to your bucket, and define a retention policy for it. I chose 10 hours in the previous example.

Simply click on “Create” to end the creation process.

Awesome, your bucket has been created!

2-buckets

Conclusion

In this tutorial, we have discussed various ways to create an InfluxDB database or bucket based on the version that you are using.

If you want more details about InfluxDB, make sure to read the definitive guide to InfluxDB.

Concepts detailed are for InfluxDB 1.7.x, but most of them still apply if you are using InfluxDB 2.0.

If you need more practical tutorials, here’s how you can monitor SSH hackers on a Linux server using InfluxDB.

Until then, have fun, as always.

How To Remove Files From Git Commit

How to Remove Files from Git Commit | Git Remove File from Commit Stage

In some working situations, developers add files or stages for commit on git repo. For better performance, you will need to remove files from Git commit to do more changes.

Git runs with three main spaces, they are the workspace (where you edit your files), the index (where you stage your files for commits), and the repository.

Do Check: GIT Commands

Let’s check this short & ultimate tutorial, to understand and learn how effectively & easily you can remove files from your Git commits, without losing your modifications.

Remove Files From Git Commit or Staging Area

In order to remove some files from a Git commit, use the “git reset” command with the “–soft” option and specify the commit before HEAD.

$ git reset --soft HEAD~1

When running this command, you will be presented with the files from the most recent commit (HEAD) and you will be able to commit them.

Now that your files are in the staging area, you can remove them (or unstage them) using the “git reset” command again.

$ git reset HEAD <file>

Note: This time, you are resetting from HEAD as you simply want to exclude files from your staging area

If you are simply not interested in this file anymore, you can use the “git rm” command in order to delete the file from the index (also called the staging area).

$ git rm --cached <file>

When you are done with the modifications, you can simply commit your changes again with the “–amend” option.

$ git commit --amend

To verify that the files were correctly removed from the repository, you can run the “git ls-files” command and check that the file does not appear in the file (if it was a new one of course)

$ git ls-files

<file1>
<file2>

Remove Single File from Committed Area

Removing file from the committed area needs 3 commands to be run, they are as follows-

git reset --soft HEAD^1

This command will undo the latest commit. Once you do git status, you will see files in the staging area. Now, we can easily remove it from the staging area, as mentioned in the previous point.

git rm --cached <file-name>

By performing the above command, the file will seem in the untracked file section. Now, we removed the single file, also you can commit back those remaining files by running the below command. So, let’s do it:

git commit -m "<your-message>"

Do Check: How To Delete File on Git

Remove File From Commit using Git Restore

Since Git 2.23, there is a new way to remove files from commit, but you will have to make sure that you are using a Git version greater or equal than 2.23.

$ git --version

git version 2.24.1

Note: Git 2.23 was released in August 2019 and you may not have this version already available on your computer. To install newer versions of Git, you can check this tutorial.

To remove files from commits, use the “git restore” command, specify the source using the “–source” option, and the file to be removed from the repository.

For example, in order to remove the file named “myfile” from the HEAD, you would write the following command

$ git restore --source=HEAD^ --staged  -- <file>

As an example, let’s pretend that you edited a file in your most recent commit on your “master” branch.

The file is correctly committed but you want to remove it from your Git repository.

To remove your file from the Git repository, you want first to restore it.

$ git restore --source=HEAD^ --staged  -- newfile

$ git status

On branch master
Your branch is ahead of 'origin/master' by 1 commit.
  (use "git push" to publish your local commits)

Changes to be committed:
  (use "git restore --staged <file>..." to unstage)
        modified:   newfile

Changes not staged for commit:
  (use "git add <file>..." to update what will be committed)
  (use "git restore <file>..." to discard changes in working directory)
        modified:   newfile

As you can see, your file is back in the staging area.

From there, you have two choices, you can choose to edit your file in order to re-commit it again, or to simply delete it from your Git repository.

Remove File from Git Repository

In this section, we are going to describe the steps in order to remove the file from your Git repository.

First, you need to unstage your file as you won’t be able to remove it if it is staged.

To unstage a file, use the “git reset” command and specify the HEAD as the source.

$ git reset HEAD newfile

When your file is correctly unstaged, use the “git rm” command with the “–cached” option in order to remove this file from the Git index (this won’t delete the file on disk)

$ git rm --cached newfile

rm 'newfile'

Now if you check the repository status, you will be able to see that Git staged a deletion commit.

$ git status

On branch master
Your branch is ahead of 'origin/master' by 1 commit.
  (use "git push" to publish your local commits)

Changes to be committed:
  (use "git restore --staged <file>..." to unstage)
        deleted:    newfile

Now that your file is staged, simply use the “git commit” with the “–amend” option in order to amend the most recent commit from your repository.

$ git commit --amend

[master 90f8bb1] Commit from HEAD
 Date: Fri Dec 20 03:29:50 2019 -0500
 1 file changed, 2 deletions(-)
 delete mode 100644 newfile

As you can see, this won’t create a new commit but it will essentially modify the most recent commit in order to include your changes.

Remove Specific File from Git Commit

In some cases, you don’t want all the files to be staged again: you only one to modify one very specific file of your repository.

In order to remove a specific file from a Git commit, use the “git reset” command with the “–soft” option, specify the commit before HEAD and the file that you want to remove.

$ git reset HEAD^ -- <file>

When you are done with the modifications, your file will be back in the staging area.

First, you can choose to remove the file from the staging area by using the “git reset” command and specify that you want to reset from the HEAD.

$ git reset HEAD <file>

Note: It does not mean that you will lose the changes on this file, just that the file will be removed from the staging area.

If you want to completely remove the file from the index, you will have to use the “git rm” command with the “–cached” option.

$ git rm --cached <file>

In order to make sure that your file was correctly removed from the staging area, use the “git ls-files” command to list files that belong to the index.

$ git ls-files

When you are completely done with your modifications, you can amend the commit you removed the files from by using the “git commit” command with the “–amend” option.

$ git commit --amend

Conclusion

In this tutorial, you learned how you can easily remove files from commit using the “git reset” command. You also learned to remove files on newer versions of Git using the “git restore” command but you will have to make sure that you have the most recent Git version (>= 2.23).

How To Delete a GitHub Repository

How To Delete a GitHub Repository | Step-by-Step Tutorial on Deleting a Repository in GitHub

As a developer once you are done with the software development process, the application should be decommissioned. In such cases, developers may see themselves in a situation where they need to delete a GitHub repository. 

Deletion of a Github Repository is not an easy task as well as not a difficult task for developers if they follow the steps prevailing here. In this tutorial, we have explained how you can easily delete a repository in GitHub. Also, you can discover some more information like warnings about git repository deletion from the below modules.

Steps to Delete a GitHub Repository

Deleting GitHub repositories is pretty straightforward. The process is the same whether you are dealing with public or private repositories. To delete a GitHub repository, just follow the steps outlined here:

  1. Tap on your profile picture at the top right corner of the GitHub interface and hit on “Your repositories“.
  2. On your repository list, choose the GitHub repository that you want to remove.
  3. On the repository page, press the “Settings” icon in the menu.
  4. In the repository settings, scroll down until you see the “Danger zone“.
  5. In the “danger zone”, tap on “Delete this repository
  6. To confirm the GitHub repository deletion, you have to type the repository name. When you are done, just press “I understand the consequences, delete this repository“.
  7. Congratulations, you have successfully deleted your GitHub repository!

How to Delete a Repository in GitHub with Screenshots?

In case you had trouble following the steps described above, here are all the screenshots that will guide you in deleting your GitHub repository.

1. Click on your profile picture and select the “Your repositories” option.

Delete GitHub repository with screenshots repository

2. Given the list of repositories that you own, select the one that you want to delete.

Delete GitHub repository github-repository

3. When you have navigated to the repository main page, click on “Settings” in the repository menu.

Delete GitHub repository settings

4. Now that you clicked on “Settings”, scroll down until you reach the “Danger zone” of your repository.

In this zone, you have the option to delete your GitHub repository, click on it to proceed.

How To Delete a GitHub Repository delete-repository

5. When clicking on “Delete this repository“, you will be asked to provide the repository name in a field in order to confirm that you want to delete this repository.

Type the repository name and click on “I understand the consequences, delete this repository“.

How To Delete a GitHub Repository delete-2

6. In some cases, you are asked to provide your user password in order to confirm the deletion.

Type your user password and click on “Continue”

How To Delete a GitHub Repository confirm

7. Back to the home page, an information message will appear to notify you that you have successfully deleted the Github repository.

How To Delete a GitHub Repository confirmation

Delete Local GitHub Repository

In some cases, you don’t want to delete a remote GitHub repository but you only want to delete the copy you got by cloning the remote repository.

In order to delete a local GitHub repository, use the “rm -rf” on the “.git” file located at the root of your Git repository.

$ rm -rf <repo_folder>/.git

By deleting the “.git” file, you will delete the Github repository but you won’t delete the files that are located in your project folder.

As a consequence, you will be able to initialize a new Git (or Github) repository using “git init”, add a remote using “git remote add” and start committing new files!

$ git init

$ git remote add origin git@github.com:<user>/<repository>.git

$ git push -u origin master

Careful, if you use the “git push” command without the “-u” option (for the upstream branch), you will be asked to provide the upstream branch.

Make sure to read our dedicated tutorial if you want to find more information about upstream branches.

Check More Articles on Git: 

Information About Deleting a Repository in GitHub

You can delete any repository, if you’re the owner of the organization or if you own admin permissions for that repository or fork. A few things to remember, though:

  • Deleting a fork does not have any effect on the upstream repository.
  • Deleting a private repository will delete all associated forks, but deleting a public repository will not have any effect on the forks.
  • Deleting a repository will remove all wikis, issues, and comments associated with the repository. Once deleted, there is no way to restore a repository. So, always keep in mind.

Conclusion

In this tutorial, you have discovered how you can easily delete Github repositories along with the detailed steps to get rid of your Github repository remotely, but also locally by using the “rm” command.

If you are interested in Git, GitHub, and software engineering, we have a complete section dedicated to it on the website like Git Commands, so make sure to check it out!