
Git is the world’s famous distributed software version control system that allows you to keep track of your software at the source level. It is used by many open-source and commercial projects. In this tutorial, we will be discussing completely how to install & get started with Git on Debian 10 Buster Linux along with the introduction of Git such as what is git, git terms, git commands, and also features of git.
- What is Git?
- What is Debian?
- Terms of Git
- Git Features
- How To Install Git On Linux 2021?
- Prerequisites
- How to Install Git from official sources?
- Steps for Installing Git From Source
- Configuring Git
- Uninstalling Git
What is Git?
Git is the most commonly used distributed version control system in the world created by Linus Torvalds in 2005. The popular option among open-source and other collaborative software projects is Git. Also, several project files are kept in a Git repository, and big companies like GitHub, Gitlab, or Bitbucket assist to promote software development project sharing and collaboration.
Mainly, the Git tool is utilized by development teams to keep track of all the changes happening on a codebase, as well as organizing code in individual branches. In today’s tutorial, we are working on how to set up Git on a Debian 10 Buster machine.
- How To Clone a Git Repository | Clone a Git Repository with Command Line & Sourcetree
- How To Git Commit With Message | Best Practices & Rules To Write Good Commit Messages in Git
- How To Set Upstream Branch on Git | What is a Git Upstream Branch? | Git Set Upstream Branch without Push
What is Debian?
Debian is an operating system for a wide range of devices including laptops, desktops, and servers. The developers of Debian will provide the security updates for all packages for almost of their lifetime. The current stable distribution of Debian is version 10, codenamed buster. Debian 10 is brand new, so if you require a complete setup tutorial for Debian 10, follow this tutorial.
Also Check:
- How To Install and Configure Debian 10 Buster with GNOME
- How To Install Logstash on Ubuntu 18.04 and Debian 9
Terms of Git
For a better understanding of Git, you must know a few of the common Git Terms. So, we have compiled here in detail:
- Repository: It is a directory on your local computer or a remote server where all your project files are kept and tracked by Git.
- Modified: If you add a file in the staging area, and modify the file again before committing, then the file will have a modified status. You will have to add the file to the staging area again for you to be able to commit it.
- Commit: It is keeping a snapshot of the files that are in the staging area. A commit has information such as a title, description, author name, email, hash, etc.
- Staged: Before you commit your changes to the Git repository, you must add the files to the staging area. The files in the staging area are called staged files.
- Tracked: If you want Git to track a file, then you have to tell Git to track the file manually.
- Untracked: If you create a new file on your Git repository, then it is called an untracked file in Git. Unless you tell git to track it, Git won’t track a file.
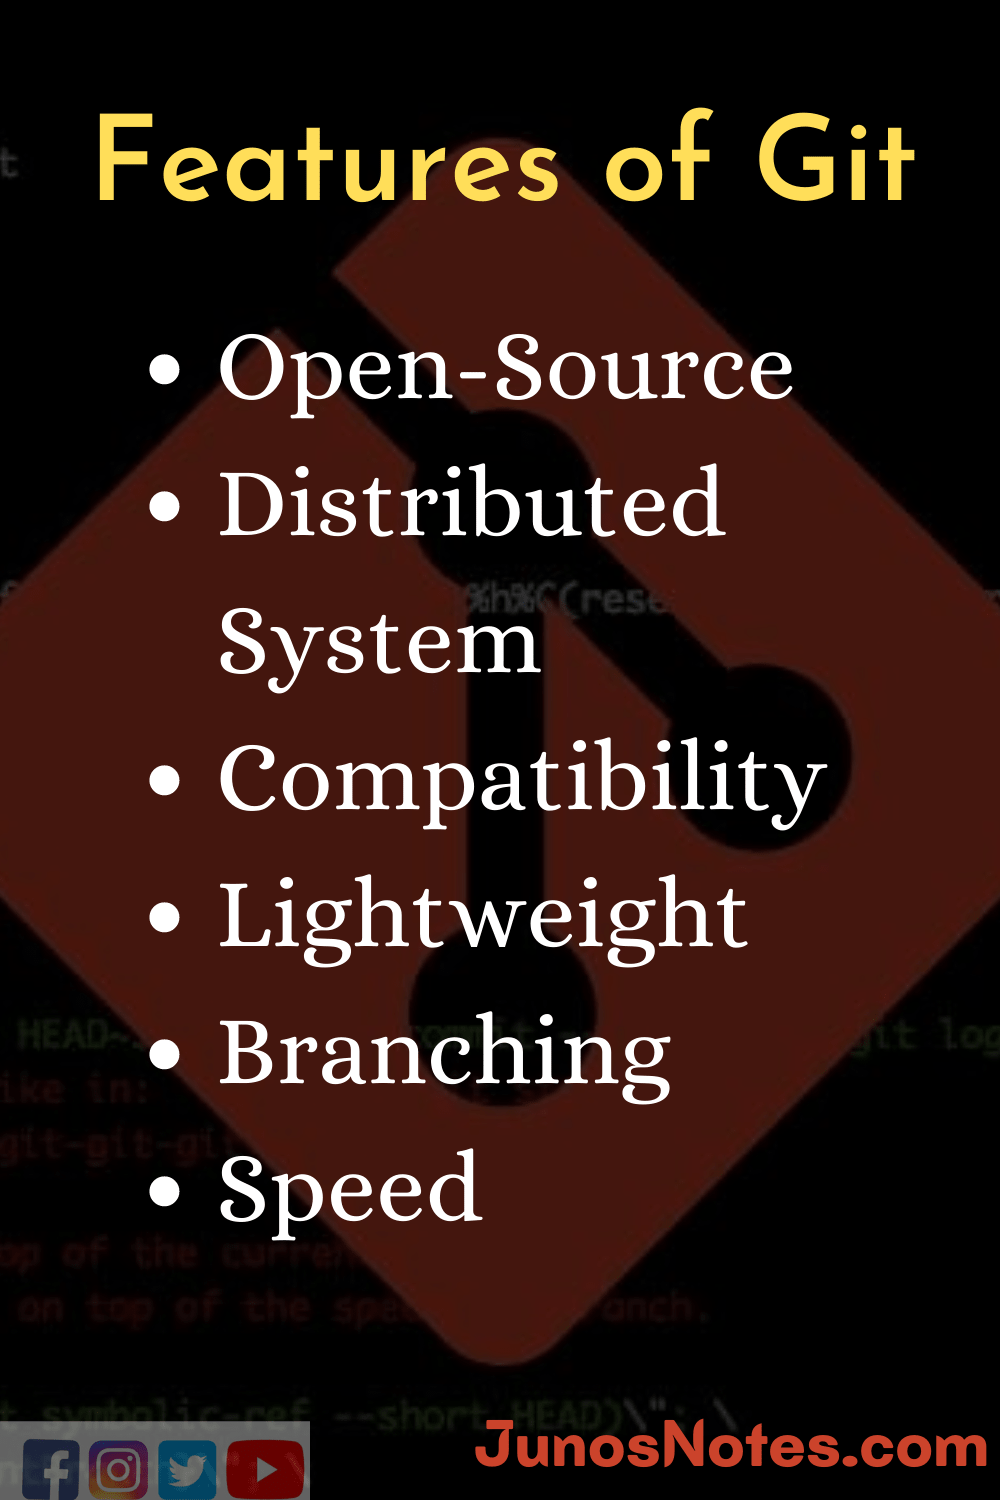
Git Features
Before learning the installation of Git, knowing completely about the tool is very essential. So, here we have provided features of Git in an image format for quick reference and easy sharing to others. Look at the below shareable image and download it on your devices for usage:
How To Install Git On Linux 2021?
Prerequisites
Before starting, make sure that you have root privileges on your instance.
To make sure of it, run the following command.
$ sudo -l

How to Install Git from official sources?
By following the below sub-modules, you can easily understand the installation of Git from official sources:
Update your apt repositories
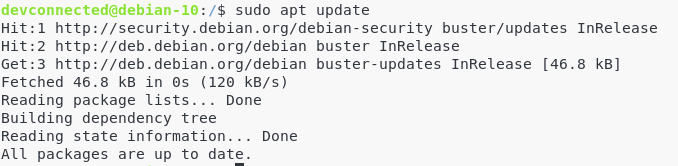
First of all, make sure that you have the latest versions of the repositories on your apt cache.
To update them, run the following command:
$ sudo apt update
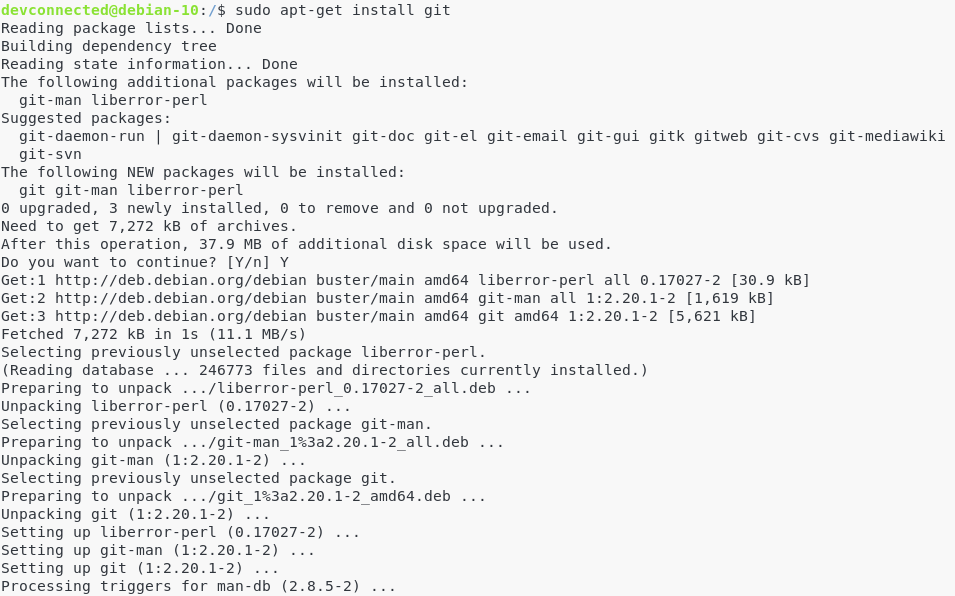
Install Git from the official repository
To install the latest stable version of Git (2.20.1 in my case), run the following command.
$ sudo apt-get install git
Great!
Now you can check the git version that is running on your computer.
<pre$ git –version 2.20.1
Steps for Installing Git From Source
As you probably noticed, you are not getting the latest version of Git with the apt repositories. As of August 2019, the latest Git version is 2.22.0. In order to install the latest Git version on your Debian 10 instance, follow those instructions.
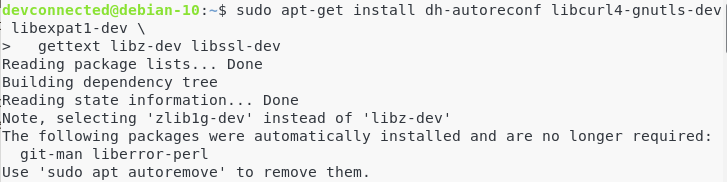
Install required dependencies
In order to build Git, you will have to install manually dependencies on your system. To do so, run the following command:
$ sudo apt-get install dh-autoreconf libcurl4-gnutls-dev libexpat1-dev \
  gettext libz-dev libssl-dev
Install documentation dependencies
In order to add documentation to Git (in different formats), you will need the following dependencies
$ sudo apt-get install asciidoc xmlto docbook2x

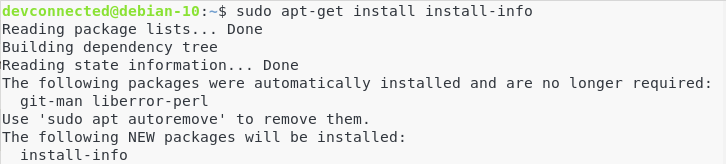
Install the install-info dependencies
On Debian configurations, you will need to add the install-info dependency to your system.
$ sudo apt-get install install-info
Download and build the latest Git version
Head to the Git repository on Github, and select the version you want to run on your Debian instance.

Head to the directory where you stored the tar.gz file, and run the following commands.
$ tar -zxf git-2.22.0.tar.gz
$ cd git-2.22.0
$ make configure
$ ./configure --prefix=/usr
$ make all doc info
$ sudo make install install-doc install-html install-info
Again, run the following command to make sure that Git is correctly installed on your system
$ git --version
![]()
Configuring Git
Now that Git is correctly set on your instance, it is time for you to configure it.
This information is used when you are committing to repositories, you want to make sure that you are appearing under the correct name and email address.
To configure Git, run the following commands:
$ git config --global user.name "devconnected"
$ git config --global user.email "devconnectedblog@gmail.com"
Now to make sure that your changes are made, run the following command.
$ git config --list

You can also look at your modifications in the gitconfig file available in your home directory.
To view it, run the following command.
$ cat ~/.gitconfig

Now that your Git instance is up and running, it is time for you to make your first contributions to the open-source world!
Here’s a very good link by Digital Ocean on a first introduction to the Open Source world!
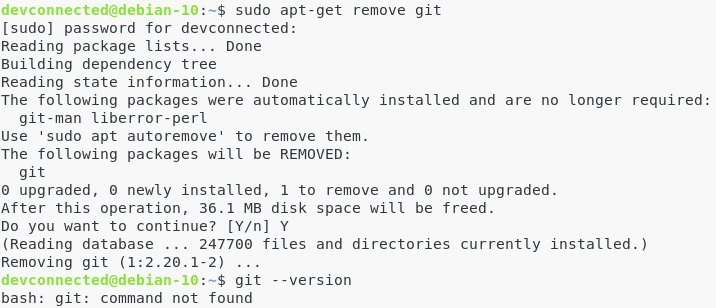
Uninstalling Git
If by any chance you are looking for removing Git from your Debian 10 Buster instance, run the following command:
$ sudo apt-get remove git
Until then, have fun, as always.