Patches are a substitute way to exchange code changes and exchanging code via patches is rare. Also, it is a valuable tool in specific circumstances. With creating a patch, you can basically export one or more commits into plain text files, that you can quickly share with someone else for integration.
Traditionally, Git Patch is linked to the Unix Patch command that was utilized in old Unix versions to store differences between files or binaries. In this ultimate tutorial, we are going to talk completely about how to create and apply git patch files and what are the commands used to make it happen. Also, check our Git Commands Tutorial to find all commands in one place.
- Create Git Patch Files using git format-patch
- Creating a Git patch with git diff
- Creating Git Patch Files in a Directory
- Create Git Patch for Specific Commit
- Apply Git Patch Files
- Using git am to Apply a Patch
- Git Patch Troubleshooting
- Git Apply Patch failed: file already exists in Index
- Git Apply Patch failed: error in file
Create Git Patch Files using git format-patch
To create a Git patch file, you have to use the “git format-patch” command, specify the branch and the target directory where you want your patches to be stored.
$ git format-patch <branch> <options>
So will the format-patch command do when executed?
The “git format-patch” command will check for commits that are in the branch specified but not in the current checked-out branch.
As a consequence, running a “git format-patch” command on your current checkout branch won’t output anything at all.
Also Read: How To Generate Git SSH Keys
Creating a Git patch with git diff
If you want to see commits differences between the target branch and the current checked-out branch, use the “git diff” command and specify the target and the destination branch.
$ git diff --oneline --graph <branch>..<current_branch>

* 391172d (HEAD -> <current_branch>) Commit 2
* 87c800f Commit 1
If you create patches for the destination branch, you will be provided with two separate patch files, one for the first commit and one for the second commit.
For example, let’s say that you have your “master” branch and a “feature” branch that is two commits ahead of your master branch.
When running the “git diff” command, you will be presented with the two commits added to your feature branch.
$ git diff --oneline --graph master..feature

* 391172d (HEAD -> feature) My feature commit 2
* 87c800f My feature commit 1
- How To Create Git Tags | Types of Tags in Git | Creating Git Tags with Examples
- How To Create a Git Branch | Learn Git Create New Branch from Current Branch
- How To Add and Update Git Submodules | Definition of Submodule
Now, let’s try creating patch files from commits coming from the master branch.
$ git format-patch master

0001-My-feature-commit-1.patch
0002-My-feature-commit-2.patch
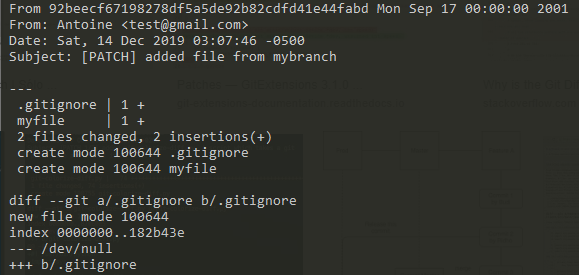
You successfully created two patch files using the “git format-patch” command.
Creating Git Patch Files in a Directory
As you probably noticed from the previous section, patch files were created directory in the directory where the command was run.
This might not be the best thing because the patch files will be seen as untracked files by Git.
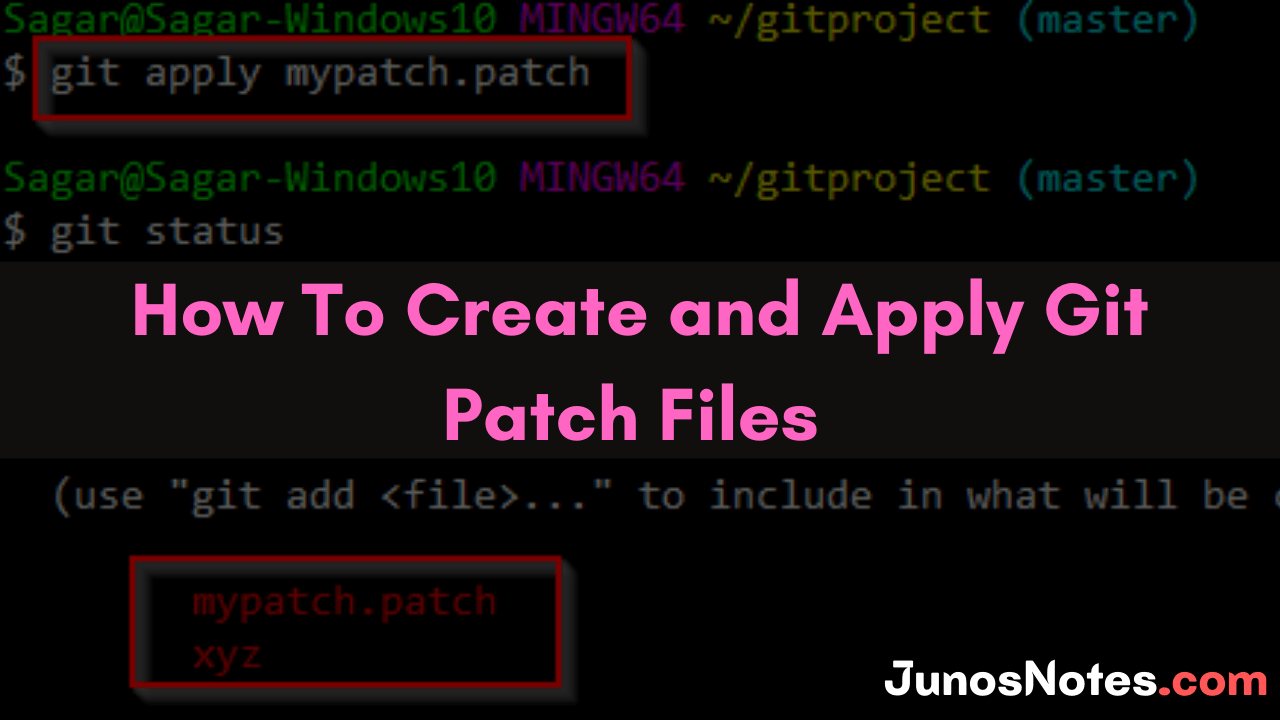
$ git status

Untracked files:
  (use "git add <file>..." to include in what will be committed)

        0001-My-feature-commit-1.patch
        0002-My-feature-commit-2.patch
In order to create Git patch files in a given directory, use the “git format-patch” command and provide the “-o” option and the target directory.
$ git format-patch <branch> -o <directory>
Back to our previous example, let’s create Git patch files in a directory named “patches”.
This would give us the following command
$ git format-patch master -o patches

patches/0001-My-feature-commit-1.patch
patches/0002-My-feature-commit-2.patch
In this case, we provided the “git format-patch” will a local directory but you can provide any directory on the filesystem out of your Git repository.
Create Git Patch for Specific Commit
In some cases, you are not interested in all the existing differences between the two branches.
You are interested in one or two commits maximum.
You could obviously cherry-pick your Git commits, but we are going to perform the same action using Git patches.
In order to create a Git patch file for a specific commit, use the “git format-patch” command with the “-1” option and the commit SHA.
$ git format-patch -1 <commit_sha>
In order to get the commit SHA, you have to use the “git log” command and look for the corresponding commit SHA.
For example, given the example we just used, let’s inspect the differences between master and feature using the “git log” command.
$ git log master..feature

commit 391172da58dbfa27bc995eda538012ae1fbc5383 (HEAD -> feature)
Author: Bob <test@gmail.com>
Date:   Wed Dec 11 16:24:46 2019 -0500

    My feature commit 2

commit 87c800f87c09c395237afdb45c98c20259c20152
Author: Bob <test@gmail.com>
Date:   Wed Dec 11 16:03:15 2019 -0500

    My feature commit 1
In this case, we are not interested in the second commit (with SHA 391172..) but in the first commit (with SHA 87c800..)
Copy the commit SHA and run the “git format-patch” command again.
You can optionally provide the output directory similarly to the example we provided in the previous section.
$ git format-patch -1 87c800f87c09c395237afdb45c98c20259c20152 -o patches

patches/0001-My-feature-commit-1.patch
Awesome! You successfully created a Git patch file for one single commit on your repository.
Apply Git Patch Files
Now that you have created a patch file from your branch, it is time for you to apply your patch file.
Using git am to Apply a Patch
In order to apply a Git patch file, use the “git am” command and specify the Git patch file to be used.
$ git am <patch_file>
Referring to our previous example, make sure to check out the branch where you want your patch file to be applied.
$ git checkout feature

Switched to branch 'feature'
Your branch is up to date with 'origin/feature'.
Now that you are on your branch, apply your Git patch file with the “git am” command.
$ git am patches/0001-My-feature-commit-1.patch

Applying: My feature commit 1
Now, taking a look at your Git log history, you should see a brand new commit created for your patch operation.
$ git log --oneline --graph

* b1c4c91 (HEAD -> feature) My feature commit 1
When applying a Git patch, Git creates a new commit and starts recording changes from this new commit.
Awesome! You have successfully applied your Git patch file using “git am”.
Git Patch Troubleshooting
In some cases, you might run into errors when trying to apply Git patch files.
Let’s say for example that you have checked out a new branch on your Git repository and tried to apply a Git patch file to this branch.
When applying the Git patch, you are running into those errors.
Git Apply Patch failed: file already exists in Index
This case is easy to solve. You tried to apply a Git patch file that contained file creations (say you created two new files in this patch) but the files are already added into your new branch.
In order to see files already stored in your index, use the “git ls-files” command with the “–stage” option.
$ git ls-files --stage <directory>

100644 eaa5fa8755fc20f08d0b3da347a5d1868404e462 0       file.txt
100644 61780798228d17af2d34fce4cfbdf35556832472 0       file2.txt
If your patch was trying to add the “file” and “file2” files into your index, then it will result in the “file already exists in index” error.
To solve this issue, you can simply ignore the error and skip the patch operation.
To skip a Git patch apply operation and ignore conflicts, use “git am” with the “–skip” option.
$ git am --skip
Git Apply Patch failed: error in file
In some cases, you might run into some “merging” errors that may happen when applying a patch.
This is exactly the same error as when trying to merge one branch with another, Git will essentially fail to automatically merge the two branches.
To solve Git apply merging errors, identify the files that are causing problems, edit them, and run the “git am” command with the “–continue” option.
$ git am --continue
Conclusion
In this tutorial, you learned how you can create Git patch files using the “git format-patch” command. Also, you have understood that it is possible to create Git patch files for single commits and to apply them to the target branch easily using the “git am” command.