As a system administrator, knowing how to install, update or delete Linux packages is crucial in order to maintain your Linux hosts and servers.
You may have to update your current packages in order to get the latest security patches for your servers.
On the other hand, you may have to setup an entire HTTP Web Server in order to deploy a brand new website your application team developed.
Sometimes, you might just want to test new software in order to see if it fits your needs, just to uninstall the packages later on.
As a consequence, knowing how to manage Linux packages is crucial.
In this tutorial, we are going to focus on Linux package management using the APT package manager.
First, we are going to go through a bit of history on the origins of Open Source Software in order to grasp the fundamentals of Linux packages.
Later on, we will be focusing a bit more on APT (Advanced Package Tool) and we are to see how you can compile your own programs in order to have custom installations.
Ready?
What You Will Learn
By reading this tutorial, you are going to learn about the following subjects:
- The GNU/Linux project and the origins of free software;
- How program installation is designed on Linux and how it differs from Windows hosts;
- What software repositories are and what are the different repository types that you may encounter;
- APT cache complete guide : how to update your cache and how to look for programs on your system;
- APT get detailed commands : how to install and remove Linux packages properly;
That’s a long program, so without further ado, let’s jump right into it.
GNU/Linux Origins explained
Before detailing how you can install and uninstall packages on Linux, it is quite important to have some basics about what GNU and Linux are.
When discussing about Linux, it is quite common to refer to Linux as an operating system but it is not entirely true.
When we refer to Linux operating systems, we actually refer to GNU/Linux operating systems.
- How To Install Docker on Ubuntu 18.04 & Debian 10
- Network File System (NFS) Administration on Linux
- Monitoring Linux Logs with Kibana and Rsyslog | Using Kibana and Rsyslog to monitor Linux logs
What is GNU?
GNU (short for “GNU Not Unix“) is an operating system designed to provide free software that is easy to acquire, distribute and modify by yourself.
Today, it is quite popular to think of Unix (or at least GNU) as a free operating system but it has not always been the case.
For example, if you were to run the “uname” command on your system, with the “-o” option (for operating system), you would see that you are most probably running a GNU/Linux OS.
$ uname -o
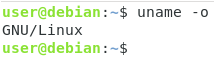
Interesting!
Back in the early days of Unix, the Unix operating system was not free open source software at all : it was developed by companies such as IBM, HP or AT&T for business needs.
However, given the rise of copyrighted software and licensed distributions, Richard Stallman, researcher at the MIT, decided to develop an UNIX alternative : GNU.
GNU was designed to be an open source operating system that is backwards compatible with Unix operating systems.
On a GNU operating system, commands (such as “ls”, “cat” or “gcc”) are completely open source.
Moreover, GNU is defined as “free software”, but are we talking about money?
Free Software Explained
As we explained before, GNU is self-proclaimed to be free software.
But the “free” software does not literally refers to money, it refers to fundamental freedoms that are core to GNU :
- Freedom to run programs as you wish, for whatever purpose you are trying to achieve;
- Freedom to modify the program, preconditioning a complete access to the program source code;
- Freedom to redistribute copies in order to help your neighbours;
- Sharing your modifications to the world : this way you are not limited to your own changes, but you can help thousands of developers around the world.
Those fundamental freedoms are tied to the concept of copyleft.
You can have specific rules added to this set of fundamental rules as long as they don’t interfere with the core rules themselves.
It would be for example illegal to take open source code, modify it and sell it without providing end users with the source code.
This is an important statement because it means that it is not forbidden to sell code per-se, it is illegal to prevent end-users from fundamental rights.
As a consequence, GNU not only defines those fundamental freedom rules but it also guarantees that those rights are spread on all subsequent versions of the software.
In this context and in order to deal with copyrighted content, the GPL license (GNU General Public License) was created.
The GPL license helps aggregating the different inherent rules dedicated to free software and to define license breaches. A complete GPL FAQ can be found on this page.
Accessing GNU packages
As you probably already understood it, GNU packages are packages designed to be shared, modified and run wherever you want, for whatever purpose.
In this context, GNU packages can be accessed directly on the GNU website.
If you head over to the software page of the GNU official website, you would be able to see the entire list of GNU packages available to you.
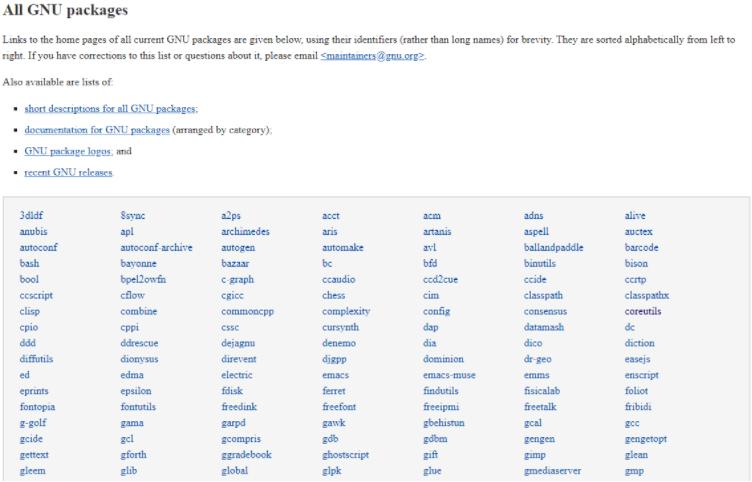
As you can see, this is quite a long list of packages.
One of the most popular package is the core-utils one, providing the most popular Linux commands such as “ls“, “cat” or “find“.
And those commands can be modified and run at will!
All those packages come whenever you installed a GNU/Linux operating system, but what if you wanted to install third-party software?
For that, Linux is designed to communicate with what we call software repositories.
What are Linux software repositories?
Before describing Linux software repositories, it is quite important to have some background about how the Linux packaging system is designed.
If you come from a Window environment, you are used to download executable files (.exe) from the Internet, open an installation wizard and click “Next” a couple of times in order to have your program installed.
On Linux, this is not the case.
On Linux, packages are downloaded and installed from online repositories by a package manager.
APT Package Manager on Linux
On Debian-based distributions, packages are downloaded via the APT package manager.
When we refer to packages, we are essentially dealing with archive files that contain multiple deb files that are used by the dpkg utility to install programs.
So why would we need APT?
APT, standing for Advanced Package Manage, is responsible for downloading, installing, updating and removing packages from your system.
But why should we need a package manager for that?

Couldn’t we install the programs by ourselves?
It would be hard because packages are tied together through package dependencies.
Concept of packages dependencies
Let’s take for example the VIM Editor on Linux.
If you are using a Debian distribution, the VIM page for Debian repositories is available here.
This is where you would be able to find information about this specific package : what functionalities it provides, who created it but most importantly what packages it depends on.
On Linux, most packages don’t come as “pure” packages : they depend on a wide variety of different packages in order to provide third-party features to the actual program.
As you can see by scrolling the page, the VIM package depends on a lot of other packages.
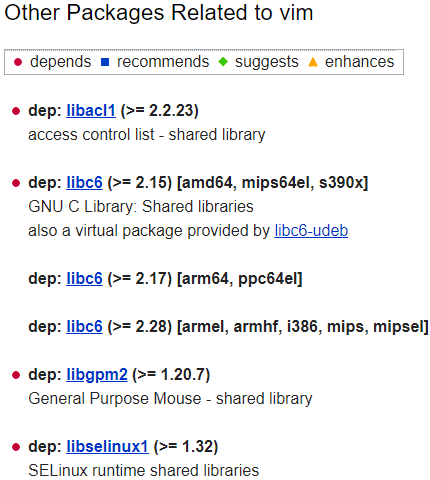
As you can see here, dependencies are split into four different categories :
- depends : as the name states, this dependency is needed in order for the program to run. Without it, the program cannot start at all;
- recommends : without this dependency, the program would be able to run but it would not provide all the features that this tool is designed to provide;
- suggests : without this dependency, the program would be able to run and provide core functionalities but it would not be the final version of the tool;
- enhances : this dependency can enhance the actual tool by improving performance or display but it is not needed at all.
Now you know why we use the APT tool : package dependencies are resolved for you at the installation time.
Now that you know more about packages, let’s have a look at what software repositories are.
Linux Software Distribution Architecture
On Linux, software is distributed through software repositories.
Software repositories are used in order to aggregate free software provided by the community.
Repositories may be tied to a specific distribution.
Ubuntu, Debian, CentOS or RHEL have their own repositories that are updated daily.
As a consequence, when you want to install a new program, you are querying those base repositories in order to retrieve packages from them.
If you wanted to install packages that are not located on distribution based repositories, you would add your own trusted repositories to your system in order to install new packages.
This is essentially why Linux is said to be safer than Windows when it comes to installing new programs.
Unless you are installing shady packages, you are most of time communicating with trusted repositories where hundreds of different developers review the code you are executing on your machine.
It does not prevent viruses or malwares from spreading but it would be unlikely because multiple independant reviewers have inspected the package code.
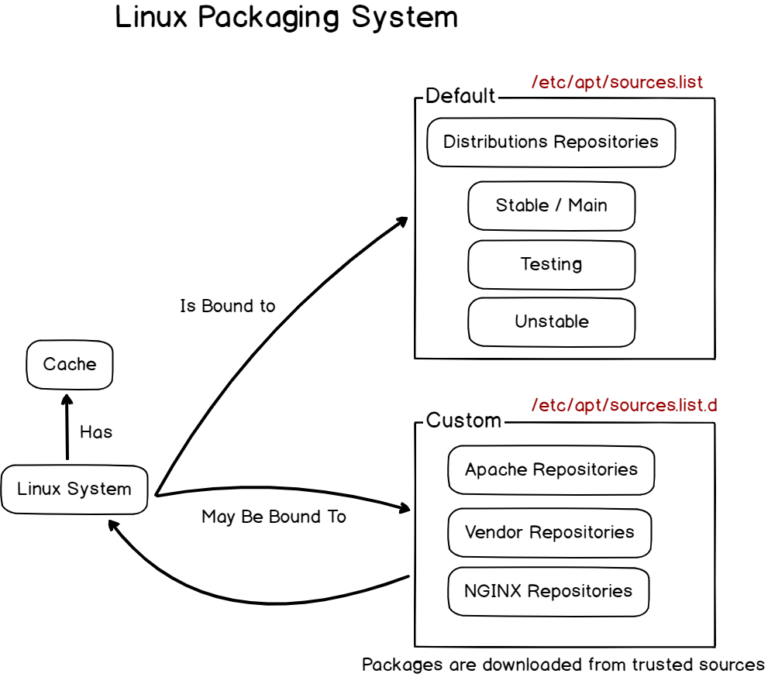
Note that repositories are split into different categories and you may have to take the correct repository to guarantee that you are running safe versions.
Such versions include “stable” repositories, “testing” repositories and “unstable repositories”.
Note : in other distributions, those repositories may have a different name (Ubuntu has multiverse, universe, main and so on)
By default, your distribution is most likely linked to the stable (also called “main”) repository via the sources.list configuration file.
$ cat /etc/apt/sources.list

Now that you know more about software repositories and how your package manager interacts with it, let’s see what your package manager cache is.
APT Cache Explained
As we discussed before, the APT package manager is responsible for downloading packages from the Internet (or local package repositories) in order to install them.
However, operations done by the APT package manager are not done online all the time.
APT manages an internal database called a cache.
The APT cache is used in order to provide offline information about current packages installed on your system. It essentially guarantees that you are able to access package information without having to be connected to Internet.
Searching packages in the cache
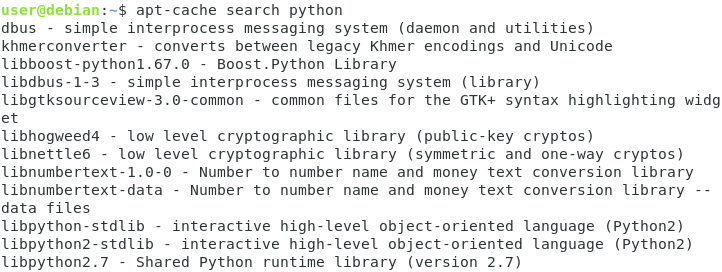
For example, you can search for all Python related packages that may be stored in your APT cache.
For that, you need to run the “apt-cache” command with the “search” option.
$ apt-cache search <search string>

$ apt-cache search python
Tip : you can pipe your cache search with “less” in order to see all the results provided.

apt-cache search python | less
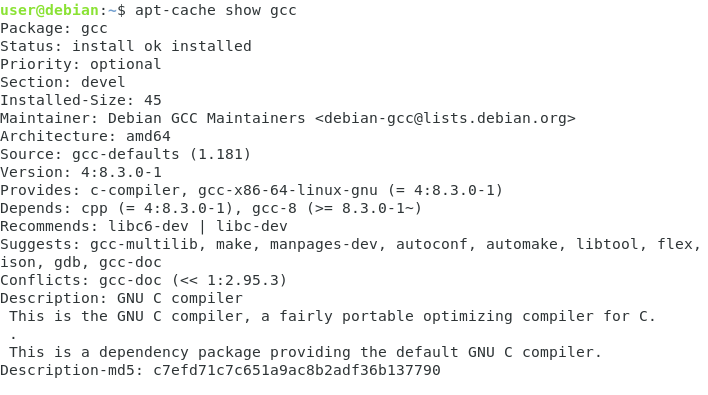
Besides searching for specific packages, the APT cache can also show complete details about a package.
Showing package information
In order to show package information, you have to execute the “apt-cache” command with the “show” option.
$ apt-cache show <package_name>
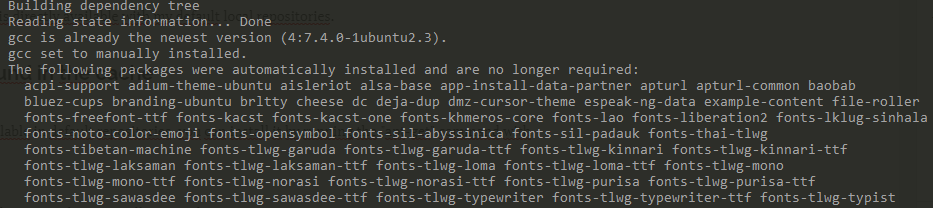
For example, in order to have more information about the gcc package (which is a GNU compiler), you would type
$ apt-cache show gcc
So if we don’t need an Internet connection to show some details, it means that they are stored somewhere on our instance.
Let’s say for example that I want to look for the cache documentation page for the nano command.
By default, package information is stored in “/var/lib/apt/lists“
$ ls /var/lib/apt/lists
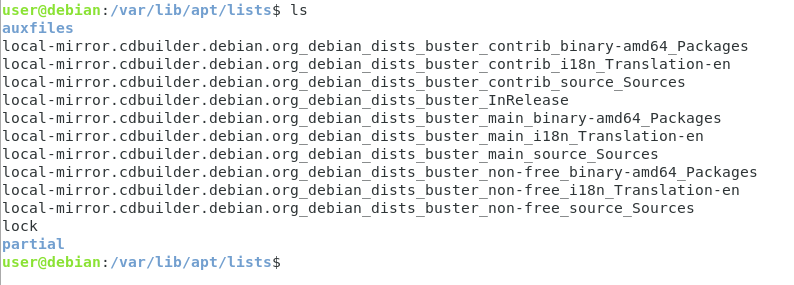
In this directory, you have access to a bunch of different files that store information about packages stored in your system.
To prove it, let’s look for the file providing information for the nano command.
$ sudo grep -r -A 3 -B 3 -E "Package: nano$" . | less
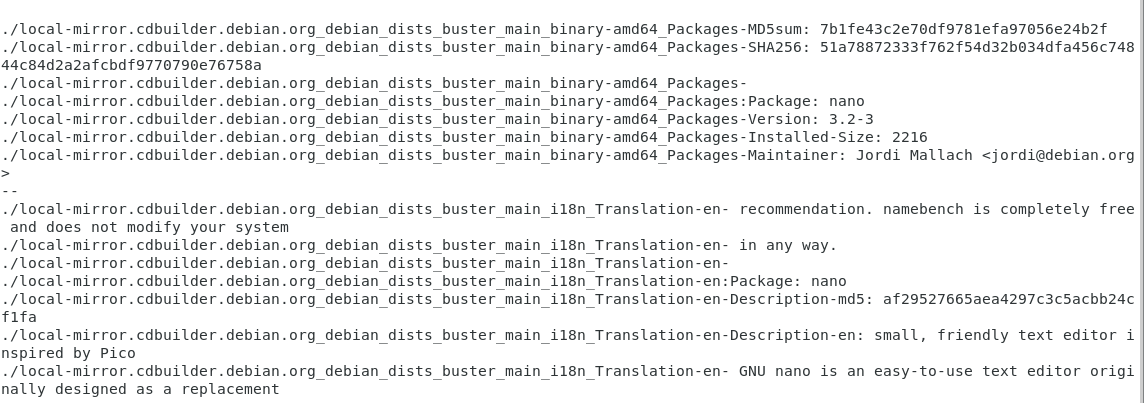
As you can see, many files contain a reference to the nano packagebut the one I am interested in is definitely contained in the “main amd64” file (as a reminder, “main” stands for stable and “amd64” to my processor architecture)
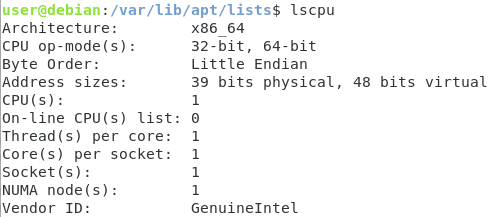
If you have any doubts about your CPU architecture, you run the “lscpu” command.
$ lscpu
Updating the APT cache
As you already probably understood, the APT cache works offline.
As a consequence, the APT cache has to be updated periodically in order to make sure that :
- You are pointing to the correct repositories;
- You are getting the latest updates for the software installed on your computer.
In order to fetch updates for your cache, you need to run the “apt-get update” command.
$ sudo apt-get update
Note : you have to be sudo in order to update your system cache.
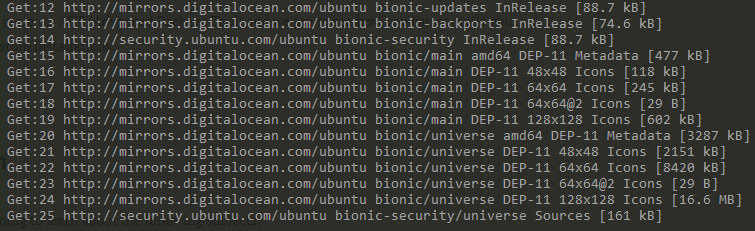
As you can see, the command executes a couple of GET calls to distant repositories in order to fetch new information.
When you update your repositories, it is important to note that no software was updated on your computer.
Running the “apt-get update” command only updates the cache in order to have latest information about software, it does not directly update your programs.
In order to update your programs, you need to execute the “upgrade” command.
Updating (upgrading) your local packages
In order to update your local programs, you need to run “apt-get” with the “upgrade” option.
$ sudo apt-get upgrade
At some point during the command, you will be asked if you want to install the updates.

Hit “Y” and press Enter.
When confirming, your programs will be upgraded to their latest stable version.

Nice!
You have successfully upgraded your packages using the upgrade command.
Updating your cache and upgrading your current packages is really nice, but what if you wanted to install new packages on your system?
In the next section, you are going to see how you can install new programs on your system using APT.
Installing new packages with APT
When installing new packages with APT, you essentially have two options :
- The package is already located in one of the repositories you are linked to;
- The package is in a distant repository and you need to add it.
In order to see if a package is already located into your APT cache, you have to search your cache.
In this example, we are going to pretend that we want to install the “gcc” package.
First, let’s see if GCC is already located into our APT cache.
$ apt-cache search --names-only ^gcc$

As you can see, the GCC package is directly available with my default local repositories.
Installing software found in the cache
When the package is directly available in default repositories, you can install it by running the “apt-get” command with the “install” option.
Note : you will need sudo privileges in order to install new packages on your system.
$ sudo apt-get install gcc
You may also be asked if you accept to install this package on your system.
Hit “Y” whenever you are prompted with this question.
Shortly after, your program should be install and usable.
In order to verify that the command was correctly installed, you can run the “whereis” command.
$ whereis gcc

Awesome, you have correctly installed the GCC compiler on your system!
Installing software unavailable in the cache
In some cases, you may want to install software that is not directly stored into your APT cache.
For this section, we are going to install Grafana, an open-source dashboarding that is not directly available in the default packages.
Note : this is not a tutorial dedicated to Grafana, this part will only cover commands related to APT.
First, we need to make sure that the package is not already contained in our APT cache.
$ apt-cache search --names-only ^grafana$
<empty>
In this case, no default packages are installed for Grafana, we need to add it by ourselves.
Adding custom APT repositories
In order to add custom APT repositories, you need to understand the APT sources directory structure.
By default, repositories are stored into the “/etc/apt” folder.
$ ls -l /etc/apt
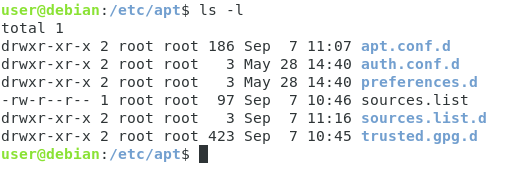
In this directory, you have multiple entries :
- apt.conf.d : the APT configuration folders containing configuration files in order to configure proxies for example;
- auth.conf.d : can be used in order to store authentication details related to proxies;
- preferences.d : can be used in order to set priorities to specific repositories or packages;
- sources. list : contains the default set of repositories for your distribution;
- sources.list.d : a directory that may contain custom APT repositories;
- trusted.gpg.d : a set of GPG keys that you trust in order to certify download authenticity.
The “sources.list” is already filled with default repositories, so we may not want to modify this file.

Instead, we are going to add a custom repository to the sources.list.d directory.
$ sudo touch /etc/apt/sources.list.d/custom.list
In this newly created file, add one entry for the custom repository you want to install.
$ sudo nano /etc/apt/sources.list.d/custom.list

deb https://packages.grafana.com/oss/deb stable main
In order to install packages securely, you may have to import GPG keys.
$ sudo wget -q -O https://packages.grafana.com/gpg.key | sudo apt-key add -
OK
Note : you may not have to add a GPG key for every package but it guarantees that the package is installed securely.
Now that your repository was correctly added, update your APT cache in order for the changes to be applied.
$ sudo apt-get update

Now, if you search for your package, you should be able to find it.
$ sudo apt-cache show grafana
As a consequence, you are now ready to install your package.
To install your package, simply run the “apt-get” command with the “install” option.
$ sudo apt-get install grafana
Awesome!
Now your package is successfully installed.
As you can see, installing custom software is quite different from installing software available in the cache : you have to add custom repositories and eventually add GPG keys.
Now that you know how to install packages, let’s see how you can uninstall them.
Uninstalling packages with APT
When uninstalling packages using the APT package manager, you essentially have two options : remove or purge.
Removing packages using apt-get remove
The first way to uninstall package is to use the apt-get remove command.
$ sudo apt-get remove <package>
Using the grafana package we installed earlier, this would give
$ sudo apt-get remove grafanaSo why would we need a purge function?
When using apt-get remove, the packages are removed but the files associated to the package are left intact.
To see it, try listing the files associated to a package on your system using the dpkg command.
$ dpkg -L <package>
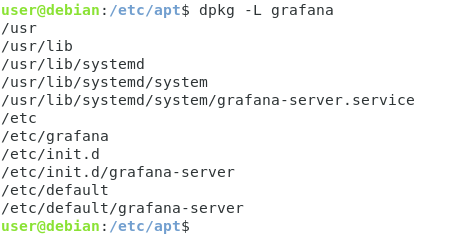
As you can see, configuration files are still there, that’s why you need to use the purge command.
Purging packages using apt-get purge
In order to use the purge command, simply execute “apt-get” with the “purge” option.
$ sudo apt-get purge <package>
Now if you try to see files associated with your package, you won’t be able to find any of them.
$ dpkg -L <package>
<empty>
Removing dependencies with autoremove
As you probably understood it, the point of using APT is that it retrieves package dependencies for you and install them correctly.
As a consequence, whenever you install new packages, you have the risk of leaving dangling dependencies on your system.
In order to remove dangling dependencies (i.e dependencies not used anymore), you have to use the autoremove option.
You can either do it while uninstalling a package
$ sudo apt-get autoremove <package>
Or you can do it after by executing the autoremove option with no arguments at all.
$ sudo apt-get autoremove
Conclusion
In this long tutorial, you learnt how you can install and uninstall packages using the APT package manager.
You also learnt more about the origins of Open Source Software, where it comes from and how the GNU/Linux operating system emerged from standard Unix operating systems.
If you are interested about Linux system administration, we have a complete section dedicated to it on the website, so make sure to check it out.