How To Copy Directory on Linux

Copying directories on Linux is a big part of every system administrator routine.

If you have been working with Linux for quite some time, you know how important it is to keep your folders well structured.

In some cases, you may need to copy some directories on your system in order revamp your main filesystem structure.

In this tutorial, we are going to see how you can easily copy directories and folders on Linux using the cp command.

Copy Directories on Linux

In order to copy a directory on Linux, you have to execute the “cp” command with the “-R” option for recursive and specify the source and destination directories to be copied.

$ cp -R <source_folder> <destination_folder>

As an example, let’s say that you want to copy the “/etc” directory into a backup folder named “/etc_backup”.

The “/etc_backup” folder is also located at the root of your filesystem.

In order to copy the “/etc” directory to this backup folder, you would run the following command

$ cp -R /etc /etc_backup

By executing this command, the “/etc” folder will be copied in the “/etc_backup”, resulting in the following folder.

Copy Directories on Linux copy-directory

Awesome, you successfully copied one folder in another folder on Linux.

But, what if you wanted to copy the content of the directory, recursively, using the cp command?

Copy Directory Content Recursively on Linux

In order to copy the content of a directory recursively, you have to use the “cp” command with the “-R” option and specify the source directory followed by a wildcard character.

$ cp -R <source_folder>/* <destination_folder>

Given our previous example, let’s say that we want to copy the content of the “/etc” directory in the “/etc_backup” folder.

In order to achieve that, we would write the following command

$ cp -R /etc/* /etc_backup

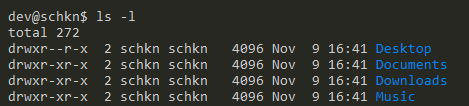
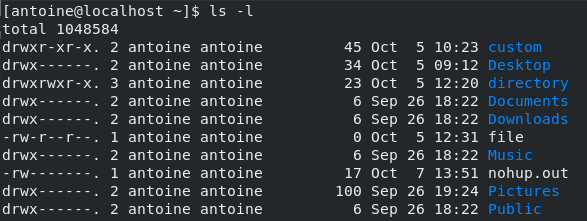
When listing the content of the backup folder, you will come to realize that the folder itself was not copied but the content of it was.

$ ls -l /etc_backup

Copy Directory Content Recursively on Linux copy-content-directory

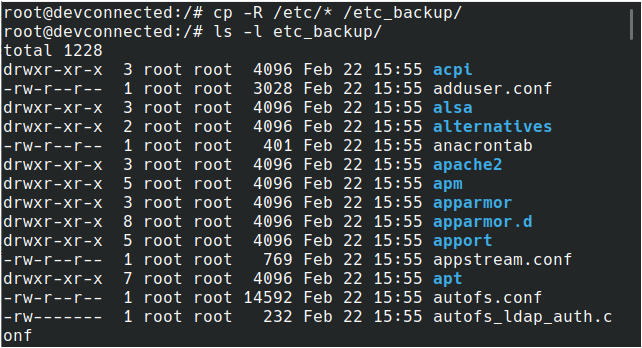
Awesome, you copied the content of the “/etc” directory right into a backup folder!

Copy multiple directories with cp

In order to copy multiple directories on Linux, you have to use the “cp” command and list the different directories to be copied as well as the destination folder.

$ cp -R <source_folder_1> <source_folder_2> ... <source_folder_n>  <destination_folder>

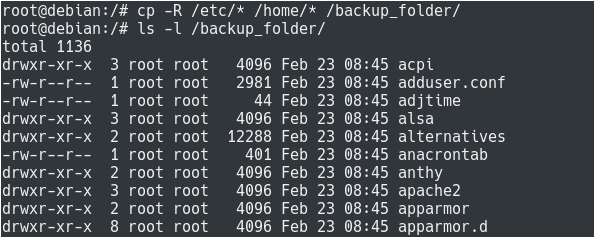
As an example, let’s say that we want to copy the “/etc” directory as well as all homes directories located in the “/home” directory.

In order to achieve that, we would run the following command

$ cp -R /etc/* /home/* /backup_folder

Copy multiple directories with cp copy-multiple

Congratulations, you successfully copied multiple directories using the cp command on Linux!

Copy Directories To Remote Hosts

In some cases, you may want to copy a directory in order to keep a backup on a backup server.

Needless to say that your backup server is locally remotely : you have to copy your directory over the network.

Copying using rsync

In order to copy directories to remote locations, you have to use the rsync command, specify the source folder as well as the remote destination to be copied to.

Make sure to include the “-r” option for “recursive” and the “-a” option for “all” (otherwise non-regular files will be skipped)

$ rsync -ar <source_folder> <destination_user>@<destination_host>:<path>

Also, if the “rsync” utility is not installed on your server, make sure to install it using sudo privileges.

$ sudo apt-get install rsync

$ sudo yum install rsync

As an example, let’s say that we need to copy the “/etc” folder to a backup server located at 192.168.178.35/24.

We want to copy the directory to the “/etc_backup” of the remote server, with the “devconnected” username.

In order to achieve that, we would run the following command

$ rsync -ar /etc devconnected@192.168.178.35:/etc_backup

Copying using rsync-distant

Note : we already wrote a guide on transferring files and folders over the network, if you need an extensive guide about it.

Similarly, you can choose to copy the content of the “/etc/ directory rather than the directory itself by appending a wildcard character after the directory to be copied.

$ rsync -ar /etc/* devconnected@192.168.178.35:/etc_backup/

Finally, if you want to introduce the current date while performing a directory backup, you can utilize Bash parameter substitution.

$ rsync -ar /etc/* devconnected@192.168.178.35:/etc_backup/etc_$(date "+%F")

Copying using rsync backup-1

Note : if you are looking for a tutorial on setting dates on Linux, we have a guide about it on the website.

Copying using scp

In order to copy directory on Linux to remote location, you can execute the “scp” command with the “-r” option for recursive followed by the directory to be copied and the destination folder.

$ scp -r <source_folder> <destination_user>@<destination_host>:<path>

As an example, let’s say that we want to copy the “/etc” directory to a backup server located at 192.168.178.35 in the “/etc_backup” folder.

In order to achieve that, you would run the following command

$ scp -r /etc devconnected@192.168.178.35:/etc_backup/

Copying using scp

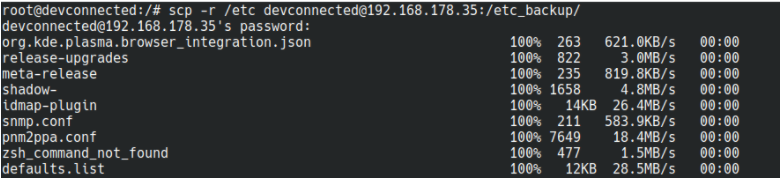
Congratulations, you successfully copied an entire directory using the scp command.

Very similarly to the rsync command, you can choose to use Bash parameter substitution to copy your directory to a custom directory on your server.

$ scp -r /etc devconnected@192.168.178.35:/etc_backup/etc_$(date "+%F")

Conclusion

In this tutorial, you learnt how you can easily copy directories on Linux, whether you choose to do it locally or remotely.

Most of the time, copying directories is done in order to have backups of critical folders on your system : namely /etc, /home or Linux logs.

If you are interested in Linux System Administration, we have a complete section dedicated to it on the website, so make sure to check it out!

How To Count Files in Directory on Linux

As a system administrator, you are probably monitoring the disk space on your system all the time.

When browsing directories on your server, you might have come across directories with a lot of files in them.

Sometimes, you may want to know how many files are sitting in a given directory, or in many different directories.

In other words, you want to count the number of files that are stored in a directory on your system.

In this tutorial, we are going to see how you can easily count files in a directory on Linux.

Count Files using wc

The easiest way to count files in a directory on Linux is to use the “ls” command and pipe it with the “wc -l” command.

$ ls | wc -l

The “wc” command is used on Linux in order to print the bytes, characters or newlines count. However, in this case, we are using this command to count the number of files in a directory.

As an example, let’s say that you want to count the number of files present in the “/etc” directory.

In order to achieve that, you would run the “ls” command on the “/etc” directory and pipe it with the “wc” command.

$ ls /etc | wc -l

268

Count Files using wc-count

Congratulations, you successfully counted files in a directory on Linux!

Remark using wc command

An important command when using the “wc” command resides in the fact that it comes the number of newlines for a given command.

As a consequence, there is a big difference between those two commands

$ ls -l | wc -l

269

$ ls | wc -l

268

Even if we think that those two commands would give us the same output, it is not actually true.

When running “ls” with the “-l” option, you are also printing a line for the total disk allocation for all files in this directory.

Remark using wc command ls

As a consequence, you are counting a line that should not be counted, incrementing the final result by one.

count-files

Count Files Recursively using find

In order to count files recursively on Linux, you have to use the “find” command and pipe it with the “wc” command in order to count the number of files.

$ find <directory> -type f | wc -l

As a reminder, the “find” command is used in order to search for files on your system.

When used with the “-f” option, you are targeting ony files.

By default, the “find” command does not stop at the first depth of the directory : it will explore every single subdirectory, making the file searching recursive.

For example, if you want to recursively count files in the “/etc” directory, you would write the following query :

$ find /etc -type f | wc -l

2074

When recursively counting files in a directory, you might not be authorized to explore every single subentry, thus having permission denied errors in your console.

Count Files Recursively using find permission-denied

In order for the error messages to be redirected, you can use “output redirection” and have messages redirected to “/dev/null”.

$ find /etc -type f 2> /dev/null | wc -l

2074

Awesome, you recursively counted files in a directory on Linux!

Count Files using tree

An easy way of counting files and directories in a directory is to use the “tree” command and to specify the name of the directory to be inspected.

$ tree <directory>

3 directories, 3 files

Count Files using tree-command

As you can see, the number of files and directories is available at the bottom of the tree command.

The “tree” command is not installed on all hosts by default.

If you are having a “tree : command not found” or “tree : no such file or directory”, you will have to install it using sudo privileges on your system.

$ sudo apt-get install tree             (for Ubunbu/Debian hosts)

$ sudo yum install tree                 (for CentOS/RHEL hosts)

Counting hidden files with tree

In some cases, you may want to count hidden files on your system.

By default, whether you are using the “tree”, “find” or “ls” commands, hidden files won’t be printed in the terminal output.

In order to count hidden files using tree, you have to execute “tree” and append the “-a” option for “all”, followed by the directory to be analyzed.

$ tree -a <directory>

For example, if we count files and directories in your “/home” directory, you will be able to see that there is a difference because multiple hidden files are present.

$ tree /home/user

4321 directories, 27047 files

$ tree -a /home/user

9388 directories, 32633 files

Counting Files using Graphical User Interface

If you are using a Desktop interface like KDE or GNOME, you might have an easier time counting files in directories.

KDE Dolphin File Manager

A quick way of finding the number of files in a directory is to use the Dolphin File Manager.

Click on the bottom left corner of your user interface and click on the “Dolphin File Manager” entry.

KDE Dolphin File Manager dolphin-file-manager

When you are in the Dolphin File Manager, navigate to the folder that you want to explore.

Right-click on the folder and select the “Properties” option.

KDE Dolphin File Manager dolphin-2

The “Properties” window will open and you will be able to see the number of files and subdirectories located in the directory selected.

KDE Dolphin File Manager number-files-kde

Awesome, you counted the number of files in a directory on KDE!

GNOME Files Manager

If you are using GNOME as a Desktop environment, navigate to the “Activities” menu on the top-left corner of your Desktop, and search for “Files”.

GNOME Files Manager Files-GNOME

When in the “File Explorer”, select the folder to be inspected, right-click on it and select the “Properties” option.

GNOME Files Manager properties

When in the “Properties” window, you will be presented with the number of “items” available in the folder selected.

Unfortunately, you won’t be presented with the actual number of “files”, but rather the number of “items” which can be found to be quite imprecise.

GNOME Files Manager etc

Awesome, you found the number of items available in a directory on Linux!

Conclusion

In this tutorial, you learnt how you can easily count files in a directory on Linux.

You have seen that you can do it using native commands such as the “wc” and “find” commands, but you can also install utilities in order to do it quicker.

Finally, you have seen how you can do it using user interfaces such as GNOME or KDE.

If you are interested in Linux System Administration, we have a complete section dedicated to it on the website, so make sure to check it out!

How To Rename a Directory on Linux

If you have been working with Linux systems for quite some time, you already know how important it is to keep your filesystem structured.

In some cases, you may need to create temporary directories with random names that need to be renamed later on.

Renaming directories on Linux is not done with a dedicated renaming command but with a command that serves multiple purposes : the “mv” command.

The “mv” command is used on Linux in order to be able to move files but also to rename directories.

In this tutorial, we are going to learn how you can rename directories on Linux.

Rename Directories on Linux using mv

To rename a directory on Linux, use the “mv” command and specify the directory to be renamed as well as the destination for your directory.

$ mv <source_directory> <target_directory>

For example, let’s say that you want to rename a specific directory on your filesystem named “temp” (located in your home directory) to “directory” (also in your home directory)

To rename this directory, you would use the “mv” command and specify the two directory names.

$ mv /home/user/temp /home/user/directory
Note : using the mv command will not delete the content stored inside your directories, you won’t lose any files by renaming your directories on Linux.

Now if you take a look at all the directories stored in your home directory, you will see a new entry for your “directory” folder.

$ ls -l /home/user

drwxr--r-x   2 user user 4096 Nov  9 16:41 Desktop/
drwxr-xr-x   2 user user 4096 Nov  9 16:41 Documents/
drwxr-xr-x   2 user user 4096 Nov  9 16:41 Downloads/
drwxr-xr-x   2 user user 4096 Nov  9 16:41 Music/
drwxrwxr-x   2 user user 4096 Dec 20 10:53 directory/

Awesome, you just renamed a directory on Linux.

Rename Directories using find

In some cases, you may not know directly where your directories are located on your system.

Luckily for you, there is a command that helps you find and locate directories on a Linux system : the find command.

In order to find and rename directories on Linux, use the “find” command with the “type” option in order to look for directories. You can then remove your directories by executing the “mv” command with the “-execdir” option.

$ find . -depth -type d -name <source_directory> -execdir mv {} <target_directory> \;

For this example, let’s pretend that you want to rename a directory beginning with “temp” on your filesystem to “directory”.

The first part of the command will locate where your directory is located.

$ find . -depth -type d -name "temp"

./temp

Now that you know where your directory is, you can rename it by using the “execdir” option and the “mv” command.

$ find . -depth -type d -name temp -execdir mv {} directory \;

Rename Multiple Directories using Bash

As described in our previous tutorials, the Bash scripting language can also be used in order to rename multiple directories on your filesystem.

To rename multiple directories on Linux, create a new script file and use the “mv” command in a “for” loop to iterate over directories.

#!/bin/bash

# Takes directory entries specified and renames them using the pattern provided.

for directory in *
do
    if [ -d "$directory" ]
    then
      mv "${directory}" "${directory}_temp" || echo 'Could not rename '"$directory"''
    fi
done

Save this script as “change_name” and add it to your PATH environment variable if you want to use it on your entire system.

In this script, we are listing all the files and directories that are located in the current working folder (where the script is located).

We are testing if the entry is a directory and if the directory exists using the “-d” option.

Then, if the directory exists, it is renamed to have a “_temp” extension at the end. Feel free to customize this line in order to rename the directories however you want them to be renamed.

$ ls

folder1/  folder2/

$ change_name

$ ls 

folder1_temp/  folder2_temp

Congratulations, you just renamed directories using a Bash script on Linux.

Rename Directories using rename

Instead of using the “mv” command, you can use a dedicated built-in command, however this command may not be directly available on your distribution.

In order to rename directories on Linux, use “rename” with how you want the files to be renamed as well as the target directory.

$ rename <expression> <directory>

As an example, let’s say that you want to rename all your directories written in uppercases to directories names in lowercase letters.

In order to rename those directories, you would run the following command

$ rename 'y/A-Z/a-z/' *

$ ls -l 

drwxrwxr-x 2 user user 4096 Dec 21 02:26 a_temp
drwxrwxr-x 2 user user 4096 Dec 21 02:26 b_temp

Filtering directories to be renamed

In some cases, you may want to rename only a few directories using the rename command.

In order to achieve that, you essentially have two options :

  • Use wildcards in order to filter directories to be renamed.

For example, if you want to rename directories ending with a given string, you would run the following command.

$ rename 'y/_html/_temp/' *
The syntax used by the rename command is the same one as the sed command : you can use this reference to have more information about this syntax.
  • Use input redirection in order to filter directories to be renamed
$ ls -d *_html | rename 'y/*_html/*_temp/'

When using one of those two options, your folders will be renamed to have a “_temp” extension.

$ ls -l

drwxrwxr-x 2 user user 4096 Dec 21 02:42 a_temp
drwxrwxr-x 2 user user 4096 Dec 21 02:42 b_temp

Awesome, you successfully renamed your directories using the rename command!

Conclusion

In this tutorial, you learnt all the ways of renaming directories on Linux, the most common way being the “mv” command.

You also learnt that it is possible to rename directories using the “find” command in order to locate your directories or by using the rename command (that may not be directly available on your system by default).

If you are interested in Linux System Administration, we have a complete section dedicated to it on the website, so make sure to check it out!

How To Check If File or Directory Exists in Bash

When working with Bash and shell scripting, you might need to check whether a directory or a file exists or not on your filesystem.

Based on this condition, you can exit the script or display a warning message for the end user for example.

In order to check whether a file or a directory exists with Bash, you are going to use “Bash tests”.

In this tutorial, you are going to learn how to check if a file or directory exists in a Bash script.

Check If File Exists

In order to check if a file exists in Bash, you have to use the “-f” option (for file) and specify the file that you want to check.

if [[ -f <file> ]]
then
    echo "<file> exists on your filesystem."
fi

For example, let’s say that you want to check if the file “/etc/passwd” exists on your filesystem or not.

In a script, you would write the following if statement.

#!/bin/bash

if [[ -f "/etc/passwd" ]]
then
    echo "This file exists on your filesystem."
fi

Check If File Exists check-file

Check File Existence using shorter forms

In some cases, you may be interested in checking if a file exists or not directly in your Bash shell.

In order to check if a file exists in Bash using shorter forms, specify the “-f” option in brackets and append the command that you want to run if it succeeds.

[[ -f <file> ]] && echo "This file exists!"

[ -f <file> ] && echo "This file exists!"

Using the example used before, if you want to check if the “/etc/passwd” file exists using shorter forms, you write the following command

[[ -f /etc/passwd ]] && echo "This file exists!"

Check File Existence using shorter forms check-file-shorter

So how does this command work?

Shorter forms are closely related to exit statuses.

When you run a command on Bash, it always exits with an error status : 0 for error and numbers greater than 0 for errors (1, 2.. 6 and so on)

In this case, the “&&” syntax will check if the exit status of the command on the left is equal to zero : if this is the case, it will execute the command on the right, otherwise it won’t execute it.

Protip : you can use “echo ${?}” in order to see the exit status of the latest command run

Checking multiple files

In some cases, you may want to check if multiple files exist on your filesystem or not.

In order to check if multiple files exist in Bash, use the “-f” flag and specify the files to be checked separated by the “&&” operator.

if [[ -f <file1> ]] && [[ -f <file2> ]]
then
  echo "They exist!"
fi

Check If File Does Not Exist

On the other hand, you may want to check if a file does not exist on your filesystem.

In order to check if a file does not exist using Bash, you have to use the “!” symbol followed by the “-f” option and the file that you want to check.

if [[ ! -f <file> ]]
then
    echo "<file> does not exist on your filesystem."
fi

Similarly, you can use shorter forms if you want to quickly check if a file does not exist directly in your terminal.

[[ ! -f <file> ]] && echo "This file does not exist!"

[ ! -f <file> ] && echo "This file does not exist!"

check-file-does-not-exist-shorter

Note that it is also possible to check if a file does not exist using the “||” operator.

The “||” operator will execute the command on the right if and only if the command on the left fails (i.e exits with a status greater than zero).

To test if a file does not exist using the “||” operator, simply check if it exists using the “-f” flag and specify the command to run if it fails.

[[ -f <file> ]] || echo "This file does not exist!"

Check If Directory Exists

In order to check if a directory exists in Bash, you have to use the “-d” option and specify the directory name to be checked.

if [[ -d "$DIRECTORY" ]]
then
    echo "$DIRECTORY exists on your filesystem."
fi

As an example, let’s say that you want to check with Bash if the directory /etc exists on your system.

In order to check its existence, you would write the following Bash script

#!/bin/bash

if [[ -d /etc ]]
then
    echo "/etc exists on your filesystem."
fi

When executing this script, you would get the following output

Output

$ /etc exists on your filesystem

Check Directory Existence using shorter forms

In some cases, you may be interested in checking if a directory exists or not directly in your Bash shell.

In order to check if a directory exists in Bash using shorter forms, specify the “-d” option in brackets and append the command that you want to run if it succeeds.

[[ -d <directory> ]] && echo "This directory exists!"

[ -d <directory> ] && echo "This directory exists!"

Let’s say that you want to check if the “/etc” directory exists for example.

Using the shorter syntax, you would write the following command.

[ -d /etc ] && echo "This directory exists!"

check-directory-2

Creating a complete Bash script

If you find yourself checking multiple times per day whether a file (or multiple) exists or not on your filesystem, it might be handy to have a script that can automate this task.

In this section, you are going to create a Bash script that can take multiple filenames and return if they exist or not.

If they don’t, a simple notification message will be displayed on the standard output.

Create a new Bash script and make it executable using chmod.

$ mkdir -p ~/bin 

$ cd ~/bin && touch check_file && chmod u+x check_file && vi check_file

Here is the content of the script to be used to dynamically check if files exist.

#!/bin/bash

# Using argument expansion to capture all files provided as arguments.

for FILE in ${@}
do
  if [[ ! -f $FILE ]]
  then
    echo "The file ${FILE} does not exist!"
  fi
done

Save your script and add the “bin” folder you just created to your PATH environment variable.

$ export PATH="~/bin:$PATH"

$ printenv PATH

~/bin:/usr/local/sbin:/usr/local/bin:/usr/sbin:/usr/bin:/sbin:/bin

Now that your script is accessible wherever you are on the system, you can call your script and start checking if files exist or not.

$ check_file /etc/passwd /etc/pass /etc/file

The file /etc/pass does not exist!
The file /etc/file does not exist!

Awesome!

You created a custom to check whether files exist on your filesystem or not.

Conclusion

In this tutorial, you learnt how you can check if a file exists or not using Bash tests and Bash short syntax.

Similarly, you learnt how it is possible to verify if a directory exists.

Finally, you have written a complete Bash script that accepts dynamic arguments in order to check if multiple files exist or not.

If you are interested in Bash programming or in Linux System administration, we have a complete section dedicated to it on the website, so make sure to check it out!

Advanced Bash Scripting Guide

In our previous tutorial on Bash, we have seen how you can effectively createrun and write simple conditional statements in Bash.

You have discovered many concepts of Bash such as exit statuses and how they can indicate a script success or a script failure.

Moreover, you have discovered shell built-ins (such as type or source) and how they differ from Bash variables.

Finally, you have learnt how you can declare and assign values to Bash values easily.

In this tutorial, we are taking a sneak peek at advanced features of the Bash shell scripting.

You will have a greater understanding of for loops, while loops and case statements.

We will also have a close look at Bash special variables as well as declaring options for your Bash scripts using the getopts shell built-in.

What You Will Learn

If you follow this tutorial until the end, you will have a deeper understanding of the following Bash concepts :

  • What are positional parameters and how they can be used;
  • What Shell special parameters are and what are the most common Shell special parameters that you can use;
  • How to declare and use for loops in order to iterate over an argument list;
  • How to declare and use while loops and how to write proper termination conditions;
  • How you can use “case” statements in order to specify special actions for given arguments;
  • What Shell options are and how they can be captured using getopts;
  • How to declare and execute simple Bash functions

That’s quite a long program so without further ado, let’s jump right into it.

Bash Positional Arguments

In Bash, you can provide “arguments” to the script you are writing.

“Arguments” are values passed to your script that can be interpreted inside your script as variables.

They can be used in order to provide additional information, context or meaning to your Shell script.

For example, if you want to execute a script that is creating three different users, you can provide the user names as arguments to your Shell script.

$ create-user john jack jim

In this case, the three names are passed as arguments to the Shell script and they can be used inside the script as variables.

In order to have access to the value of the argument provided, you can simply reference them as ${1} for the first argument, ${2} for the second argument and so on.

The ${0} refers to the path to the script currently being executed.

As a example, if you try to see the value of the first argument in your script, you would write

#!/bin/bash

echo "The first argument passed to the script is ${1}"

# This line will display "john"

Shell Special Parameters

In our previous tutorial, we already discovered some of the shell special variables when learning about exit statuses.

So what are Shell special variables?

Shell special variables are read-only variables that are created by Bash in order to store values such as the last exit status or the arguments provided by the user to the command-line.

In order to have a look at Shell special variables, you have to open the documentation for the bash command.

$ man bash

When you are inside the documentation, hit the forward slash “/” and look for “Special Parameters“.

There you will be presented with a complete section as well as a description of all the Shell special parameters.

Shell Special Parameters special

In our case, we are only interested in a couple of Shell special parameters :

  • ? : results in the exit status of the last executed command (as a reminder, 0 for success and 1 for error)
$ echo "This is a successful command"

$ echo ${?}
0
  • # : describes the number of positional arguments provided to the command;
$ ./myscript "First argument" "Second argument"

Number of arguments provided is 2
  • @ : expands the positional arguments provided into a space-separated list of arguments. Arguments provided in quotes are preserved;
  • * : expands the positional arguments provided into one single string of arguments. Arguments provided in quotes are expanded;
  • 0 : provides the script name or the path to the script being executed.

Now, what would is the purpose of Shell special variables?

Shell special variables can be used with loops in order to iterate over all arguments provided to a Shell script for example.

This is what we are going to illustrate in our next section.

Using For Loops in Bash

The “FOR” statement is a shell keyword and it is used in order to iterate over a list and execute actions for every item on that list.

In order to get some help related to the “for” keyword, use the help command.

$ help for

Using For Loops in Bash

As you can see, the for loop expects a list of words to be provided in order to iterate over it.

For each iteration, the commands specified will be executed.

for X in WORDS
do
  COMMANDS
done

As a quick example, you can provide a list of strings separated by white spaces to the for loop and echo the result to the standard output.

$ for X in "First" "Second" "Third"
> do
> echo $X
> done

First
Second 
Third

In this case, using the for loop is not very useful, but it can be very useful when combined with Shell special parameters.

Let’s say for example that you want to iterate over the list of arguments provided to the command-line.

Instead of having to guess how many arguments were provided, you can use the for loop with the “${@}” special variable.

If for example you want to create a user for every username provided to the command-line, you can use the for loop to that effect.

#!/bin/bash

for USERNAME in ${@}
do
  echo "Created username ${USERNAME}"
done

Using For Loops in Bash john-jack

Awesome!

You know how you can iterate over the argument list provided to your script now.

Now that you understand “for” loops better, you are ready to learn about “while” loops.

Using While Loops in Bash

The “WHILE” statement is a shell keyword that evaluates a condition and executes a statement if the condition evaluates to true.

The “WHILE” statement lasts until the condition evaluates to false at some point.

while [[ condition ]]
do
  COMMANDS
done

As an example, let’s assign a value to the X variable and print the value of X until X is lower than 1.

#!/bin/bash

X=3
while [[ ${X} -ge 1 ]]
do
  echo "Value of X is ${X}
  X=$((X-1))
done

On the first iteration, X will be equal to 3 thus returning true to the condition specified in the while loop.

On every iteration of the while loop, the X variable will decrease by one, reaching a value lower than 1 at some point.

When X is lower than 1, the condition will return false and the while loop will simply exit.

Needless to say that other conditional statements such as “IF” or loops such as “FOR” can be imbricated into a while loop to create complex scripts.

While Infinite Loop

As described in the introduction, the while loop keeps on evaluating until the condition set evaluates to false.

This is quite important because it unveils one of the inherent problems of the while loop : it can lead to infinite loops.

Infinite loops are loops that are running indefinitely and that never stop.

They are often caused by a badly designed condition and they will prevent your script from finishing its execution.

In order to illustrate infinite loops, let’s take a look at the following loop.

X=1
while [[ ${X} -eq 1 ]]
do
  echo "Value of X is ${X}"
done

While Infinite Loop infinite-loop

As you can see, in this case, the script will keep on evaluating forever unless you shut the process down using Ctrl + C.

Now that you have a better understanding of the while loop, let’s see how you can use the “case” statement in order to create complex conditional statements.

Case Statement Explained

The case statement is a popular statement used in many programming languages.

The case statement is a shell expression used in order to match patterns and execute matching conditions.

The syntax of the case statement is as follows.

Case Statement Explained

case <pattern> in
  option1)
    COMMAND
    ;;
  option2)
    COMMAND
    ;;
  *)
    COMMAND
    ;;
esac

As an example, let’s say that you want to want to create a script that is able to interpret commands such as “start”, “finish” or “restart” provided as a script argument.

In order to match those commands, you can use the “${1}” special variable (in order to capture the first positional argument) and match it against a list of predefined commands.

Using the case command in a script, this would give us the following output

Case Statement Explained 1

case "${1}" in
  start)
    echo "You executed start"
    ;;
  finish)
    echo "You executed finish"
    ;;
  restart)
    echo "You executed restart"
    ;;
  *)
    echo "You provided an unknown command to the script"
esac

Case Statement Explained case

Providing conditional matching in case

In some cases, you want the case statements to be a little more permissive than they are.

You may want them to match multiple expressions for example, or to match text starting with a given string.

Luckily for you, the case statement understands globbing characters.

You can have a look at the Pattern Matching section of the bash documentation.

Providing conditional matching in case pattern-matching

Using this section, you can specify that you want to match multiple patterns under the same statement using the “|” operator.

case <pattern> in
  option1|option2)
    COMMAND
    ;;
  option3)
    COMMAND
    ;;
  *)
    COMMAND
    ;;
esac

You can also provide patterns that begin with a defined string and have the “*” operator match the rest of the pattern.

case <pattern> in
  opt*)
    COMMAND
  *)
    COMMAND
    ;;
esac

Now that you learnt about the case statement, you are ready to parse Shell script options using the getopts command.

Parsing script options using getopts

In order to parse script options, you need to know how to use the case statement and the while statement.

Pretty much as all the commands we used before, getopts is a Shell built-in and its documentation can be read using the help command.

$ help getopts

Parsing script options using getopts getopts

In order to use the getopts command, you have to combine the while statement and the case statement.

The syntax of the getopts command is as follows

The syntax of the getopts command is as follows

while getopts <options> <variable>
do
  case "$OPTION" in
    option)
      <command>
      ;;
    option_two)
      <command>
      ;;
    *)
      <command>
      ;;
  esac
done

As a quick example, let’s say that you want to be able to have the “-a” option and the “-b” option for your script.

As the beginning of the script, you would write the following getopts statement.

The syntax of the getopts command is as follows 1

while getopts "ab" FLAG
do
  case "${FLAG}" in
    a)
      echo "You provided a to the script"
      ;;
    b)
      echo "You provided b to the script"
      ;;
    *)
      echo "Unknown usage, provide a or b to the script"
      ;;
  esac
done

Parsing script options using getopts flags

Bash options arguments

In some cases, you may want to provide arguments to the options that you are giving to your Shell script.

Say for example that you want to have a “-n” option and provide a number for it.

In order to indicate that you expect an argument to your option, you have to append a “:” character right after your option.

while getopts "<option>:<option2>" VARIABLE
do
  <commands>
done

Given the example we wrote just before, in order to indicate that the “a” flag expects an argument, you would write the following script.

Bash options arguments

while getopts "a:b" FLAG
do
  case "${FLAG}" in
    a)
      echo "You provided a to the script"
      ;;
    b)
      echo "You provided b to the script"
      ;;
    *)
      echo "Unknown usage, provide a or b to the script"
      ;;
  esac
done

Now, when trying to execute your script with the “a” option, you will be presented with an error if you don’t provide an argument to the option.
Bash options arguments script-arguments

Accessing Bash options arguments

Now declaring arguments for your options is great, but accessing their values would be even greater.

In order to accede to the value of the argument provided to the option, you can use the ${OPTARG} special variable.

Back to our previous example, let’s try to have a look at the value provided by the user.

Accessing Bash options arguments

while getopts "a:b" FLAG
do
  case "${FLAG}" in
    a)
      echo "You provided a to the script"
      echo "You gave ${OPTARG} to the a option."
      ;;
    b)
      echo "You provided b to the script"
      ;;
    *)
      echo "Unknown usage, provide a or b to the script"
      ;;
  esac
done

Accessing Bash options arguments option-value

Awesome!

You finally know how you can retrieve arguments provided to your options.

Bash Functions

For the last chapter of this complete Bash scripting guide, we are going to take a look at Bash functions.

So what are Bash functions?

Bash functions usually store multiple commands and they are used in order to factorize and re-use code in multiple places.

Declaring Bash Functions

In order to declare a Bash function, provide the name of the function with left and right parenthesis right after the Bash function name.

#!/bin/bash

my_function() {

  <command1>
  <command2>
  <command3>

}

Alternatively, you can simply provide the function name but you need to write the keyword “function” before the function name.

#!/bin/bash

function my_function {

  <command1>
  <command2>
  <command3

}

As an example, let’s say that you want to declare a Bash function that sends a static log message to your log files.

In order to achieve that, you would write the following function.

log_to_file() {

   logger -p local0.notice "This is a message coming from a Bash function"
   echo "Correctly recorded a message in the system logs"
}

Executing Bash Functions

Now that your Bash functions are defined, you will need to call them in order to execute the code that they store.

In order to execute Bash functions, simply write the function name where you want them to be called.

Executing Bash Functions

#!/bin/bash

# Declaring a Bash function

log_to_file() {

   logger -p local0.notice "This is a message coming from a Bash function"
   echo "Correctly recorded a message in the system logs"
}

# Executing a Bash function

log_to_file

Executing this script would give you the following output

$ Correctly recorded a message in the system logs

Bash Functions Arguments

Having Bash functions just executing simple static commands is not very beneficial.

In most cases, you want to be able to pass function arguments in order to dynamically execute functions.

In a Bash script, when you want to access the arguments provided to the script, you can use the “${1}”, ${2}” and so on notation.

When running a Bash function, you can use the exact same syntax to have references to the function arguments.

#!/bin/bash

repeat() {
  echo "You said ${1}"
}

repeat "Linux"

Executing this command would give you the following output

$ ./script

"You said Linux"

Conclusion

In this tutorial, you learnt advanced features of the Bash scripting language.

You learnt about positional arguments and about Bash special variables.

You are also now able to execute simple Bash loops such as the for and the while loops.

Finally, you can now design scripts that accept options and that contain functions in them.

If you are interested in Bash or in Linux System Administration, make sure to read our other tutorials on the subject.


Screen Command on Linux Explained

The screen command is a very common command used on Linux to launch and arrange multiple terminal shells within one single shell.

Screen is most of the time used for two purposes.

It can either be used in order to organize multiple shells and navigate between them easily.

It can also be used in order to have long running commands on remote servers.

In fact, screen is launched in order to ensure that you don’t lose any distant work in case of a sudden network outage.

In this tutorial, we are going to have a complete overview of what the screen command on Linux is and how it can be used effectively.

Ready?

Prerequisites

In order to install new packages, you will have to be a sudo user.

If you need to add a user to sudoers on Debian, there is a tutorial for it.

There is also one for Red Hat based distributions.

When you are ready, type this command to make sure that you have sudo rights.

$ sudo -l

User user may run the following commands on localhost:
   (ALL) ALL

Installing Screen on Linux

In order to install screen, you will have to run one of the following commands.

On Debian-based distributions, you can run

$ sudo apt-get install screen

For Red Hat based distributions, you will have to run

$ sudo yum install -y screen

When you are done, you can run this command in order to check your current screen version.

$ screen -v
Screen version 4.06.02 (GNU) 23-Oct-17

Interacting with Screen on Linux

As described previously, screen is used in order to start an interactive shell where you can rearrange multiple shells in it.

To start your first screen, simply type the following command.

Interacting with Screen on Linux screen

As you can see, there are no differences with your previous shell except for the fact that the header writes

screen 0: antoine@localhost:~

From there, it means that a bash interpreter is executed within another bash interpreter through the screen utility.

To run a command, simply type a command like you would normally do.

simple-command

Getting help with screen

When interacting with the screen command, you will have to run shortcuts on your keyboard to execute actions within the screen session.

By default, the “Ctrl + A” keystrokes are designed to interact with screen.

As an example, type “Ctrl + A” then “?” in order to get the screen help.

screen-help

As you can see, you many different options to interact with screen.

The most popular ones are probably the following ones :

  • “Ctrl + A” then “d” : detach mode. You can use this option in order to detach (meaning going back to your original shell) and let screen run in the background. This is particularly handy when you are running long tasks on your host.
  • “Ctrl + A” then “x” : lockscreen. This is used in order to protect your screen session to be used by another user. As a consequence, a password is set to your session.
  • “Ctrl + A” then “c” : screen command. One of the most used commands by far, those bindings are used in order to create a new window within your screen instance.
  • “Ctrl + A” then “|” : vertical split. By default, this command will split your current window into two different areas that you can interact with.
  • “Ctrl + A” then “S” : horizontal split.
  • “Ctrl + A” then “n” : used to navigate between your different window sessions from the one with the lowest index until the one with the greater index.
  • “Ctrl + A” then “Tab” : used in order to move your input cursor to one of your different areas within screen.

In most of the cases, those are the commands that you are going to use with screen.

Splitting regions with the screen command

As an example, we are going to create the following layout with the screen command on Linux.

Splitting regions with the screen command

As you can see, we are going to split the terminal both vertically and horizontally.

One window will be used in order to execute a command (like a long running command for example).

A second window will be used in order to monitor the system performance using the top command.

Finally, another window can be used in order to edit a file via the nano editor.

Screen window creation

First, create a screen session by executing the following command.

$ screen -S user-screen

The -S option will create a named session for your screen environment.

When multiple administrators are working on the same system, it might be a good idea to have named sessions to distinguish your sessions from others.

Next, as you are going to manipulate three shell sessions, you are going to need two additional screens.

Execute the “create” command two times (“Ctrl + A” then “c”). You should end up with the following screen.

Notice the header or your terminal shell displaying “screen 2” because three screens are currently active for your session.
Screen window creation screen

Splitting screen windows vertically and horizontally

The next step will be to create your different regions on your current window.

To achieve that, first split your current region vertically by pressing “Ctrl +A” then “|”

You should end up with the following output.

Splitting screen windows vertically and horizontally

Next, split your layout horizontally by pressing “Ctrl +A” then “S”.

This is what you should get.

Splitting screen windows vertically and horizontally layout

Navigate to your second region by pressing “Ctrl +A” then “Tab”. By default, your region should be empty, so you can press “Ctrl +A” then “n” in order to navigate to your screen 0 session.

From there, execute the command you want to run.

Splitting screen windows vertically and horizontally screen-4

Repeat the previous steps in order to execute commands in the other regions.

Remember that you have to navigate between your screen windows when you first enter a split region.

Splitting screen windows vertically and horizontally final-screen

Awesome! You created your complete custom screen session.

Detaching from your screen session

In order to detach from your screen session, simply press the following keystrokes.

$ Ctrl + A then d

Detaching from your screen session detach

Your screen session is still executing in the background.

This is one of the main aspects of the screen command.

It can be used in order to create to a remote host via SSH, perform some actions, and exit to come back to them later on.

This way, you don’t have to manipulate background and foreground that you may lose by closing your current terminal.

To verify that your screen session is still running, run the following command

$ pstree | grep -A 2 -E "screen-"

Detaching from your screen session pstree-1

Reattaching to your screen session

First of all, you can list your screen windows by executing the following command.

$ screen -ls

Reattaching to your screen session screen-ls

If you named your screen session, you can simply run the following command

$ screen -r <session_name>

In the example above, I would have to run this command in order to go back to my session.

$ screen -r user-screen

Note that you can also get back to your session by using the screen ID at the very left of the ls command.

$ screen -r 3600

Unfortunately, you lose all your visual changes and you will have to split your windows again.

However, with enough practice, you might learn about the shortcuts very easily.

Locking your screen session

Sometimes, you might want to prevent other users from interacting with your screen session.

In order to lock your screen, hit “Ctrl + A” then “x”.

Locking your screen session lock

In order to unlock it, you have to enter the password of the user owning the screen session.

Conclusion

In today’s tutorial, you learnt how you can easily manipulate the screen command on Linux in order to create custom shell environments within a common shell.

You learnt that it can be used on remote servers in order to make sure that you can exit the session and still save your work (if you have long running commands in the foreground for example).

If you are interested about Linux System Administration, we have a complete section dedicated to it on the website.

Find Files and Directories on Linux Easily

This tutorial focuses on how to find files on Linux using the find and the locate command.

As a system administrator, it is a very common task to look for a specific file on your file system.

However, it might be sometimes hard to find files on a Linux filesystem especially if you have dozens of different users.

There are two commands that can help you achieve your goal : find and locate.

In this tutorial, we are going to see how to use those commands effectively and how they can be tuned to achieve what we are looking for.

Find Files using the Find command

The first way to find and locate files on a Linux host is to use the find command.

By default, the find command is available on all distributions and it has the following syntax

$ find <options> <path> <expression>
Quick tip : do you have some trouble remembering if path or expression comes first?

Remember that for the grEP is Expression Path, and find is the opposite, so Path Expression!

Find is a pretty powerful command as it has way more options than the locate command.

Here are all the possibilities of the find function on Linux.

Find files with find by filename

The most common usage of the find function is to locate files given their filenames.

$ find <path> -name <pattern>

The main difference between find and locate when it comes to searching for files is that find will lookup for filenames while locate will look for paths to the file.

For example, if we go back to the runlevel example we used before, here’s how to look for runlevel files using the find command.

$ find / -name runlevel*

Find files with find by filename find-name

What’s the “2> /dev/null” part?

I redirected the error output to /dev/null using output redirection to avoid error messages on the console.

Find files using find by filetype

As we previously discussed in our article on hard and soft links, files are assigned file types and it is used as a way to differentiate them.

Here is a recap of all the file types used on Linux.

  • f : a standard file
  • d : a folder or directory
  • l : a symbolic link or soft link
  • b : block devices (such as a hard drive for example)
  • c : character devices (serial ports, sound cards)
  • p : named pipe
  • s : socket

Knowing all those file types, you are now able to search for files by file type with the find command.

$ find <path> -type <filetype>

For example, if we search for all the symbolic links on the host, we would issue the following command.

$ find / -type l

Parameters can be combined, for example if I am looking for all symbolic links whose filenames are ending with “.service” (to isolate all systemd services for example), I would run the following command.

$ find / -type l -name *.service

Find files using find by filetype combining-parameters-find

Find files using a pattern (for extensions)

Similarly to the locate command, you are able to find files on Linux using a pattern.

As a reminder, a pattern is a string that includes globbing characters (such as *, ?, or ranges).

This option is particularly when you are trying to find files given an extension, for example Javascript files.

To find files on Linux using a pattern, run the following command

$ find <path> -name ".<extension>"
$ find / -name "*.js"

Find files using a pattern files-by-extension

Files files on Linux by owner

Sometimes, you want to isolate files created by a certain user.

When deleting a user on your host, you may want to delete all files associated with this user for example.

Sometimes, users create files out of their home directory and deleting a user home directory isn’t sufficient by itself.

As a consequence, to find files created by a certain user on Linux, run the following command

$ find <path> -user <user>

For example, to find all files owned by “john” on my host, I would run the following command.

$ find / -user john

Files files on Linux by owner john-files

Now what if I want to delete all files owned by john with a simple command?

It can be easily be achieved using the delete flag.

$ find / -user john -delete

Find files on Linux by permissions

Using the find command, you can also find and locate files that have certain permissions on your host.

$ find <path> -perm <permissions>

As a reminder, here is how file permissions work on Linux.

To find all files that have full permissions (a 777 given the binary notation), you can run the following command.

$ find / -perm 777

It can be quite handy if for security reasons you want to inspect if no files are configured with full permissions on your system.

Find files on Linux by permissions find-file-perm

Find files with find by size

Another very handy way to find and locate files on Linux is to find the find command with the size option.

The size option allows you to search for files that are exactly the size you are specifying, greater than a specific size or lower than a specific size.

To search for files by size, use the following command

$ find <path> -size <size>

The size is defined by the following prefixes :

  • c: bytes
  • b: 512-byte blocks
  • k: Kilobytes
  • M: Megabytes
  • G: Gigabytes

You can specify a “+” if you are looking for files greater than the size specified.

For example, in order to find files greater than 1 GB on your system, run the following command

$ find / -size +1G

To find files lower than 10 MBs on your system, run the following command

$ find / -size -10M

Finally, to search for files that are exactly the size specified in the query, you should not append any plus or minus prefixes to the command.

$ find / -size 1024k

The command just defined will find all files that are exactly 1024 Kbs in size on your host.

Find files on Linux by modification date

Using the find, you are also able to find files given a modification date, recent or not.

This command is very handy and used quite often by system administrators to find files or directories that have been recently modified.

To search for files using find by modification date, run the following command

$ find <path> -mtime <time>

Where time represents the files modified 24*<time> hours ago.

As a consequence, time is expressed in days.

Similarly to the size option, you can append a “plus” or a “minus” operator to the time to look for files modified more than <time> days ago, or less than <time> days ago.

For example, to look for files modified exactly 3 hours ago, you would run the following command.

$ find / -mtime 3

To find files modified more than one week ago, you would run the following command

$ find / -mtime +7

To find files modified less than two days ago, you will run the following command

$ find / -mtime -2

Find files with dynamic depth

As you probably noticed, since the beginning of this tutorial, we are giving examples of files searches starting from the root directory.

As a consequence, all folders are browsed recursively.

However, we can restrict the number of directories recursively traveled from one directory, this is called the depth.

To limit file searches to a given depth, run the following query

$ find <path> -maxdepth <depth>

As an example, here is how you can restrict files searches to the current directory, with no children directories being browsed.

$ find / -maxdepth 1

You can obviously combine this command with the name flag in order to search for files with a given name in the current directory.

$ find . -maxdepth 1 -name *.tar

Find files with dynamic depth maxdepth-find

Chaining find with -exec

In some cases, you may find useful to chain the find command with the exec one.

The exec option can be used in order to chain multiple commands together : taking the result of the first one as an input of the second one.

Let’s say for example that you want to find all files modified less than one minute ago

$ find /home/user -mmin -1
./file1

Now let’s say that you want to delete all files that were modified less than one minute ago.

You can chain the find command with the -exec option using this syntax.

$ find /home/user -mmin -1 -exec echo rm -f '{}' \;

Chaining find with -exec rm

We obviously first “echo” the results as we want to make sure that we are deleting the correct files.

When you are ready to delete those files, simply remove the echo command.

$ find /home/user -mmin -1 -exec rm -f '{}' \;

Find Files on Linux using the Locate command<

Another great way to find and locate files on Linux is to use the locate command.

Prerequisites

If the locate command in not available on your system, make sure to read the next section to get locate running on your system.

a – Installing Locate on APT and RPM based distributions

To install locate, you will need sudo privileges on your Linux host.

To check if locate is installed on your host, run the locate command in the command line.

$ locate

If locate is installed on your computer, it will expect an expression to provided

locate-installed

If locate is not installed on your host, an error message will be displayed

locate-not-installed

To install locate on Ubuntu 18.04 and Debian 10, run the following command.

$ sudo apt-get install mlocate

Similarly, if you are on a CentOS or Fedora based distribution, run the following command to install locate.

$ sudo yum install mlocate

b – Updating your mlocate database

The locate function works with a local database stored on your filesystem that stores every single filename of your host.

When performing a locate command, locate will search into the database prepared by updatedb for the file you are searching for.

Periodically, a cron job updates the mlocate.db file for you to look for the most recent entries.

The database is located at /var/lib/mlocate/mlocate.db by default and the updatedb configuration file is stored at /etc/updatedb.conf.

For now, you can leave the default options and run a simple updatedb command for your database to refresh.

$ sudo updatedb

updatedb-command

Locate files given a name pattern

The most basic way to find files on Linux is to provide a pattern to the locate command.

By default, the syntax of the locate command is the following one

$ locate [OPTION]... [PATTERN]...

If you are looking for a given configuration file on your system, an easy way to find it is to provide its complete file name to the locate command.

$ locate updatedb.conf

locate-config

As you can see, the locate command is returning the complete paths to the file I am looking for.

Locate files in restricted directories

Sometimes, you may not have access to some directories on your system.

As a consequence, you won’t be able to locate the files located into it.

Let’s take the example of a forbidden folder containing a file named “restricted-file“.

Locate files in restricted directories restricted

To locate files located on restricted directories, you have to run the locate command with sudo privileges.

$ sudo locate restricted-file

Locate files in restricted directories listing-restricted

Locate files using a pattern

Using the locate command, you can provide “patterns” in the form of globbing characters.

Globbing characters, also called wildcards, are characters used in order to match one or multiple entries with a simplified expression.

The most popular one is the “*” that will match any character including none.

Here’s a recap table for globbing characters and their functions.

Wildcard Description Example Matches Does not match
* matches any number of any characters including none devco* devconnected, devcoco, devco.com devdevco,
[abc] matches one character given in the bracket [ab]ab aab, bab cab
[a-z] matches one character from the (locale-dependent) range given in the bracket runlevel[0-9] runlevel1, runlevel2, runlevel6 runlevels, runlevelo

As an example, here’s a way to locate all text files on your system.

$ locate *.txt

locate-text-files

Locate files using a regular expression

As stated in the official man page for locate, the locate command accepts a pattern as an input.

It means that you are able to provide a regular expression to the locate command.

To find and locate files given a regex, use the –regex option for the locate command.

$ locate --regex <regex>

For example, to isolate all files starting with runlevel followed by a number, you would run the following command.

$ locate --regex runlevel[0-9]+

Locate files using a regular expression locate-regex

When using regexes, there is one important point that you should be aware of when locating files.

The locate command is looking for paths to files in its local database.

As a consequence, when searching for files, you should be aware that your regular expression has to match the path to the file and not the file name alone.

For example, if I look for files starting with “run”, no results won’t be returned as the path to the file starts with “/usr”.

locate-regex-2

Locate files using case insensitive option

When searching for files on your filesystem, you may not be sure about the way a given file was named.

Was it written in uppercase or in lowercase? Does it contain any uppercase letters at all?

To find and locate files using a case insensitive option, append the -i option to your locate command.

$ locate -i <file_pattern>

Locate files using case insensitive option case-insensitive

Search files by content using grep

In some cases, you may be interested in searching for files that are matching a specific word of sentence that is located INSIDE the file.

This may happen for example if you are trying to find the file containing specific log events.

The first way to search for files matching a specific word is by using the grep command

$ grep -r <pattern> <path>
Note : do not forget the “-r” option if you are searching files through entire directories.

For example. if you are searching all the files having “error” in their content, located in your home directory, you would type

$ grep -r error /home/user

Search files by content using grep files

In some cases, you may want to find files given a regular expression.

In order to find files using a regular expression, use the “-E” option.

$ grep -r -E <expression> <path>

Let’s say for example that you want to find the file matching the ‘abc’ pattern in one of your files, you would type

$ grep -r -E "abc.*" --color /home/user

Search files by content using grep

Note : the color option is used in order to highlight matches using the grep command.

Find files using which

Another great way to locate files on Linux is to use the which command.

The which command is used in order to locate the files associated with a specific command.

This can become very handy when you don’t know where you stored your binaries for a command or if you need to locate a command in order to add it to your PATH.

$ which <command>

For example, in order to search for files associated to the “ls” command, you would type

$ which ls
/usr/bin/ls

As you can see, you are given the complete path to the file.

Locate binaries using whereis

Similarly, it is completely possible to search for files by using the whereis command.

The “whereis” command can be seen as a superset of the “which” command : “whereis” provides information about the name of the command, the file location as well as the location of the manual pages.

To execute whereis, simply type “whereis” and append the name of your command.

$ whereis ls
ls: /usr/bin/ls /usr/share/man/man1/ls.1.gz

Pretty handy!

Conclusion

In today’s tutorial, you learnt how you can find and locate files on Linux using two important commands : locate and find.

Even if option were presented individually, you should remember that they can be combined in order to be able to specify even more the files you are looking for.

As always, if you are interested in Linux system administration, we have a complete section dedicated to Linux on our website.

Writing Scripts on Linux using Bash

This tutorial discusses how you can easily write your own Bash scripts on Linux.

As a system administrator, it is quite likely that you are performing repetitive tasks that could be automated.

Luckily for you, there is a programming language that can be used on Linux in order to write scripts : the Bash programming language.

Using Bash, you can schedule entire system backups by specifying as many commands as you want in Bash scripts.

You can also have custom scripts that create and delete users and remove their associated files.

With Bash, you can also have scripts running and dumping useful performance metrics to a file or database.

Bash is a very powerful programming language for system administrators.

In today’s tutorial, we are going to learn all the basics that there is to know about Bash : how to create and run scripts, how to use variables and shell built-ins effectively.

What You Will Learn

If you read this tutorial until the end, you are going to learn about the following concepts regarding Bash

  • How to create and run Bash scripts using the command line;
  • What shebang is and how it is used by Linux for scripting;
  • What shell built-ins are and how they differ from regular system programs;
  • How to use Bash variables and what special variables are;
  • How to use Bash command substitution;
  • How to use simple IF statements on Bash;

As you can see, this is quite a long program, so without further ado, let’s start by seeing how you can create and run Bash scripts.

Getting Started with Bash

Before issuing any commands, let’s have a quick word on Bash and Shell common histories.

History of Bash

The first version of the Bash shell was released in 1989 by Brian Fox and it comes as an open-source implementation of the Unix shell.

Back then, as Unix systems started to arise, such systems were using standard Unix shells named Bourne shells.

Getting Started with Bash sh
Image from LinuxJournal

In the early days of Unix, systems developed by companies such as the MIT or Bell Labs were not free and they were not open-source.

Even if documentation was provided for those tools, it became a priority for the GNU initiative (led by Richard Stallman) to have its own version of the Unix Shell.

Six years after announcing the GNU project, the Bash (Bourne-Again Shell) shell was born with even more features than the original Bourne shell.

Bash programming language

When working with a Unix-like system such as Linux, Bash usually has two meanings :

  • Bash is a command-line interpreter or in other words a Unix shell. It means that whenever you are opening a terminal, you will be facing a Unix shell that is most of the time a Bash shell.

When typing commands directly in the terminal, commands are interpreted by the shell, executed using system calls and return values are given back to the end-user.

If you are not sure about the current interpreter that you are using, the SHELL environment variable indicates which shell you are currently using.

$ printenv SHELL

Bash programming language shell

As you can see, in this case, we are correctly using the Bash command interpreter to work.

It is important to note that even if terms like “Bash scripting” and “Shell scripting” are used interchangeably, they might not actually describe the same thing depending on your distribution.

Some recent distributions (such as Debian 10) have symbolic links from the original Bourne shell (named sh) to their own shell implementations (in this case Dash or Debian Almquist shell)

Bash programming language dash

  • Bash is also describing a command-line language and it is also referred as the Bash language. Bash exposes a set of operators and operands that can be used in order to have some basic features such as piping or executing multiple commands at once.

When executing some basic piping, you are used to work with the “|” symbol. This symbol is part of the Bash command-line language.

The same logic goes for the “&&” symbol that executes the second command if, and only if, the first command succeeded.

$ command1 && command2

Create and Run Bash Scripts

Now that you have some background about the Bash shell and the Bash command-line language, let’s start by creating and running simple Bash scripts.

In order to create your first Bash script, simply create a file named “script.sh”.

As you probably already noticed, we are still using the “sh” extension referring to the original Bourne shell (also denoted as sh).

$ touch script.sh

Now creating a file ending with the “sh” extension is not enough for your script to be considered as a Shell script.

You can actually see that your file is not yet considered as a shell script by running the file command.

$ file script.sh

Create and Run Bash Scripts file-command

As you can see here, your file is only described a simple empty file.

In order for your file to be described as a shell script file, you need to specify the shebang line at the top of your file.

Specifying shell using shebang

If you have been using Linux for quite some time, it is very likely that you have already encountered the shebang line at the beginning of your file.

Shebang, short for “Hash + “Bang”, is a one-liner set at the beginning of shell scripts in order to specify which shell is to be used to interpret this script.

#!/bin/<shell>

In our case, we want to work with Bash scripts. In other words, we want our scripts to be interpreted by a Bash interpreter.

In order to determine the path to the interpreter, you can use the “which” command.

$ which bash
/bin/bash

Now that you know the path to your interpreter, edit your script file and add the shebang line at the top of your file.

#!/bin/bash

Now that you have added this line at the beginning of your file, re-execute the “file” command in order to see the difference.

Specifying shell using shebang shebqng

As you can see, the output is slightly different : this time, your script is seen as a “Bourne-Again shell script” and more importantly as an executable.

So what would happen if you didn’t specify the shebang line at the top of the script.

When not specifying the shebang line, the script is run using the current shell used in order to start the execute command.

Now that you know how to create Bash scripts, let’s see how you can executing them.

Execute Bash Scripts

In order to execute Bash scripts on Linux, you essentially have two options :

  • By specifying the shell interpreter that you want to use and the script file;
  • By using the path to the script file

Specifying the shell interpreter

The first method is pretty straightforward.

In order to execute your bash script, you are going to specify the interpreter that you want to use by yourself.

$ bash <script>

$ /bin/bash <script>

Using the example that we used before, this would give us the following output.

Specifying the shell interpreter bash-script

As you can see, this method does not even require the execute permissions on the file, you just need to be able to use the bash executable.

Specifying the shell interpreter bash-script-2

As you can see, when logged as another user, without execute permissions, I am still able to execute this script.

This is an important remark because you might want to store your script files in protected directories (that only you can access) in order to prevent other users from executing your files.

Specifying the path to the script

The other way to execute bash scripts is to specify the path to the file.

In order to use this method, the file needs to have execute permissions.

First, use the “chmod” command in order to set execute permissions for the current user.

$ chmod u+x <script>

Specifying the path to the script chmod

As you can see, the file color is quite different : your current terminal highlights executable files using specific colors, in this case the green color.

Now that your script is executable, you can execute it by specifying the relative or absolute path to the script.

Using a file named “script.sh” located in my current working directory, the script can be executed by running

$ ./script.sh

If you are in another directory, you will have to specify the absolute path to the script file.

$ /home/user/script.sh

Specifying the path to the script absolute-path

As you probably realized by now, this method is not very convenient if you have to specify the path to the script every single time.

Luckily for you, there is a way to execute your script by simply typing the filename in the command-line.

Adding the script to PATH

The “.sh” extension is not needed for a script to be considered a script file.

For the sake of simplicity, we are going to rename the existing “script.sh” file to “script”.

To rename files on Linux, simply use the “mv” command and specify the source and destination targets.

$ mv script.sh script

Now, what if you wanted to execute your script by typing “script”?

In order to do that, you have to add the path to your script to your PATH environment variable.

To print the current value of your PATH environment variable, use “printenv” with the “PATH” argument.

$ printenv PATH

To update the PATH in your current working environment, edit the PATH environment variable using the following syntax.

$ export PATH="<path_to_script>:$PATH"

Now, the “script” command you just defined will be directly available without specifying any paths : you can launch it like any other commands.

Adding the script to PATH script-command

Note : if you want to make your changes permanent, follow those steps to update your PATH variable properly.

Shell built-ins explained

Before declaring any variables in your shell script, it is important for you to know about shell built-ins.

When you are working with the Bash shell, you are most of the time executing “programs“.

Examples of programs are “ls”, “fdisk” or “mkdir”. Help for those commands can be found by using the “man” command short for “manual”.

However, have you ever tried to read the documentation for the “source” command?

Shell built-ins explained man-source

You would not be able to read the documentation using “man” because the source command is a shell built-in function.

In order to read the documentation for shell built-ins, you have to use the “help” command.

$ help <command>

Shell built-ins explained help-source
The list of shell built-ins is quite extensive but here is a screenshot of every bash built-in command that you may find on Ubuntu systems.
built-in

Using Bash Variables

Now that you know about Bash built-ins, it is time for you to start writing your own Bash scripts.

As a reminder, the commands typed in your terminal can be used in a Bash script in the exact same way.

For example, if you want a script that simply executes the “ls -l” command, simply edit your script, add the shebang line and the command.

#!/bin/bash

# This simple script executes the ls command

ls -l

Using Bash Variables ls-l

Now, what if you wanted to have Bash variables?

Bash variables are simple program variables that can store a wide variety of different inputs.

To declare a Bash variable, simply specify the name of the variable and its value separated by an equal sign.

VAR=value

In order to be able to use the content of your Bash variable in your script, use “$” and append the name of your variable.

echo $VAR

variable

Even if you can use this syntax in order to have the variable value, you can also use the “brackets” notation.

echo ${VAR}

Using this syntax, variables can be combined together.

If you have two Bash variables named VAR1 and VAR2 for example, you can have them both printed using the following syntax

echo "${VAR1}${VAR2}"

curly-brackets

Executing commands within scripts

In order to execute commands inside Bash scripts, you have to use command substitution.

Command substitution is a technique used in Bash shells in order to store the result of a command in a variable.

To substitute a command in Bash, use the dollar sign and enclose your command in brackets.

VAR=$(command)

For example, in order to get the result of the numbers of files in your current directory, you would write

#!/bin/bash

NUMBER=$(ls -l | wc -l)

echo "${NUMBER} files in this directory!"

Executing commands within scripts files

As you can see, command substitution is pretty handy because it can be used to dynamically execute commands in a shell script and return the value back to the user.

Speaking about returning results to the end-user, how do you handle scripts not terminated correctly?

What if a command inside the script did not execute properly?

Understanding Exit Statuses

When you are executing a script, even if you are not returning a value, the script always returns what we call “an exit status”.

An exit status in Bash scripting indicates whether the script execution was successful or not.

If the status code is zero, your script execution was successful. However, if the value is any different from zero (say one, two or more), it indicates that the script execution was not successful.

To demonstrate the exit status, run any valid command in your bash shell.

echo "This is a simple working command"

Now, use this command in order to inspect the exit status of the last command run.

echo ${?}

Understanding Exit Statuses exit-status

As you can see, the output of this command is “0” or the exit status of the last command I executed.

This syntax (“${?}”) can be used in scripts in order to make sure that commands executed properly.

The exit status can be used in scripts in order to exit the script with a specific status code.

For example, if you want to exit the script with an error, you can use the following command in your script.

exit 1

Similarly, you can use the “zero” exit code in order to specify that the script executed successfully.

exit 0

In order to verify if the status code was correct, you are going to need basic conditional statements such as the IF statement.

Manipulating conditions in Bash

Sometimes, executing bash scripts is not only about having multiple commands next to each other : you want to have conditional actions.

In some cases, it might be handy to have a condition checking whether the current user is the root user (or just a specific user on your system).

One simple way to have conditions in Bash is to use the if statement.

“If” is shell built-in, as a consequence, the manual is available via the “help” command

$ help if

Manipulating conditions in Bash if-help

The help page describes the syntax for the if command using semi-colons, but we are going to use this syntax (that is equivalent)

if [[ condition ]]
then
  <commands>
else
  <command>
fi

Practice case : checking if the user is root

In order to showcase what the if statement can be used for, we are going to write a simple script checking whether a user if the root user or not.

As a reminder, the root user always has the UID set to zero on any Unix system.

Knowing this information, we are going to check whether the UID is set to zero, if this is the case, we are going to execute the rest of the script, otherwise we are going to exit the script.

As explained in other tutorials (about user administration), you can get the current user ID by using the “id” command.

$ id -u
1000

We are going to use this command in order to check whether the user executing the script is root or not.

Create a new script and add the shebang line to it.

#!/bin/bash

Right below it, add the “id” command and store the result in a variable named “USERID” using command substitution.

USERID=$(id -u)

Now that the “USERID” contains the current user ID, use an IF statement in order to check whether the user ID is zero or not.

If this is the case, write a simple informational message, if not exit the script with an exit status of 1.

if [[ "${USERID}" -eq 0 ]]
then
  echo "This is root"
else
  exit 1
fi

Now if you execute the script as your current user, the script will simply exit with an exit status of one.

Practice case checking if the user is root script-root

Now, try to execute the script as the root user (with the sudo command)

Practice case checking if the user is root sudo-script

As you can see, your informational message was displayed and the script exited with an error code of zero.

Conclusion

In this tutorial, you learnt about the Bash programming language and how it can be used in order to create Bash scripts on your system.

You also learnt about exit statuses and conditional statements that are key in order to have custom logic set into your scripts.

Now that you have more knowledge about Bash, you should start by writing your own scripts for your needs : you can start by having a tutorial on create archive backup files for example.

If you are interested in Linux System administration, we have a complete section dedicated to it on the website, so make sure to check it out!

Working Remotely with Linux Systems

As a Linux system administrator, you are responsible for many machines that may be located locally or on distant sites.

In some cases, you will need to connect to them in order to fix an issue with disk space for example.

If you are working with users, some of them may get stuck in an application and you will have to kill the application for them.

In order to perform all those operations, you will need to remotely access those instances from your own computer.

Working with remote Linux instances can be done with handful different solutions depending on your needs.

Sometimes, you simply need to have a remote shell bound to a remote host.

However, what if you are working with an application that requires a graphical interface?

In this tutorial, we are going to explore all the ways of working with remote Linux systems.

From X11, to SSH until XRDP, you will learn everything that there is to know about remote Linux system administration.

Remote communication basics

Before listing and detailing the different ways of connecting to remote Linux hosts, you have to understand a few basics related to the way computers communicate.

Client-server model

Nowadays, computers are rarely standalone computers, they actually communicate with other computers all the time.

When you are browsing the Internet in order to retrieve a web page, you are communicating with another computer in order to perform this task.

When you are playing your favourite game, you are also communicating with another computer (or many different computers) in order to know if you won or not.

All those tasks are based on the same model : the client-server model.

The client-server model is one model that defines and organizes how communication takes place between two computers.

In this scenario, one computer is acting as the client (the one that asks for resources or computation) and another computer is acting as the server (the one that does the work, that performs the computation).

client-server

As you probably understand it, the server is responsible for the actual work and clients are only responsible for delivering the end information to you.

Note : is it the only way for computers to communicate? Not at all, peer-to-peer is another way for example. Ever tried sharing files online via tools like Bittorrent?

Client-server model examples

Now that you know a bit more about the client-server architecture, it is time to unveil what protocols are based on this model to exchange information.

The most famous protocol based on the client-server architecture is the HTTP protocol.

As a reminder, the HTTP protocol is used in order to fetch HTTP resources (usually web pages) from a HTTP server.

In this scenario, you are contacting a remote HTTP server and you are asking for a specific page.

If you are allowed to communicate with this server, you will be answered with the resources that you asked for : usually a web page.

Client-server model examples http-protocol

Note : HTTP servers can be used in order to deliver web pages, but they can be used to download files remotely, or access any kind of information located on a HTTP server

Great!

But why were we talking about the client-server model in the first place?

Because most of the ways of working remotely with Linux systems are based on the client-server model.

Secure and unsecure protocols

In our case, we are not interested in requesting web pages from a distant server.

We are interested in being able to execute commands remotely from one machine (the client) to another (the server).

In order to execute commands remotely from one computer to another, you can choose between two protocols : telnet and SSH.

Telnet protocol

Developed in 1969, telnet is a protocol enabling a bi-directional communication between two hosts in order to be able to send commands remotely.
telnet-2

The telnet protocol is based on the client-server architecture we saw before : a client connects to a TCP server (usually located on port 23 of the remote machine) and starts writing down commands to be executed.

The TCP server understands those commands, performs those operations on the server and returns the output of the command.

If you install a telnet server on your machine, you would be able to connect to it and run commands remotely.

$ sudo apt-get install telnetd -y

$ sudo systemctl status inetd

telnetd

From there, you can use a simple Telnet client in order to connect to your remote server.

$ telnet 127.0.0.1 23

telnet-example
In this scenario, my TCP client is connecting to my remote host and sending commands through the network.
telnet

Awesome, so what’s the catch?

The Telnet protocol is not encrypted.

In short, it means that if a spy was to spy on the network traffic, it would be able to see all the commands that you are sending, as well as the results of your commands.

This is a big issue because most of the time you are accessing distant servers that are located outside your premises, on distant sites where you might not be in complete control of the security.

If you were for example to connect to a SQL database, your username as well as your password would be sent over the network in plain text.

Luckily for you, there is another protocol, safer than Telnet, that was developed in order to execute commands remotely : the SSH protocol.

SSH protocol

On the other hand, the SSH protocol is completely secured.

ssh-1

SSH stands for Secure Shell and it is widely used in order to perform commands remotely in a safe and secure way.

In short, SSH is built on common cryptographic techniques: symmetrical encryption or asymmetrical encryption for the most part.

Those two techniques are in a way verifying the identity of the two hosts as well as encrypting the traffic between those two hosts.

The SSH protocol is also based on the client-server model we saw earlier.

When connecting through SSH to distant servers, you are essentially talking with a SSH server, located remotely, with a SSH client located on your machine.

Note : as you can see in the diagram, the port number should be customized in order to avoid having SSH brute force attacks on your SSH server.

ssh-protocol

In this case, as the traffic is encrypted, if somebody spies on the traffic it won’t be able to read the content sent.

In this tutorial on remote Linux system administration, we are going to focus on the SSH protocol as the Telnet one is considered obsolete in terms of security.

Execute shell commands remotely using SSH

In order to execute commands remotely, we are going to install a SSH server on our host.

There are plenty of different SSH servers but we are going to use an open-source alternative called OpenSSH.

OpenSSH was first released in 1999 and it provides a suite of secure networking tools in order to ensure communications between different hosts over SSH.

OpenSSH brings a SSH server but it also brings many different utilities that are using the power of SSH such as sftp, scp or ssh-keygen.

OpenSSH Server Installation

First of all, you need to install the OpenSSH SSH server on your host.

By default, OpenSSH may be installed depending on your distribution, but you will have to make sure that this is the case.

First, for safety purposes, make sure to update the packages on your system.

$ sudo apt-get update

To install OpenSSH, run one of those commands depending on your distribution (APT or YUM)

$ sudo apt-get install openssh-server

$ sudo yum install openssh-server openssh-clients

Running those commands, the OpenSSH server will be installed on your computer.

$ sudo systemctl status sshd

sshd-service

By default, the SSH server is listening to connections on port 22 as described in the previous sections.

In order to verify that this is the case, run the “netstat” command to list open ports.

$ sudo netstat -tulpn | grep 22

netstat-1

Great!

Your SSH server is now listening on incoming connections from port 22.

Updating firewall rules

As you probably know, the Linux operating system manipulates a built-in firewall that will blocks unauthorized requests.

This built-in firewall can be manipulated with the iptables utility which is one of the tools of the Netfilter framework.

In our case, on Debian recent systems, we are manipulating the UFW front-end in order to manipulate rules.

On CentOS or RHEL systems, you will have to update the FirewallD rules.

To allow SSH traffic on your host, run of the following commands.

$ sudo ufw allow ssh         (on Debian/Ubuntu systems)

$ sudo firewall-cmd --permanent --zone=public --add-service=ssh    (on RHEL/CentOS systems)
$ sudo firewall-cmd --reload

Next, make sure that your settings were correctly taken into account

$ sudo iptables -L | grep ssh

iptables-greop

Connecting to your SSH server

Now that your SSH server is up and running and that traffic is allowed on port 22, it is time for your client to connect.

On your client machine, make sure that you have the SSH utility.

$ ssh -V

ssh-client-version

If you are getting the following output, it means that the SSH client utility is currently installed on your machine.

In order to connect to your SSH server, simply use “ssh” followed by your username and the IP address (or hostname if it is configured) of your SSH server.

$ ssh <username>@<ip|host>

ssh-remote

Right off the bat, you are asked to verify the identity of the SSH server you are communicating with.

Known hosts

When first connecting to your remote SSH server, you are asked to verify the authenticity of the host.

The SSH utility displays a ECDSA key-fingerprint that can be used in order to verify the server authenticity.

Unless you want to verify the identify of your SSH server, you want to enter “yes”.

As a consequence, the server identify will be added to your known_hosts file located in the .ssh directory.

$ cat ~/.ssh/known_hosts

Executing commands

Now that you are connecting to your SSH server, you can start executing remote tasks on your server.

$ ls

ls-command-remote

Your commands are not executed on your local machine but they are executed on the remote machine.

To verify it, run a command that is simply sleeping for an extended period of time on the client.

$ sleep 100

Back on the server, you can actually verify that the command is actually running on the server.

server-ssh

You can even see which user started it and the terminal it used in order to start it.

Great!

But what if you wanted to execute a graphical application, like Firefox for example?

$ firefox

firefox-no-display

When trying to execute a graphical application remotely, you will get an error message stating that you have no DISPLAY environment variable specified.

So what happened here?

In order to execute graphical applications remotely over SSH, we are going to dig deeper into another protocol that is used to draw applications remotely : the X11 protocol.

Execute graphical applications remotely using X11 forwarding

Before executing your first commands with X11, you will have to understand how applications are being displayed on Linux hosts.

Understanding the X protocol

Back in the early days on Linux, users did not have any graphical applications or desktop environments installed on their computers.

Instead, they were dealing with plain terminals in order to execute commands (also called tty terminals)

Later on, graphical applications, relying on window systems, became popular and were used as a way to democratize administration for users.

In order to be able to display windows on the screen, the X protocol was invented.

The X protocol, also known as the X Window System Core Protocol, is a client-server protocol where applications (known as X clients) are connecting to X servers.

X servers, also known as display servers, are responsible for transmetting data from the user to the client applications, receiving the response from client applications and communicating with drivers in order to render your application.

In short, a X server is responsible for making applications appear on your screen.

x-architecture

As a consequence, every Linux system that is running graphical applications has a display server running on them.

This is an important concept to grasp because it essentially means that the graphical interface is decorrelated from the process itself.

As a consequence, programs can be run on distant machines but they can be presented on other machines : your local machine for example!

In this case, this is the architecture that you would have.

remote

In this example, you have two separate computers, but each computer has a display server running on it.

This is also an important point to grasp because even if the X protocol is based on the client-server model, the client AND the server might be located on the same computer.

Now that you know more about the X protocol, let’s see how applications are being displayed on your physical computer screen.

X Protocol & Displays

As detailed before, the display server (also called X server) located on your computer will be responsible for drawing graphical interfaces on your screen.

As a consequence, display servers need to be connected to display devices that are most of the time materialized as computer screens.

In order to know where the graphical interface needs to be drawn, your session has a DISPLAY environment variable that details the output device.

$ echo $DISPLAY

echo-display

The syntax for the DISPLAY environment variable is as follows :

hostname:D.S

Where :

  • hostname : the name of the computer where the display server runs. In this case, this is omitted meaning that it runs on localhost;
  • D : represents the number of displays connected to your computer. If you have two screens, you might get a different sequence number;
  • S : represents the screen number in case your display device has multiple screens.

In this case, we are in the standard case, meaning that the display server displays graphical interfaces on the localhost machine, on the first screen.

The xrandr command can be used in order to see screens connected to a Linux system.

$ xrandr --query

querying-displays

When running X clients applications on your instance, graphical instructions will be redirected to your main screen, but what if you wanted to have applications running on your server and the graphical interface on your local machine?

For this, we are going to use SSH forwarding.

Using SSH and X11 forwarding

When using the SSH client, you can append the “-x” option in order to redirect X11 traffic to your local machine.

As a consequence, the application will run on the server but it will be displayed on your client.

$ ssh -x <user>@<host>

remote-ssh-x

As you can see, when displaying the DISPLAY environment variable, the output is quite different.

This time, we have the hostname (localhost), the device number (10) as well as the screen number (0).

In this case, the device number is not actually connected to a real piece of hardware on the server but it is mapped to a remote connection on the server.

To illustrate that, try listing the open connections on your server starting with 60.

open-ports

As you can see, there is one line stating that one application is listening on port 6010 : this is actually the end point used in order to access remote displays on the server.

With that in mind, you are now able to forward the X11 traffic to your client, meaning that you can launch graphical applications from the server to your client.

On the client, while being connected to a SSH session, try running Firefox.

$ firefox

firefox-display

Awesome!

You are now able to run graphical programs remotely.

The Firefox process is running on the server, but the graphical interface is displayed on the client.

Now displaying graphical applications is fantastic, but what if you wanted to display whole desktop environments?

For this, you need to deal with what we call the RDP protocol.

Execute remote desktop using the RDP protocol

Developed by Microsoft and embedded in the early versions of Microsoft Windows servers, the RDP protocol is a proprietary protocol used in order to provide remote desktop access.

The RDP is well established on Windows operating systems and you might have already dealt with the RDP client on your Windows machine : mstsc.

xrdp-windows

Luckily for you, Linux has a wide variety of open-source alternatives in order to be able to access your Linux system remotely.

The RDP protocol is also based on the client-server model : on one hand you will have a RDP server sitting and waiting for connections on port 3389.

A popular implementation of the RDP protocol on Linux is the xRDP project that is essentially an open-source RDP server.

On the other hand, you will have a RDP client making connections to this remote server and forwarding the display to your RDP client program.

Popular RDP clients on Linux can be RemminaTigerVNC or RealVNC.

You can even use the mstsc Windows client if you are on a Windows machine.

Here is an example of a RDP connection to a Linux host using a Microsoft host computer.

Conclusion

In this tutorial, you learnt a bit more about the different ways of working with Linux systems remotely.

You learnt about at least four different ways of doing so : using the Telnet protocol (which is not used anymore today), the SSH protocol (which is far more secure), the X protocol (used in order to display graphical applications remotely) and the RDP protocol (in order to display remote desktop environments).

If there are tools that you use and that you want to share with the community, make sure to leave a comment below with your implementation, it always helps.

Also, if you are curious about Linux system administration, make sure to have a read at our other tutorials on the subject.

Find Text in Files on Linux using grep

This tutorial focuses on finding text in files using the grep command and regular expressions.

When working on a Linux system, finding text in files is a very common task done by system administrators every day.

You may want to search for specific lines in a log file in order to troubleshoot servers issues.

In some cases, you are interested in finding actions done by specific users or you want to restrict lines of a big file to a couple of lines.

Luckily for you, there are multiple ways of finding text into files on Linux but the most popular command is the grep command.

Developed by Ken Thompson in the early days of Unix, grep (globally search a regular expression and print) has been used for more than 45 years by system administrators all over the world.

In this tutorial, we will focus on the grep command and how it can help us effectively find text in files all over our system.

Ready?

Grep Syntax on Linux

As specified above, in order to find text in files on Linux, you have to use the grep command with the following syntax

$ grep <option> <expression> <path>

Note that the options and the path are optional.

grep-version

Before listing and detailing all the options provided by grep, let’s have a quick way to memorize the syntax of the grep command.

In order to remember the syntax of the grep command, just remember that grep can be written as grEP which means that the expression comes before the path.

This is a great way to remember the grep syntax and the find syntax at the same time but the find syntax is the exact opposite : path first and expression after.

Quick grep examples

There are complex options that can be used with grep, but let’s start with a set of very quick examples.

Listing users using grep

On Linux, as you already probably know it, user accounts are listed in a specific file called the passwd file.

In order to find the root account in a specific file, simply enter your text and the file you want to search into.

$ grep root /etc/passwd
root:x:0:0:root:/root:/bin/bash

Another very popular way of using the grep command is to look for a specific process on your Linux system.

Filtering Processes using grep

As explained in one of our previous tutorials, you have to use the “ps” command in order to list all the processes currently running on your system.

You can pipe the “ps” command with the “grep” command in order to filter the processes you are interested in.

$ ps aux | grep <process>

If you are interested in bash processes for example, you can type the following command

$ ps aux | grep bash

root      1230  0.0  0.0  23068  1640 tty1     S+   Jan11   0:00 -bash
user      2353  0.0  0.1  23340  5156 pts/0    Ss   03:32   0:00 -bash
user      2473  0.0  0.0  14856  1056 pts/0    S+   03:45   0:00 grep --color=auto bash
user      6685  0.0  0.0  23140  1688 pts/2    Ss+  Nov09   0:00 bash
Note : if you are not sure about how to use pipes on Linux, here’s a complete guide on input and output redirection.

Inspecting Linux Kernel logs with grep

Another great usage of the grep command is to inspect the Linux Kernel buffer ring.

This is heavily used when performing troubleshooting operations on Linux systems because the kernel will write to its buffer ring when starting or booting up.

Let’s say for example that you introduced a new disk into your system and you are not sure about the name given to this new disk.

In order to find out this information, you can use the “dmesg” command and pipe it to the grep command.

$ dmesg | grep -E sd.{1}

list-disks-grep

Grep Command Options

The grep command is very useful by itself but it is even more useful when used with options.

The grep command literally has a ton of different options.

The following sections will serve as a guide in order to use those options properly and examples will be given along the way.

Search specific string using grep

In some cases, you may interested in finding a very specific string or text into a file.

In order to restrict the text search to a specific string, you have to use quotes before and after your search term.

$ grep "This is a specific text" .

To illustrate this option, let’s pretend that you are looking for a specific username on your system.

As many usernames may start with the same prefix, you have to search for the user using quotes.

$ grep "devconnected" /etc/passwd

grep-specific-text

Search text using regular expressions

One of the greatest features of the grep command is the ability to search for text using regular expressions.

Regular expressions are definitely a great tool to master : they allow users to search for text based on patterns like text starting with a specific letters or text that can be defined as an email address.

Grep supports two kinds of regular expressions : basic and extended regular expressions.

Basic Regular Expressions (BRE)

The main difference between basic and extended regular expressions is the fact that you can use regular expressions symbols with BRE (basic regular expressions) but they will have to be preceded by a backslash.

Most common regular expression patterns are detailed below with examples :

  • ^ symbol : also called the caret symbol, this little hat symbol is used in order to define the beginning of a line. As a consequence, any text after the caret symbol will be matched with lines starting by this text.

For example, in order to find all drives starting with “sd” (also called SCSI disks), you can use the caret symbol with grep.

$ lsblk | grep "^sb"

caret-symbol-linux

  • $ symbol : the dollar sign is the opposite of the caret symbol, it is used in order to define the end of the line. As a consequence, the pattern matching will stop right before the dollar sign. This is particularly useful when you want to target a specific term.

In order to see all users having bash shell on your system, you could type the following command

$ cat /etc/passwd | grep "bash$"

dollar

  •  (dot symbol) : the dot symbol is used to match one single character in a regular expression. This can be particularly handy when search terms contain the same letters at the beginning and at the end but not in the middle.

If for example, you have two users on your system, one named “bob” and one named “bab”, you could find both users by using the dot symbol.

$ cat /etc/passwd | grep "b.b"

dot-regex

  • [ ] (brackets symbol) : this symbol is used to match only a subset of characters. If you want to only match “a”, or “o”, or “e” characters, you would enclose them in brackets.

Back to the “bob” example, if you want to limit your search to “bob” and “bab”, you could type the following command

$ cat /etc/passwd | grep "b[ao]b"

brackets-regex

Using all the options provided before, it is possible to isolate single words in a file : by combining the caret symbol with the dollar symbol.

$ grep "^word$" <file|path>

word-grep

Luckily for you, you don’t have to type those characters every time that you want to search for single word entries.

You can use the “-w” option instead.

$ grep -w <expression> <file|path>

search-word

Extended Regular Expressions (ERE)

Extended regular expressions as its name states are regular expressions that are using more complex expressions in order to match strings.

You can use extended regular expressions in order to build an expression that is going to match an email address for example.

In order to find text in files using extended regular expressions, you have to use the “-E” option.

$ grep -E <expression> <path>

One great usage of the extended regular expressions is the ability to search for multiple search terms for example.

Searching multiple strings in a file

In order to search for multiple strings in a file, use the “-E” option and put your different search terms separated by straight lines (standing for OR operators in regular expressions)

$ grep -E "text1|text2|text3" <path>

Back to our previous grep example, you could find the root account and the bob account using extended regular expressions.

$ grep -E "root|bob" /etc/passwd

regular-expression-or

Search for IP addresses using grep

In some cases, you may want to isolate IP addresses in a single file : using extended regular expressions is a great way of finding IP addresses easily.

Plenty of different websites provide ready-to-use regular expressions : we are going to use this one for IP addresses.

"\b([0-9]{1,3}\.){3}[0-9]{1,3}\b"

How would you read this regular expression?

An IP address is made of 4 3-digit numbers separated by dots, this is exactly what this regular expression describes.

([0-9]{1,3}\.){3}      = 3 3-digits numbers separated by dots

[0-9]{1,3}             = the last 3-digits number ending the IP address

Here is how you would search for IP addresses using the grep command

grep -E "\b([0-9]{1,3}\.){3}[0-9]{1,3}\b" <file|path>

ip-address-regex

Search for URL addresses using grep

Similarly, it is entirely possible to search for URL addresses in a file if you are working with website administration on a daily basis.

Again, many websites provide regular expressions for URLs, but we are going to use this one.

grep -E '(http|https)://[^/"]+' <file|path>

url-regex (1)

Search for email addresses using grep

Finally, it is possible to search for email addresses using extended regular expressions.

To find email adresses, you are going to use the following regular expression

grep -E "\b[A-Za-z0-9._%+-]+@[A-Za-z0-9.-]+\.[A-Za-z]{2,6}\b" <file|path>

grep-email

Now that you have seen how to use extended regular expressions with grep, let’s see how you can recursively find text in a file using options.

Find Text Recursively with grep

In order to find text recursively (meaning exploring every directory and its children) on Linux, you have to use “grep” with the “-r” option (for recursive)

$ grep -R <expression> <path>

For example, to search for all files containing the word “log” in the /var/log directory, you would type

$ grep -R "log$" /var/log

Using this command, it is very likely that you will see a lot of entries with permission denied.

In order to ignore those permission denied entries, redirect the output of your command to /dev/null

$ grep -R "log$" /var/log 2> /dev/null

recursive

In order to find text recursively, you can also use the “-d” option with the “recurse” action.

$ grep -d recurse "log$" /var/log

Searching text recursively can be pretty handy when you are trying to find specific configuration files on your system.

Printing line numbers with grep

As you can see in our previous examples, we were able to isolate lines matching the pattern specified.

Over, if files contain thousands of lines, it would be painful identifying the file but not the line number.

Luckily for you, the grep option has an option in order to print line numbers along with the different matches.

To display line numbers using grep, simply use the “-n” option.

$ grep -n <expression> <path>

Going back to our user list example, if we want to know on which line those entries are, we would type

$ grep -n -E "root|bob" /etc/passwd

line-numbers

Find text with grep using case insensitive option>

In some cases, you may not be sure if the text is written with uppercase or lowercase letters.

Luckily for you, the grep command has an option in order to search for text in files using a case insensitive option.

To search for text using the case insensitive option, simply use the “-i” option.

$ grep -i <expression> <path>

case-insensitive

Exclude patterns from grep

Grep is used as a way to identify files containing a specific files, but what if you wanted to do the exact opposite?

What if you wanted to find files not containing a specific string on your Linux system?

This is the whole purpose of the invert search option of grep.

To exclude files containing a specific string, use “grep” with the “-v” option.

$ grep -v <expression> <file|path>

As a little example, let’s say that you have three files but two of them contain the word “log”.

In order to exclude those files, you would have to perform an invert match with the “-v” option.

invert-grep

Show filenames using grep

In some cases, you are not interested in finding text inside files, but only in their filenames.

In order to print only filenames, and not the filename with the actual output, use the “-l” option.

$ grep -l <expression> <path>

Using our previous example, we would not get the content of the file, but only the filename.

grep-l

Conclusion

In this tutorial, you learnt how you can easily find text in files on Linux.

You learnt that you can use many different options : basic regular expressions or more advanced (extended) regular expressions if you are looking to match IP addresses or phone numbers for example.

You also discovered that you can perform inverse lookups in order to find files not matching a specific pattern on your system.

If you are interested in Linux system administration, we have a complete section dedicated to it on the website, so make sure to have a look!