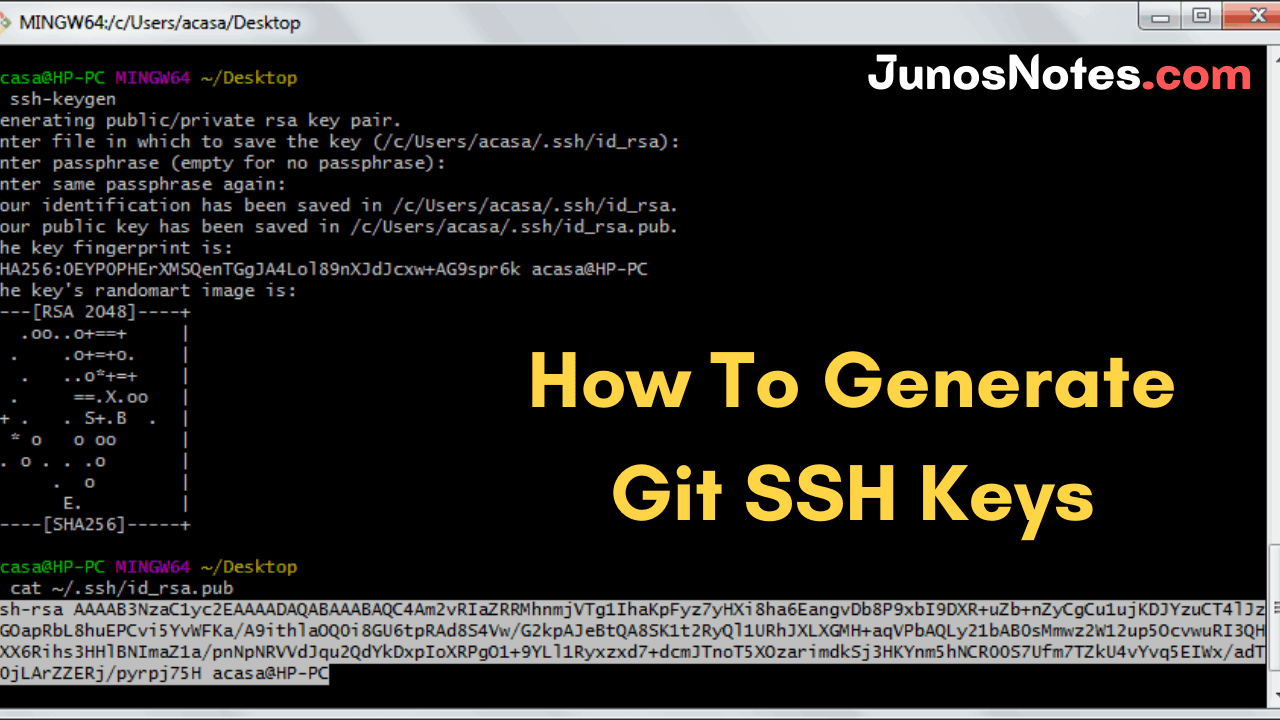
How To Generate Git SSH Keys

How To Generate Git SSH Keys | Process of Git Generate SSH Key on Windows, Linux, Mac

In case you are a great expert in working with Git, then you would know that how necessary is to set up SSH authentication. Are you excited to learn how to generate Git SSH key and SSH authentication? Then, this tutorial is the best option for you.

From here, you will understand that SSH authentication is one of two ways of logging into your Git remote repository and pushing modifications to it. In this tutorial, we are explaining more about how you can generate SSH keys for Git on Linux, or on Windows, or on Mac. Along with that, you should have some knowledge of Git Commands to check the Git installation version using the command line.

Note: If you are using Github, follow this tutorial to setup SSH keys on Github

What is an SSH KEY?

The definition of an SSH key is an access credential for the SSH (secure shell) network protocol. For remote communication between machines on an unsecured open network, we use this authenticated and encrypted secure network protocol. Also, SSH is utilized for remote file transfer, network management, and remote operating system access. The SSH acronym is also utilized to specify a set of tools used to communicate with the SSH protocol.

How to Create an SSH Key?

SSH keys are created using a key generation tool. The generation of SSH keys can be through a public key cryptographic algorithm, the most common being RSA or DSA. At a very high-level SSH keys are created via a mathematical formula that uses 2 prime numbers and a random seed variable to output the public and private keys. This is a one-way formula that assures the public key can be obtained from the private key but the private key cannot be obtained from the public key.

Checking PC’s SSH Keys

You can check your PC’s SSH Keys by following the command below.

ls -al ~/.ssh

By typing the above command, you can see your SSH keys easily. The filename of the public key is one of the following by default:

id_ecdsa.pub
id_ed25519.pub
id_rsa.pub

Generate a new SSH key

If you don’t have an SSH key, first, you should create it. Later, please follow the step-by-step guide on how to generate a new SSH key.

Type the command below, using your GitHub’s account email:

ssh-keygen -t rsa -b 4096 -C "[your github's email]"

After running this command, you will be offered to set the SSH key path, but we advise you to use its default value by pressing the “Enter” button.

Enter a file in which to save the key (/Users/you/.ssh/id_rsa): [Press enter]

After that, it will allow you to insert a passphrase to protect your SSH key.

> Enter passphrase (empty for no passphrase): [Type a passphrase]
> Enter same passphrase again: [Type passphrase again]

Read More on Git: 

How to Generate SSH keys for Git authorization

This tutorial is all about generating SSK Keys on various platforms like Windows, Mac, Linux, etc. If you poor at this concept then check out how to do it by following the steps given here:

Generate SSH Keys on Linux

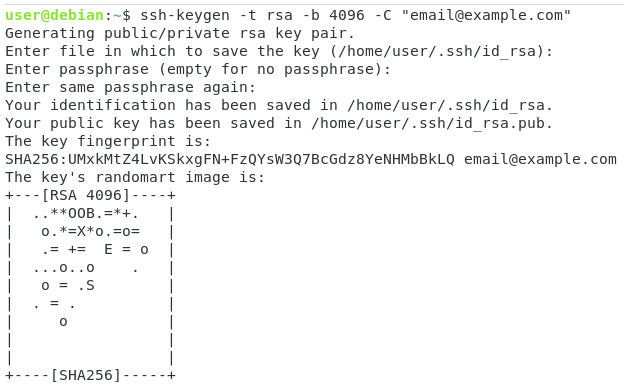
In order to generate SSH keys for your Git repository, use the “ssh-keygen” command and specify the encryption algorithm that you want to use.

$ ssh-keygen -t rsa -b 4096 -C "email@example.com"

Note that it is recommended to generate your SSH keys in the “.ssh” directory of your home directory.

When using the ssh-keygen utility, you will be prompted with multiple questions.

First, you will be asked to provide the filename for your key as well as the passphrase.

For the filename, you usually want to leave the default options and simply press Enter.

For the passphrase, we won’t bother choosing a passphrase for this tutorial.

Even if it includes an extra layer of security for your Git repository, you will be prompted with the passphrase every time that you want to perform an operation on the repository.

Generate SSH Keys on Linux ssh-keygen

The ssh-keygen utility created two files for you :

  • id_rsa: this is the private key of your SSH key pair, you should not share this key with anybody.
  • id_rsa.pub: this is the public key of your SSH key pair, this is the key that you will copy to your server in order to connect to it seamlessly.

Generate Git SSH Keys on Mac

Just take a look at the below provided five main steps and follow them carefully to generate SSH keys for git:

  1. Start the terminal
  2. Navigate to your home directory by typing: cd ~/
  3. Now, perform the following command: ssh-keygen -t rsa (when prompted, enter a password, the key name can stay the same)
  4. Open the file you’ve just created ~/.ssh/id_rsa.pub with your favorite text editor, and copy contents to your Git repository’s keys field (GitHub, beanstalk, or any other repository provider), under your account.
  5. Make sure that you don’t copy any whitespace while copying the public key’s content (id_rsa.pub).

Generate SSH keys for Git on Windows

In order to generate SSH keys for Git on Windows, you have to enable the OpenSSH commands using the “Add-WindowsCapability” command.

$ Add-WindowsCapability -Online -Name OpenSSH.Client*

Path          :
Online        : True
RestartNeeded : False

Note: You have to be an administrator to enable OpenSSH on your computer.

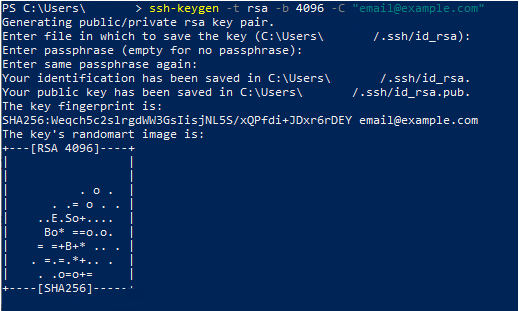
Now that OpenSSH is enabled and configured on Windows, simply use the “ssh-keygen” command in order to generate your SSH keys.

$ ssh-keygen -t rsa -b 4096 -C "email@example.com"

By default, you will be prompted to provide a public key filename as well as a passphrase.

You can leave those options empty: by default, your key-pair will be named “id_rsa” (or “id_rsa.pub” for the public key).

When it comes to the passphrase, it provides more security to add one but you will be asked to provide it on every SSH authentication.

Generate SSH keys for Git on Windows rsa-windows

As you can see, your SSH keys for Git are located in the “.ssh” directory of your user home.

The ssh-keygen utility created two files for you :

  • id_rsa: this is the private key of your SSH key pair, you should not share this key with anybody.
  • id_rsa.pub: this is the public key of your SSH key pair, this is the key that you will copy to your server in order to connect to it seamlessly.

Setup SSH authentication on Git

Now that your SSH keys are generated for Git, it is time to add them to your remote Git repository in order to push changes.

In order to setup SSH authentication on the server, you will have to copy the content of the public key to the “authorized_keys” file of the server.

Copy SSH keys to your Git server

On the client, use the “cat” command in order to see the content of the public key.

$ cat ~/.ssh/id_rsa.pub

Copy SSH keys to your Git server id-rsa

Copy the output of your cat command, and paste it into the “authorized_keys” file of your server (or remote repository).

$ sudo vi /home/git/.ssh/authorized_keys

Copy SSH keys to your Git server server

Alternatively, if you don’t want to copy and paste the content of your public key, you can use the “ssh-copy-id” command.

This command will simply take the content of your “.ssh” directory and add the relevant public keys to the “authorized_keys” file of the server.

$ ssh-copy-id <user>@<remote>

Push Changes to Git through SSH

Now that your keys are correctly configured for Git, you should be able to pull and push modifications to your Git repository.

Head over to the directory where your project files are stored.

$ cd /home/myproject

If you don’t have a Git repository, initialize one using the “git init” command.

$ git init

Initialized empty Git repository in /home/user/myproject/.git/

If there is already a “.git” file in your directory, it means that there is already a repository initialized.

Note: To get the content from your existing Git repository, use the “git clone” command.

Now that your Git repository is correctly configured, add the remote repository using the “git remote add” command.

$ git remote add origin git@<server_ip>:<path_to_git_repository>

On the server, if the “project.git” file (i.e the repository root) is located directly on the git user home directory, you would write

$ git remote add origin git@8.8.8.8:project.git

After adding your remote, make sure that your modifications are effective by running the “git remote -v” command.

$ git remote -v

origin   git@8.8.8.8:project.git (fetch)
origin   git@8.8.8.8:project.git (push)

Great!

Let’s now try to add some files in order to test if files can be pushed to your remote repository.

Create a README file using the “touch” command.

$ touch README

Add the files using the “git add” command and commit them using the “git commit” command.

$ git add .

$ git commit -m "This is the first commit of this repository"

Finally, push your modifications: the push operation should not require any password using the SSH method.

$ git push

Now, you have correctly configured SSH key-based authentication for your Git repository.

Conclusion

In this tutorial, you learned how you can generate SSH keys for Git easily using the ssh-keygen utility.

You learned that the same utility is used on Linux and on Windows. The directories used in order to store the keys are also the same.
How To Delete Local and Remote Tags on Git

How To Delete Local and Remote Tags on Git | Git Delete Tag for local & remote

Are you curious to learn how to delete local & remote tags on Git? Firstly, you should gain some knowledge about tags and git tags together with Git Commands. Generally, tags are utilized to tag particular commits that may be more significant than others. Also, you can use tags for bookmarking specific events like releases, bug fixes or simply to add an informative and descriptive note to a commit.

For instance, tags are often associated with genuine product releases on GitHub. But in some situations, you may require to delete git tags locally or remotely with ease. Now, it’s time to learn completely about the process of deleting Local and Remote Tags on Git. Use these available links and learn the concept that you are eagerly waiting for.

Describing Git Tags

Git tags support tagging particular points in the history of the repository and answer to them later. Once you create a tag, it won’t have a commit history. Actually, you can observe two types of tags supported by git. They are Annotated and Lightweight Tags. The major difference between them is the amount of metadata they store. One more difference is that annotated tags are public, and lightweight tags are private.

Now, you get some idea about git tags. So, take a look at the below explained delete local and remote tags in Git.

Delete a Local Git Tag

To delete a local Git tag, use the “git tag” command with the “-d” option.

$ git tag -d <tag_name>

For example, if you wanted to delete a local tag named “v1.0” on your commit list, you would run

$ git tag -d v1.0
Deleted tag 'v1.0' (was 808b598)

If you try to delete a Git tag that does not exist, you will simply be notified that the tag does not exist.

$ git tag -d v2.0
error: tag 'v2.0' not found.

If you want to make sure that tags were correctly deleted, simply list your existing tags using the tag command and the “-l” option.

$ git tag -l
<empty>

Delete a Remote Git Tag

To delete a remote Git tag, use the “git push” command with the “–delete” option and specify the tag name.

$ git push --delete origin tagname

Back to the previous example, if you want to delete the remote Git tag named “v1.0”, you would run

$ git push --delete origin v1.0

To https://github.com/SCHKN/repo.git
 - [deleted]         v1.0

To delete a remote Git tag, you can also use the “git push” command and specify the tag name using the ref’s syntax.

$ git push origin :refs/tags/<tag>

Back to the example, in order to delete a tag named “v1.0”, you would run

$ git push origin :refs/tags/v1.0

To https://github.com/SCHKN/repo.git
 - [deleted]         v1.0
Why should we specify the “refs/tags” instead of just specifying the tagname?

In some cases, your tag may have the same name as your branch.

If you tried to delete your Git tag without specifying the “refs/tags” you would get the following error

$ git push origin :v1.0

error: dst refspec v1.0 matches more than one.
error: failed to push some refs to '<repository>'

As a consequence, you need to specify that you are actually trying to delete a Git tag and not a Git repository.

Conclusion

In this tutorial, you have learned how you can easily delete a local and a remote Git tag. If you are interested to learn more about Git, check out our other tutorials on the subject such as:

How To Push Git Branch To Remote

How To Push Git Branch To Remote | Git Push to Existing Remote Branch

In Git, the git push command is utilized to upload local repository content to a remote repository. Pushing is how you transfer commits from your local repository to a remote repo. If you are working with a local branch and want to share your modifications, you will require to push your git branch to the remote repo.

Here is the ultimate tutorial that helps beginners and experienced developers to learn how to push Git branch to remote repo easily and solve all their hurdles while working with the local and remote repositories in Git. Also, check git commands that help developers to do modifications & other tasks on local and remote repositories of git.

Push Git Branch To Remote

In order to push a Git branch to remote, you need to execute the “git push” command and specify the remote as well as the branch name to be pushed.

$ git push <remote> <branch>

For example, if you need to push a branch named “feature” to the “origin” remote, you would execute the following query

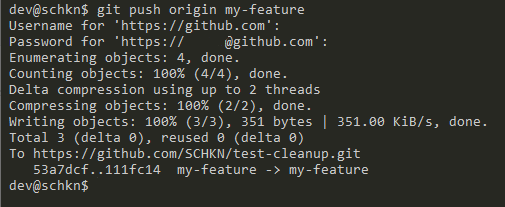
$ git push origin feature

Push Branch To Remote git-push-2

If you are not already on the branch that you want to push, you can execute the “git checkout” command to switch to your branch.

If your upstream branch is not already created, you will need to create it by running the “git push” command with the “-u” option for upstream.
Push Branch To Remote git-push

$ git push -u origin feature

Congratulations, you have successfully pushed your branch to your remote!

Also Refer: How To Create a Git Branch

How to push all local branches to the remote?

You won’t need to push all branches from your local very often, but if you do you can add the --all flag:

(main)$ git branch
* main
my-feature

(main)$ git push --all
...
To github.com:johnmosesman/burner-repo.git
b7f661f..6e36148 main -> main
* [new branch] my-feature -> my-feature

Push Branch to Another Branch

In some cases, you may want to push your changes to another branch on the remote repository.

In order to push your branch to another remote branch, use the “git push” command and specify the remote name, the name of your local branch as the name of the remote branch.

$ git push <remote> <local_branch>:<remote_name>

As an example, let’s say that you have created a local branch named “my-feature”.

$ git branch

  master
* my-feature
  feature

However, you want to push your changes to the remote branch named “feature” on your repository.

In order to push your branch to the “feature” branch, you would execute the following command

$ git push origin my-feature:feature

Enumerating objects: 6, done.
Counting objects: 100% (6/6), done.
Delta compression using up to 2 threads
Compressing objects: 100% (3/3), done.
Writing objects: 100% (3/3), 513 bytes | 513.00 KiB/s, done.
Total 3 (delta 1), reused 0 (delta 0)
remote: Resolving deltas: 100% (1/1), completed with 1 local object.
To https://github.com/SCHKN/repo.git
   b1c4c91..9ae0aa6  my-feature -> feature

In order to push your branch to another branch, you may need to merge the remote branch to your current local branch.

In order to be merged, the tip of the remote branch cannot be behind the branch you are trying to push.

Before pushing, make sure to pull the changes from the remote branch and integrate them with your current local branch.

$ git pull

$ git checkout my-feature

$ git merge origin/feature

$ git push origin my-feature:feature

Note: When merging the remote branch, you are merging your local branch with the upstream branch of your local repository. Congratulations, you pushed your branch to another branch on your repository!

Push Branch to Another Repository

In order to push a branch to another repository, you need to execute the “git push” command and specify the correct remote name as well as the branch to be pushed.

$ git push <remote> <branch>

In order to see the remotes defined in your repository, you have to execute the “git remote” command with the “-v” option for “verbose”.

$ git remote -v

origin  https://github.com/user/repo.git (fetch)
origin  https://github.com/user/repo.git (push)
custom  https://github.com/user/custom.git (fetch)
custom  https://github.com/user/custom.git (push)

In the previous examples, we pushed our branch to the “origin” remote but we can choose to publish it to the “custom” remote if we want.

$ git push custom feature

Awesome, you pushed your branch to another remote repository!

How to push your branch to a remote GitHub repo?

While working with feature branches on a team, it is not typically suited to merge your own code into a master. Although this is up to your team to accomplish, the norm is normally to do pull requests. Pull requests demand that you push your branch to the remote repo.

To push the new feature branch to the remote repo, simply do the following:

$ git push origin my-new-feature-branch

As long as Git is concerned, there is no real difference between a master and a feature branch. So, all identical Git features apply.

Troubleshooting

In some cases, you may run into errors while trying to push a Git branch to a remote.

Failed to push some refs

Failed to push some refs troubleshoot

The error message states that the pushed branch tip is behind its remote (references are behind)

In order to fix this, you need first to pull the recent changes from your remote branches with the “git pull” command.

$ git pull

When pulling the changes, you may run into merge conflicts, run the conflicts and perform a commit again with your results.

Now that the files are merged, you may try to push your branch to the remote again.

$ git push origin feature

Enumerating objects: 6, done.
Counting objects: 100% (6/6), done.
Delta compression using up to 2 threads
Compressing objects: 100% (3/3), done.
Writing objects: 100% (3/3), 513 bytes | 513.00 KiB/s, done.
Total 3 (delta 1), reused 0 (delta 0)
remote: Resolving deltas: 100% (1/1), completed with 1 local object.
To https://github.com/SCHKN/repo.git
   b1c4c91..9ae0aa6  feature -> feature

Conclusion

In this tutorial, you learned how you can push a Git branch to a remote with the “git push” command.

You learned that you can easily specify your branch and your remote if you want to send your changes to other repositories.

If you are interested in Software Engineering or in Git, we have many other tutorials on the subject, so make sure to check it out!